
A good steampunk medal needs three things before anything else: a clear center, an old-metal look, and enough backing support to hang straight when worn. You can make one from ribbon, broken jewelry, gears, keys, buttons, or watch parts, but the design works best when it looks intentional rather than simply covered in small pieces.
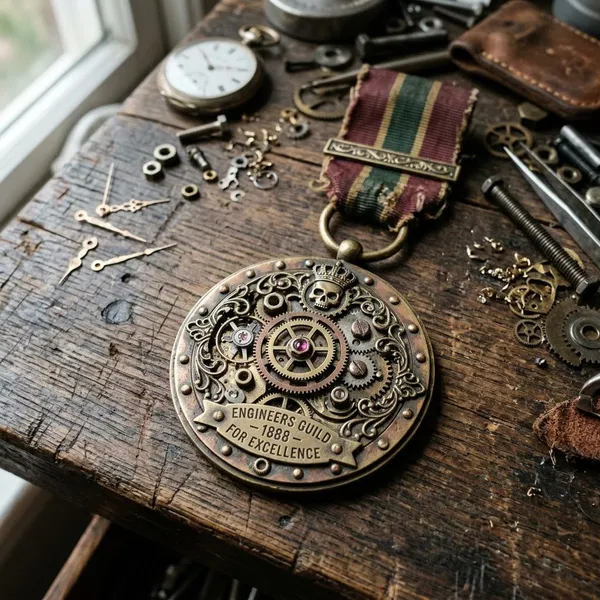
What makes a medal steampunk?
A steampunk medal mixes the formal shape of a Victorian award with mechanical details that look aged, repaired, or salvaged. Ribbon gives it the ceremonial side; gears, keys, chains, crests, and darkened metal give it the industrial side.
Victorian ribbon shapes
Ribbon is what makes the piece read as a medal instead of just a brooch. A folded drop, forked tail, layered V, or rosette top gives the design that old award-like silhouette.
Gears and clockwork details
Gears work best when they create structure, not when they are scattered everywhere. One medium gear behind a key or button usually looks stronger than ten tiny cogs filling every gap.
- Use a large gear as a frame if the medal needs a bold outline.
- Use tiny gears only as accents near the focal point.
- Use watch hands or screws to add direction and depth.
Antique metal finishes
Bright chrome can make a handmade medal look too modern. Antique brass, bronze, gunmetal, pewter, and darkened silver usually fit the steampunk mood better because they suggest age and use.
If your parts do not match, do not try to make everything identical. A light rub of dark wax, diluted black paint, or metallic finish can tone down shiny areas while keeping raised edges visible. That small contrast often makes cheap findings look more convincing.
Keys, crests, and watch parts
Keys, crests, and watch parts are good focal pieces because they already carry a story. A key feels adventurous, a crest feels formal, and a watch face immediately points to clockwork and Victorian timekeeping.
Chains, pins, and layered trim
Chains and trim should frame the medal rather than steal attention from it. Short chain drapes, narrow lace, metallic braid, and bead strands can soften the join between fabric and metal.
Keep heavy hanging pieces short unless the backing is very strong. Long chains may look dramatic in your hand, but on a jacket they can pull the medal forward, catch on fabric, or make the whole piece twist.
How to make a steampunk medal
Start with structure before decoration. Decide where the medal will be worn, how heavy it can be, and whether it needs to survive one costume party or repeated use at conventions.
Choose the medal base
The base sets the size and comfort of the whole piece. Ribbon works for classic medal shapes, while felt, canvas, faux leather, or a premade rosette can give heavier designs more stability.
Match the base to the use case: a small lapel medal can stay narrow and light, but a statement piece for a waistcoat or costume bodice needs a wider backing so the weight is spread across more fabric.
Plan the layout
Lay out every piece before gluing. Put the main emblem down first, then add the support layer, side accents, chain, and trim around it.
Build the center layers
The center stack is where most medals succeed or fail. Keep it layered enough to look dimensional, but not so thick that it becomes awkward to wear.
If the center already looks complete after three layers, stop there. Extra pieces should solve a visual problem, not fill empty space just because the table still has supplies on it.
Add chains and small details
Small details are best added slowly. A short chain under the emblem, two corner studs, or a slim strip of lace can make the medal feel finished without making it busy.
Attach the pin backing
Use a pin that suits the weight. A small brooch back is fine for a light ribbon badge, but a heavier medal usually needs a wider bar pin or a reinforced safety-pin setup.
- Place the pin level, not at an angle.
- Keep it close to the medal's center of gravity.
- Cover rough glue or metal edges with felt.
- Test it on the actual fabric before wearing it out.
Let it cure and test the fit
Metal and fabric can feel secure before the bond is fully strong, so give the adhesive the full curing time recommended on the product. Overnight is often safer than handling it too soon.
Pin the medal to the outfit you plan to wear, then move around a little. If it tilts, pulls the fabric, or flips forward, reduce weight, move the pin, or add a larger backing patch before calling it finished.
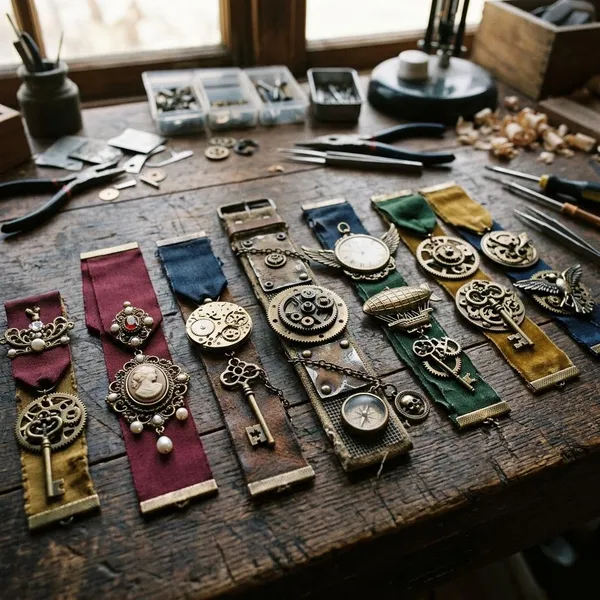
Steampunk medal styles to try
Choosing a style first makes the project easier because it tells you which supplies belong together. A formal medal needs cleaner symmetry, while a mechanical brooch can be tighter, darker, and more industrial.
Victorian military medal
This style uses neat ribbon folds, a centered emblem, and a controlled palette such as burgundy, navy, black, cream, or deep green. Brass, bronze, and dark gold details work especially well.
Keep the decoration orderly: one crest, button, watch cover, or filigree medallion should lead the design. It suits tailcoats, waistcoats, structured jackets, and uniforms where a messy layout would look out of place.
Mechanical gear brooch
A gear brooch leans more industrial than ceremonial. It can use one large cog as the base, with smaller cogs, screws, watch hands, or a compact charm layered over it.
Key and wing badge
A key and wing badge feels more adventurous and fantasy-inspired. The key gives the center a clear symbol, while wings add movement without needing many extra parts.
Symmetry helps here. Place the key in the center, anchor it with a gear or shield shape, and keep the wings similar in size so the badge does not look lopsided.
Pocket watch medal
A pocket watch medal is one of the most recognizable steampunk styles because the round watch form already looks Victorian and mechanical. A watch face, cover, or visible movement can become the whole centerpiece.
Lightweight cosplay medal
For conventions, performances, or children's costumes, lightweight materials often make more sense than real metal. Craft foam, resin charms, plastic gears, and faux-metal paint can create the same impression with less pulling on fabric.
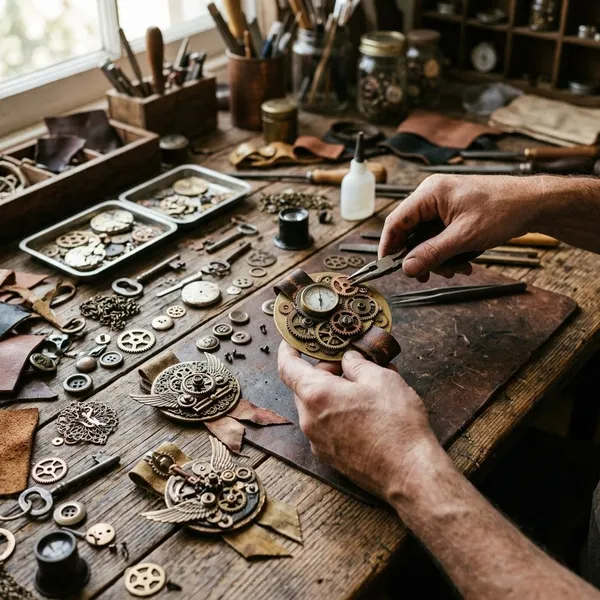
Upcycled materials for steampunk medals
Upcycled materials suit steampunk because scratches, tarnish, and mixed finishes can add character. The trick is to sort the pieces before designing so the finished medal looks collected, not random.
Broken jewelry
Broken jewelry is useful because it often has detail already built in. Old brooches, unmatched earrings, pendant frames, filigree connectors, and necklace chains can become ready-made medal parts.
Look for strong shapes first. A crest-like pendant or embossed metal button is usually more useful than a handful of tiny sparkly pieces, unless you are making a very delicate design.
Old watch parts
Old watch parts bring instant clockwork character, especially faces, covers, hands, winding crowns, and larger gears. Very tiny internal parts can be beautiful up close but may disappear once the medal is worn.
Use one clear watch element rather than scattering many small pieces. A watch face over ribbon with two side gears will usually read better than a crowded patch of miniature parts.
Bicycle gears
Bicycle gears are excellent for larger medals because they have a strong mechanical outline. They work well for bold cosplay pieces, coat decorations, or display costumes.
Clean them carefully before use, especially if they come from an actual bike. Grease and loose rust can weaken glue and stain fabric. If the metal looks too modern, darken it before assembly so it blends with the rest of the medal.
Vintage buttons and chains
Vintage buttons can stand in for crests, seals, or small medallions. Chains add movement and can echo the look of formal military decoration when used in short, controlled drapes.
Ribbon and fabric scraps
Fabric scraps are not just background material. They can create ribbon tails, rosettes, backing patches, top tabs, and color contrast behind open gears.
- Use felt for easy backing and hidden reinforcement.
- Use grosgrain ribbon for crisp folds.
- Use velvet or brocade when the medal needs a richer costume look.
- Use heavy cotton or twill when comfort matters more than shine.
How to make a steampunk medal look polished
A polished medal is usually edited, not overloaded. The front should have a clear visual order, and the back should be strong enough that the piece sits flat instead of twisting or drooping.
Use one clear focal point
Pick the part people should notice first: a key, crest, watch cover, winged emblem, large gear, or ornate button. Everything else should point toward it or frame it.
Mix metal and fabric textures
Metal gives the medal structure and machinery; fabric gives it ceremony and color. The contrast is what keeps the piece from looking like either plain jewelry or a flat ribbon badge.
Black grosgrain with brass gears feels sharper and more military. Burgundy velvet with aged silver feels softer and more theatrical. Choose the pairing based on the outfit rather than using whatever sits closest on the craft table.
Choose aged metallic finishes
Aged finishes make mixed parts look more related. Antique brass, dark bronze, pewter, and muted silver are easier to combine than bright gold, chrome, and mirror-finish findings.
When a piece looks too new, darken the recesses and leave the raised edges slightly brighter. That gives the detail more depth without pretending the medal is a historical object.
Keep the weight centered
Weight matters as much as appearance. Put the heaviest part near the center and avoid long, heavy pieces hanging from one side.
Reinforce the pin backing
A reinforced back makes the front look better because the medal sits flatter. Felt patches, leather scraps, extra fabric layers, or stitched support can spread the stress from the pin.
For medium or heavy pieces, a wide bar pin is usually safer than a tiny brooch back. Cover the hardware neatly so rough edges do not scratch skin, snag fabric, or loosen after a few wears.
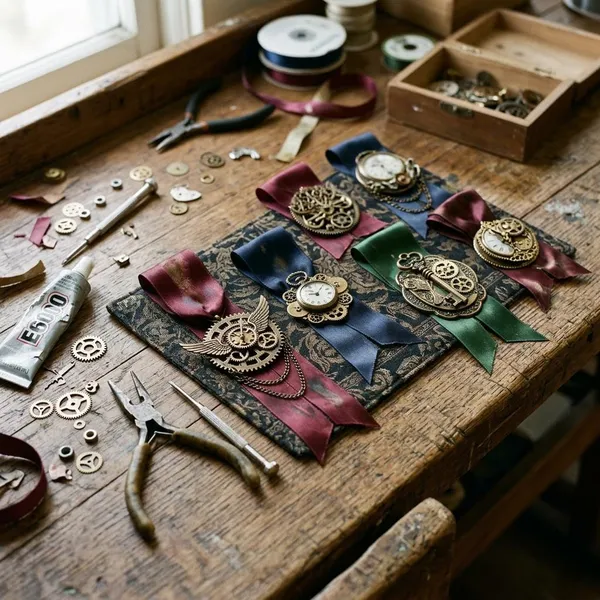
Conclusion
The best steampunk medals are not the ones with the most parts; they are the ones that hang straight, have a readable focal point, and look aged in a believable way. Start with a sturdy base, choose one strong emblem, keep the weight under control, and the finished piece will feel far more intentional than a crowded pile of gears and charms.
FAQ
Can you make a steampunk medal without watch parts?
Yes. A key, crest, gear, bicycle cog, filigree piece, or vintage button can create the same mood if the finish looks aged and the design has a clear center.
How do you attach a pin to a steampunk medal?
Attach a brooch back or bar pin to a reinforced backing layer, then cover the join with felt or fabric if needed. Keep the pin level and near the balance point so the medal does not tilt.
Can steampunk medals be worn as pendants?
Yes, but lighter designs work better. Add a bail, jump ring, or hidden fabric loop at the top, and avoid sharp or bulky backings that would sit uncomfortably against the chest.
Can you make a steampunk medal without watch parts?
Yes. A key, crest, gear, bicycle cog, filigree piece, or vintage button can create the same mood if the finish looks aged and the design has a clear center.
How do you attach a pin to a steampunk medal?
Attach a brooch back or bar pin to a reinforced backing layer, then cover the join with felt or fabric if needed. Keep the pin level and near the balance point so the medal does not tilt.
Can steampunk medals be worn as pendants?
Yes, but lighter designs work better. Add a bail, jump ring, or hidden fabric loop at the top, and avoid sharp or bulky backings that would sit uncomfortably against the chest.