
A steampunk computer case works best when you treat the PC as a real machine first and a themed object second. Start with airflow, hardware clearance, and access to filters, then add brass tones, wood, gauges, warm lighting, and aged finishes around those limits. For most builders, modifying a normal mid tower is safer, cheaper, and cleaner than building a case from scratch.

What makes a computer case look steampunk
The style is more convincing when the details look like they belong to one working machine. A brass trim ring around a fan, a leather pull tab on a removable panel, or a gauge near a control area feels intentional. Random gears glued across every flat surface usually do not.
Brass copper and aged metal finishes
Brass, copper, and darkened metal are the fastest way to signal the steampunk look. Use them on trim, fan surrounds, corner guards, switch plates, screw heads, and small visible fittings rather than trying to cover the whole case.
Wood leather and riveted panels
Wood brings the handmade workshop feel that plain metal lacks. Thin veneer, stained plywood, or a shaped front insert can change the case quickly without adding too much weight.
- Use wood on front panels, side accents, or trim strips.
- Use leather for pull tabs, handle wraps, or small texture details.
- Use rivets along seams and edges, not scattered randomly.
Keep leather and softer materials away from radiator exhaust, GPU heat zones, and top exhaust areas. They are better as touch points than heat-facing surfaces.
Gauges pipes and mechanical details
Gauges, pipework, valve wheels, and gear shapes should create a focal point, not clutter. One strong dial on the front panel or a short pipe run around a mesh intake often looks better than covering every side with mechanical parts.
Warm lighting and vintage controls
Amber, soft white, and dim warm lighting suit the theme better than bright rainbow effects. Place light behind mesh, under a wood lip, or around a gauge face so it adds depth instead of flooding the case.
Decorative parts with a clear purpose
The best decorative parts either improve the look of a focal area, help with daily use, or protect the structure. A brass-framed mesh grille, for example, can look period-correct while keeping an intake useful.
If a part only adds visual noise, leave it out. A cleaner build usually ages better than one packed with ornaments.
How to plan a steampunk PC build
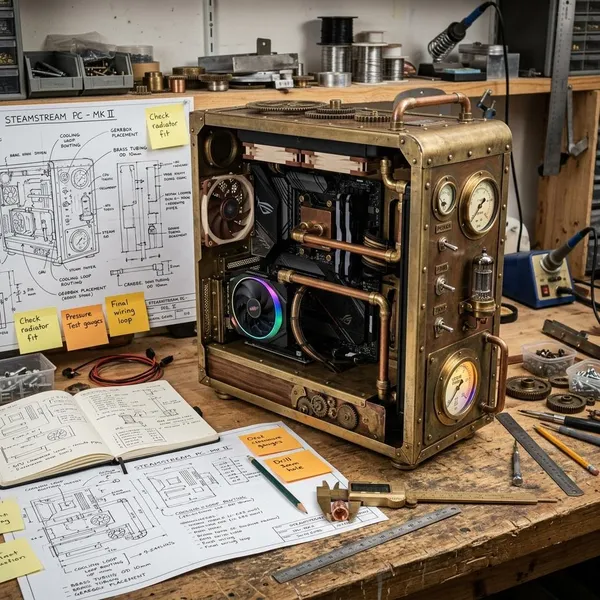
Planning matters because themed parts take up space that a normal PC case usually keeps clear. Wood overlays, trim, mesh frames, faux gauges, and pipe details can interfere with fans, GPU clearance, cable routing, or filter access if they are added after the hardware layout is already fixed.
Choose the case size
A mid tower is usually the easiest starting point. It has enough room for standard components and visible panel work without becoming as cramped as a small form factor build or as heavy as a full tower.
| Case size | Best fit | Main caution |
|---|---|---|
| Small form factor | Compact display builds or low-power PCs | Very little room for extra layers and cable bends |
| Mid tower | Most first-time steampunk PC projects | Front intake must stay open after cosmetic work |
| Full tower | Large gaming builds or dramatic show pieces | Needs stronger mounting and more visual balance |
Measure every component
Measure the GPU length and width, CPU cooler height, radiator space, PSU depth, fan thickness, cable bends, and side-panel clearance before buying materials. Decorative layers that look thin on a desk can become a problem once they sit in front of fans or beside a large graphics card.
Set the budget and build scope
Decide early whether you are doing a light cosmetic mod or a more serious fabrication project. A light build might use paint, veneer, mesh, faux rivets, and warm lighting. A heavier build may involve cutting panels, adding real metal fittings, and reinforcing mounts.
- Low budget: paint, mesh, faux rivets, stained thin wood, amber LEDs.
- Moderate budget: real brass accents in visible places, better switches, custom trim.
- High effort: structural metalwork, large wood panels, custom brackets, complex controls.
For a daily gaming PC, spend first on cooling-friendly materials and secure mounting. For a low-power display or office PC, you have more freedom with cosmetic surfaces, but filters and access still matter.
Sketch the panel layout
A simple sketch prevents many avoidable mistakes. Mark the fan openings, dust filters, panel seams, front I/O, screws, side-panel movement, and cable paths before placing decorative items.
Plan airflow and cable routes
Plan airflow before decoration, especially if the PC will run games, rendering software, or long work sessions. Front, bottom, or side intakes need open paths to the fans, while rear and top exhaust areas need space to release warm air.
- Mark every intake and exhaust opening on the base case.
- Check where the GPU, CPU cooler, radiator, and PSU pull or dump heat.
- Leave cable routes that do not cross fan blades or visible window areas.
- Keep dust filters reachable without removing half the decoration.
- Test fit panels before paint, glue, or final fasteners.
Best materials for a steampunk computer case
The best material is not always the most authentic-looking one. A real brass pipe might look great, but a lightweight painted tube may be safer on a thin panel. A thick wood front may feel premium, but veneer may preserve airflow and fit better.
Wood and plastic for simple cosmetic mods
Wood and plastic are the friendliest materials for beginners. Thin plywood, veneer, acrylic, ABS sheet, and hobby plastic can be cut into trim, raised panels, vent frames, and faux mechanical housings with modest tools.
Veneer is often better than thick boards on a front panel because it adds the wood look without pushing the panel too close to the fans. Painted plastic is useful for fake metal details that would be too heavy or expensive in real brass.
Aluminum and steel for structural work
Use aluminum or steel when a part must carry weight, reinforce a cutout, or stop a panel from flexing. Aluminum is easier to cut and drill at home; steel is stronger but harder to work neatly.
You usually do not need to rebuild the case frame. Reinforce only the areas that need it, such as a heavy handle, a large wood front, or a side feature mounted on a thin removable panel.
Brass fittings for visible details
Real brass works best in small, high-impact places: switch surrounds, handle mounts, corner accents, fan bezels, and gauge frames. Those areas draw the eye, so a little genuine material can make nearby painted parts look more convincing.
Mesh panels for ventilation
Mesh is one of the most useful steampunk materials because it looks industrial and lets air move. Expanded metal, perforated sheet, and grille mesh can all work, but the pattern should be open enough for the fan behind it.
For intake areas, judge mesh by airflow first and style second. If the fan is hidden behind a dense decorative grille, temperatures can rise and fan noise can increase. A more open mesh with a riveted frame often looks better and performs better.
Heat-safe paint and adhesives
Primer, layered paint, and the right adhesive matter more than many first-time builders expect. Poor paint can chip or soften, and weak glue can fail near warm panels or under vibration.
- Use primer on metal and plastic before decorative paint.
- Use screws or brackets for heavy parts instead of glue alone.
- Use epoxy carefully for fixed pieces that will not need removal.
- Use automotive tape only for light trim on clean, stable surfaces.
- Keep craft materials away from exhaust heat and GPU hotspots.
How to build a steampunk computer case
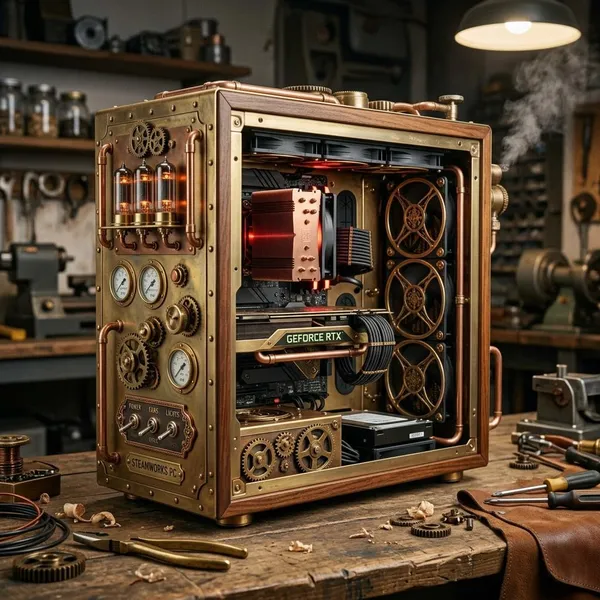
Build in a sequence that protects the hardware: strip the case, prepare the panels, modify and test fit the exterior, mount the decorative hardware, reinstall components, test cooling, then apply the final aged finish. Do not cut, sand, or spray paint around installed PC parts.
Strip and prepare the base case
Remove the motherboard, GPU, PSU, storage, fans, filters, and any brackets that could collect dust or overspray. Clean the panels, lightly scuff glossy areas if needed, and mark all cuts, drill points, and trim locations while the case is empty.
Before cutting, compare your marks with real screw holes, clips, panel seams, and fan positions. This is the last easy moment to move a feature that would weaken a panel or cover an important opening.
Modify the outer panels
Work on one panel at a time. Add the wood face, cut the vent, frame the window, or build the trim layer, then test the panel on the case before moving to the next one.
Leave extra material when cutting and refine gradually. Rough oversized openings are much harder to hide later, especially around a window or front intake.
Fit the decorative hardware
Dry fit gauges, handles, faux pipes, rivets, trim, and switch housings before final mounting. Check screw length, backing plates, cable paths, filter movement, fan clearance, and whether a removable panel still feels removable.
Heavy pieces deserve mechanical fasteners. Use washers, backing plates, or hidden brackets to spread the load, especially on plastic front bezels and thin side panels.
Route cables and install components
Reinstall the hardware only after the messy fabrication work is finished and the case is cleaned. Route cables so they support the look instead of breaking it: dark sleeving, tidy bends, and hidden front-panel wires help a lot in a windowed build.
- Keep wires away from fans and sharp cut edges.
- Leave access to RAM, storage, fan headers, and the GPU latch.
- Bundle lighting wires where they cannot be seen through mesh.
- Check that side panels close without cable pressure.
Test cooling and clearances
Run the system with all panels installed before applying the final finish. Check that every fan spins, listen for rattles, and watch CPU and GPU temperatures during normal use and a heavier load that matches how you actually use the PC.
Apply the final aged finish
The aged finish should make the mixed materials feel like one machine. Use darker washes in seams, light edge highlights on handled areas, and subtle wear around screws, corners, vents, and handles.
How to protect cooling and performance
Cooling is the part of a steampunk build that should not be treated as decoration. The case still needs open intakes, a clear exhaust path, space around hot parts, secure external pieces, and removable filters.
Keep intake vents open
Do not seal the front of the case with wood or metal and expect the fans to cope. If you cover an intake area, replace the lost opening with mesh, side gaps, spaced slats, or another clear air path.
Leave space around the GPU
The GPU is often the part most likely to suffer from an overdecorated case. Large modern cards need side clearance, bottom airflow, and enough room for power cables to bend without pressing against the panel.
If your build uses a thick side-panel design, test it with the GPU installed before final paint. A display PC with a low-power card may be forgiving; a gaming PC with a large triple-fan GPU needs much more breathing room.
Separate decorations from hot parts
Keep leather, low-grade plastic, craft foam, weak adhesives, and painted decorative parts away from radiator exhaust, GPU backplates, CPU cooler outlets, and top exhaust zones. Even if the material survives a short test, repeated heat can discolor, soften, or loosen it over time.
Secure heavy external pieces
Case panels are often thinner than they look. Solid handles, thick wood panels, large brass fittings, and side-mounted ornaments can flex a panel or crack a plastic bezel if the load is not spread out.
- Use backing plates behind heavy parts.
- Use more than one fastener for long trim or handles.
- Check for panel flex before final finish.
- Choose lighter faux parts when the panel feels weak.
This is not just about durability. A loose part can rattle, fall into a fan, catch a cable, or damage the finish when the case is moved.
Keep filters and panels removable
A case that is hard to clean will eventually run hotter and louder. Keep dust filters, side panels, fan screws, and front connectors reachable after the steampunk parts are installed.
Avoid decorations that bridge across fixed and removable sections. Screw-on frames, magnetic trim, and modular front covers are usually better than permanent pieces that must be torn apart for basic maintenance.
Conclusion
A good steampunk PC case should look like a believable retro-industrial machine without making the computer worse to own. Start with a practical base case, protect the airflow and clearances, then spend your effort on a few strong details that look intentional; that approach usually beats a heavily decorated build that runs hot, rattles, or becomes difficult to clean.
FAQ
Can you turn a normal PC case into a steampunk case?
Yes. A normal case is often the best base because the motherboard tray, expansion slots, fan mounts, and panels are already designed to work together.
Are steampunk cases practical for gaming PCs?
Yes, if the cooling layout stays functional. For a gaming build, treat open intake area and GPU clearance as fixed requirements, not optional design details.
Can decorative pipes block airflow?
Yes. Pipes are safest along panel edges, on cosmetic zones, or around unused space; avoid placing them directly in front of intake fans or beside the GPU.
Can you turn a normal PC case into a steampunk case?
Yes. A normal case is often the best base because the motherboard tray, expansion slots, fan mounts, and panels are already designed to work together.
Are steampunk cases practical for gaming PCs?
Yes, if the cooling layout stays functional. For a gaming build, treat open intake area and GPU clearance as fixed requirements, not optional design details.
Can decorative pipes block airflow?
Yes. Pipes are safest along panel edges, on cosmetic zones, or around unused space; avoid placing them directly in front of intake fans or beside the GPU.