
A steampunk motorcycle is usually a regular bike with a Victorian-industrial custom style, not a machine that actually runs on steam. The best build starts with a simple, mechanically sound motorcycle, then adds aged metal, leather, vintage lighting, and handmade-looking details without blocking controls, lights, heat protection, or service access.
Best motorcycles for a steampunk build
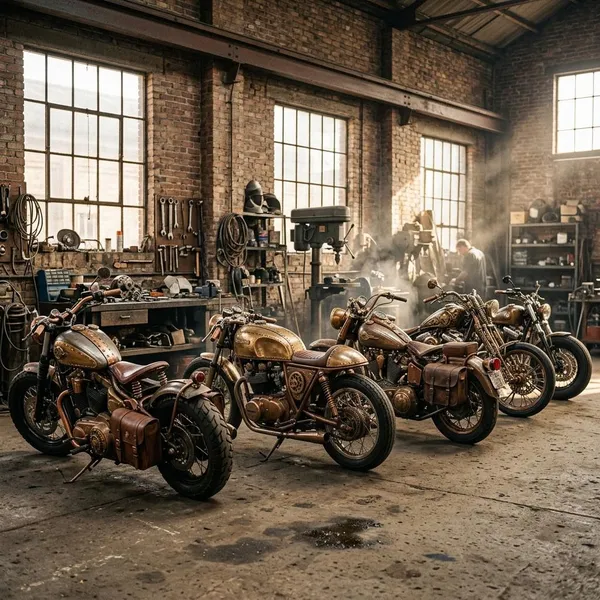
The easiest donor bikes have exposed engines, round lights, simple frames, and little plastic bodywork. If the bike already looks mechanical, you do not need to cover it with fake gears or oversized props to make the theme clear.
- Best first check: exposed engine, simple frame, easy wiring access, and legal lighting points.
- Best use case: bobbers and classic standards for rideable builds; choppers for showier customs.
- Biggest mistake: buying a cheap donor that needs so much mechanical work there is no budget left for the actual styling.
Bobbers for a stripped-back look
Bobbers are one of the safest starting points because the stripped layout already suits the workshop-made look. A solo seat, short fenders, visible engine, and simple bars leave enough empty space for a leather tool roll, aged tank, brass badges, or a vintage headlamp without making the bike look crowded.
Choppers for bold custom styling
Choppers work when the goal is visual drama: long forks, stretched lines, high bars, and a strong silhouette. They can carry oversized lamps, engraved covers, and heavier metal details better than a compact bike.
The trade-off is comfort and control. Extreme rake, hardtail frames, or awkward bars may look good parked but become tiring on longer rides. A chopper-style steampunk build is best kept for short rides, shows, or careful cruising unless the geometry and ergonomics are still practical.
Cafe racers for vintage speed
A cafe racer suits a cleaner, more refined version of the style. Think stitched leather, brushed metal side panels, brass instrument bezels, and a narrow tank rather than bulky fake boilers.
- Works well for: riders who want a sporty vintage feel.
- Use restraint with: heavy pipework, large props, and clutter around the cockpit.
- Best detail zone: gauges, seat, tank finish, and small metal accents.
Classic bikes for period character
Classic motorcycles already have many of the right shapes: spoked wheels, round headlamps, analog dials, exposed shocks, and painted tanks. Older Triumph, BSA, BMW, Royal Enfield, and Japanese standard-style bikes can look convincing with relatively subtle changes.
Rat bikes for a rough industrial finish
Rat bikes fit the rougher side of steampunk because worn paint, patched leather, and mixed metals can look genuinely industrial. The line is simple: patina is style, neglect is a problem. Rusted structural parts, weak brakes, loose wiring, or unsafe tires should never be treated as part of the look.
Key steampunk motorcycle parts
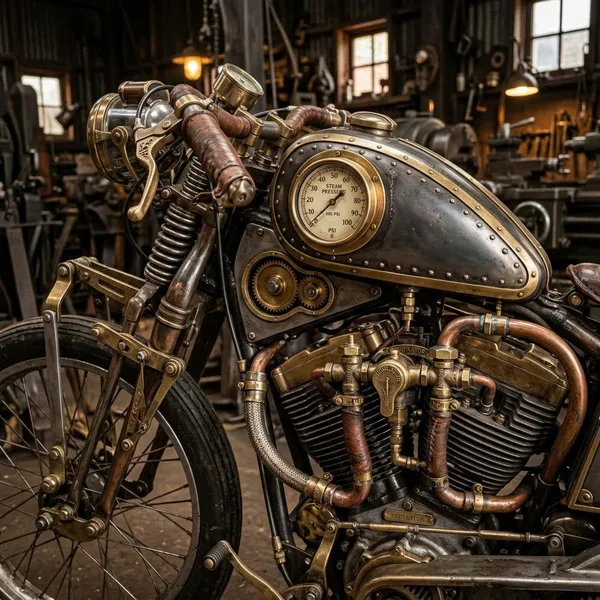
The strongest details are the ones that still make sense on a motorcycle: tank finishes, seats, lights, gauges, grips, heat shields, tool rolls, and metal trim. A good build usually has two or three standout features instead of decoration on every surface.
Aged tanks and side panels
The tank is the natural focal point. Aged paint, subtle pinstriping, riveted overlays, brass badges, or copper-toned inserts can set the whole mood without adding much weight.
Do not let the finish interfere with normal use. The fuel cap must open cleanly, knees should not rub sharp trim, and side panels should come off without dismantling half the bike. Realistic wear looks better when it follows edges, hand-contact points, and panel lines rather than random scratches.
Leather seats and tool bags
Leather gives the bike warmth and craft. Brown, oxblood, or weathered black works especially well with dark metal and brass.
- Daily rider: choose padding and shape before looks.
- Show build: a tractor-style or heavily riveted seat can work if comfort is less important.
- Wet climate: treat real leather regularly or use a high-quality synthetic that will not absorb water as easily.
Vintage lights and instruments
Round headlamps, analog-style gauges, brass bezels, and mesh guards can change the whole character of the bike quickly. They are also easy places to ruin usability, so keep brightness, beam pattern, indicator visibility, and gauge readability ahead of appearance.
Brass controls and metal grips
Controls are small, but the rider sees and touches them constantly. Levers, switch housings, bar ends, reservoir caps, and grip details can make the cockpit feel custom without adding much visual clutter.
Avoid decorative parts that make the bike harder to control. Smooth metal grips can be slippery in rain or uncomfortable in strong sun, and improvised levers can change brake or clutch feel. Motorcycle-grade parts with antique finishes are safer than adapting random hardware.
Heat-safe pipes and exhaust details
Steam-inspired pipework looks best around the engine and lower frame, where the bike already has mechanical density. Copper-colored lines, riveted shields, wrapped sections, and shaped guards can suggest old machinery without needing fake functional parts.
Heat decides what is realistic. Keep decorative pieces away from likely leg contact, leave space around headers and cylinders, and use proper brackets. If a pipe is only there for style, place it where it will not cook wiring, bags, boots, or the rider.
How to keep the motorcycle safe and rideable
A custom bike can look theatrical and still ride normally, but only if the useful parts stay useful. Lights must be seen, controls must move freely, heat must be managed, and service points must remain reachable.
- Check visibility first: headlight, indicators, brake light, and plate.
- Check rider contact next: legs, hands, boots, seat edges, and hot zones.
- Check service access last: battery, oil points, fuses, plugs, cables, and brakes.
Keep lights and plates visible
Decorative grilles, side mounts, bags, and rear brackets should frame lights and plates, not hide them. Check from the front, rear, and both sides, then test the bike at dusk to see whether mesh, tinted lenses, or metal trim reduces visibility more than expected.
Secure every decorative part
Anything added to the bike has to survive wind, vibration, potholes, and engine pulses. Faux gauges, copper tubes, badges, lamp shells, leather straps, and tool rolls should be mounted with proper brackets, locking hardware, thread locker, or rubber isolation where needed.
After the first few rides, inspect every added part again. One-off custom pieces have not been factory-tested, so the shakedown period matters more than it would on a stock motorcycle.
Protect riders from hot surfaces
Brass, copper, and steel can hold heat longer than expected, especially near headers, cylinders, and exhaust shields. Test the bike after a real ride, not just while it is idling in the garage, because slow traffic and longer running time often reveal heat problems.
- Safe sign: boots and legs do not touch hot trim during normal stops.
- Warning sign: leather bags, wiring, or trouser legs sit close to exhaust parts.
- Better fix: spacing and shields, not simply warning yourself to "be careful."
Avoid unnecessary weight
Thick steel covers, solid metal props, oversized lamps, and heavy brackets can make a small motorcycle feel clumsy. Weight mounted high, far forward, or far behind the axle is especially noticeable at low speed.
Use thin-gauge metal, hollow fabricated pieces, or lighter trims when the goal is only visual mass. A bike can look industrial without carrying the weight of actual machinery.
Leave service points easy to reach
Custom panels should not turn simple maintenance into a puzzle. Leave access to the battery, fuse box, oil fill and drain points, spark plugs, throttle and clutch cables, and brake components. If a decorative cover hides wiring or connectors, make it removable with simple fasteners and label anything that could confuse future troubleshooting.
Steampunk motorcycle vs related styles
Steampunk, dieselpunk, rat bike style, and actual steam power often get mixed together, but they are not the same thing. The easiest way to separate them is to look at the main influence: Victorian invention, early industrial machinery, rough survival, or real steam propulsion.
| Style | Main visual cue | Common mistake |
|---|---|---|
| Steampunk | Brass, leather, gauges, rivets, Victorian workshop feel | Adding random gears with no design logic |
| Dieselpunk | Darker steel, aviation, military, 1920s-1950s influence | Calling every industrial custom steampunk |
| Rat bike | Worn surfaces, repairs, mismatched parts | Confusing unsafe neglect with patina |
| Steam motorcycle | Actual steam system and pressure equipment | Assuming styled bikes are steam-powered |
Conclusion
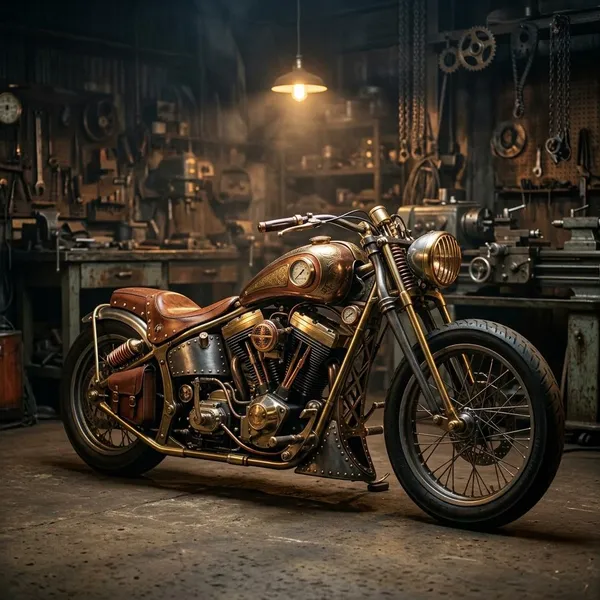
The most convincing build is the one that still feels like a motorcycle first: the donor bike runs well, the major details have a clear visual purpose, and the custom parts do not make riding or maintenance harder than necessary. If you are choosing between a subtle rider and a full showpiece, be honest about how often the bike will actually be used; that one decision should shape the donor bike, the materials, the weight, and how far the styling can safely go.
FAQ
Are steampunk motorcycles really steam-powered?
Usually no. Most are petrol or electric motorcycles styled with steam-era materials and shapes; actual steam-powered motorcycles are rare engineering projects.
Can a steampunk motorcycle be road legal?
It can be, depending on local rules. Keep required lighting, plate visibility, mirrors, noise control, emissions equipment, and safe mounting points intact before assuming it is legal to ride.
Which bike is best for a steampunk build?
A simple bobber, classic standard, or retro-style motorcycle is usually the easiest choice. Pick the one that already has exposed mechanical character and a riding position you can live with.
How much does a steampunk motorcycle build cost?
The cost depends on how much fabrication is needed. Paint, seat work, lighting, and small metal accents can stay modest; one-off panels, exhaust changes, custom brackets, and professional finishing can raise the budget quickly.
Are steampunk motorcycles really steam-powered?
Usually no. Most are petrol or electric motorcycles styled with steam-era materials and shapes; actual steam-powered motorcycles are rare engineering projects.
Can a steampunk motorcycle be road legal?
It can be, depending on local rules. Keep required lighting, plate visibility, mirrors, noise control, emissions equipment, and safe mounting points intact before assuming it is legal to ride.
Which bike is best for a steampunk build?
A simple bobber, classic standard, or retro-style motorcycle is usually the easiest choice. Pick the one that already has exposed mechanical character and a riding position you can live with.
How much does a steampunk motorcycle build cost?
The cost depends on how much fabrication is needed. Paint, seat work, lighting, and small metal accents can stay modest; one-off panels, exhaust changes, custom brackets, and professional finishing can raise the budget quickly.