
If you want to build a diy steampunk model without buying a full kit, start small: pick one object idea, make a sturdy core shape, then add gears, pipes, panels, and aged metal paint only where they help the design make sense. The biggest beginner mistake is not using cheap materials; it is adding too many details before the model has a clear shape.
What makes a model look steampunk
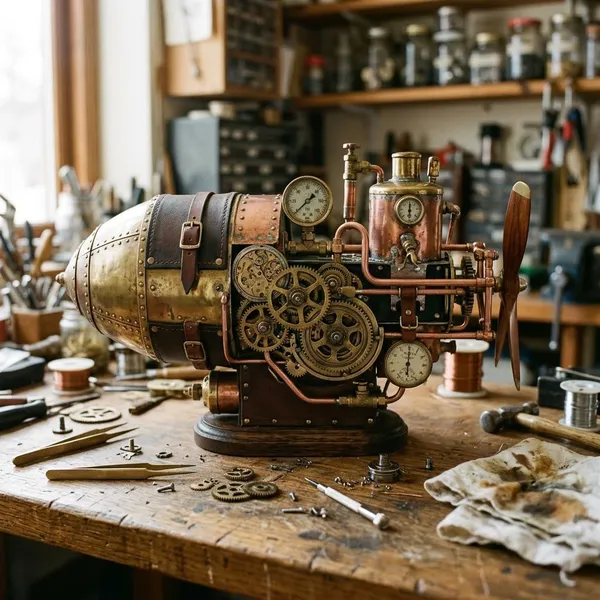
A steampunk model usually feels like a machine from an alternate Victorian-era world: old-fashioned in shape, mechanical in detail, and aged rather than clean and modern. Before adding decoration, check three things first: the silhouette, the mechanical logic, and the finish.
Victorian industrial shapes
Victorian industrial shapes give the model its first visual clue. Rounded tanks, boilers, smokestacks, domes, clock cases, gauges, and cabinet-like bodies usually read as steampunk faster than sleek, flat, modern forms.
For a first build, choose one dominant shape and two or three supporting shapes. A central cylinder with a small chimney and side tank is easier to understand than a model covered in unrelated pieces. If the outline still looks interesting before any gears are added, the final model has a much better chance of working.
Gears, pipes, and rivets
Gears, pipes, and rivets are useful because they suggest machinery, not because every surface needs them. Place rivets along panel edges, run pipes between parts that look like they exchange steam or pressure, and group gears where they seem to drive something.
- Good use: a gear cluster beside a wheel housing or engine box.
- Weak use: identical gears scattered evenly over every open space.
- Simple rule: add large details first, then medium trim, then small rivets.
Brass, copper, and dark tones
Brass, copper, bronze, dark brown, black, and aged steel are the safest color family for a beginner steampunk build. You do not need real metal; painted cardboard or plastic can look convincing once the surface is primed and shaded.
A dark base coat with light metallic dry brushing often looks better than one bright metallic layer. Use brass for the main body, copper for pipework, and darker steel for gears if you want contrast without making the model look busy.
Aged mechanical surfaces
Aged surfaces make the piece feel used, but heavy grime everywhere can hide the work you put into the build. Put darker shading around vents, seams, pipe joints, and lower corners, then keep some larger surfaces cleaner so the eye has a place to rest.
Materials and tools for a steampunk model
The best beginner materials are easy to cut, light enough to glue securely, and able to take primer. Recycled packaging, craft board, bottle caps, wire, washers, beads, tubes, and old small hardware can all work if they fit the theme.
Cardboard, wood, or plastic for the structure
Cardboard is usually the easiest starting material because it cuts quickly and is cheap to replace if a part goes wrong. Use thicker card or foam board for walls and large panels, then seal it with primer before painting.
Wood is better for bases, support arms, thin platforms, or areas that will carry extra weight. Plastic sheet and tubing are useful for clean mechanical parts, but they can be harder to cut neatly, so use them selectively on a first project.
Gears, wire, tubes, and small hardware
Small hardware gives the model depth, but it works best when repeated with purpose. Use wire as conduit, railings, or coils; use tubes as steam lines; use washers, beads, and gears as mechanical accents.
Before gluing, lay the parts on the model and step back. If the details make the main shape harder to read, remove some. If they lead the eye toward the focal point, they are doing their job.
Craft glue, epoxy, and cutting tools
Use craft glue for paper, card, and lightweight trim; super glue for small hard details; and epoxy for heavier mixed-material joints. If a part sticks out from the side or sits high on the model, choose the stronger bond rather than the fastest one.
- Hobby knife: cleaner cuts on card, foam board, and thin plastic.
- Metal ruler: straighter panels and safer cutting lines.
- Tweezers: better placement for rivets, beads, and tiny gears.
- Pliers: controlled bends in wire and small metal parts.
- Sandpaper: smoother edges and better paint adhesion.
Primer, acrylic paint, and brushes
Primer helps paint grip and makes mixed materials look like one object. A black or dark brown primer is especially useful for steampunk because it leaves natural shadows in corners and under raised details.
Acrylic paint is beginner-friendly because it dries quickly and layers well. Keep one medium brush for coverage, one older dry brush for metallic highlights, and one fine brush for rivets, stains, seams, and small repairs.
Clear sealer for protection
A clear sealer protects the paint from dusting and light handling. Matte or satin usually suits steampunk better than high gloss, unless you intentionally want a polished brass display piece.
Test the sealer on a scrap if you can. Some sealers dull metallic highlights or darken weathering, and it is better to discover that before spraying the finished model.
How to plan your steampunk model
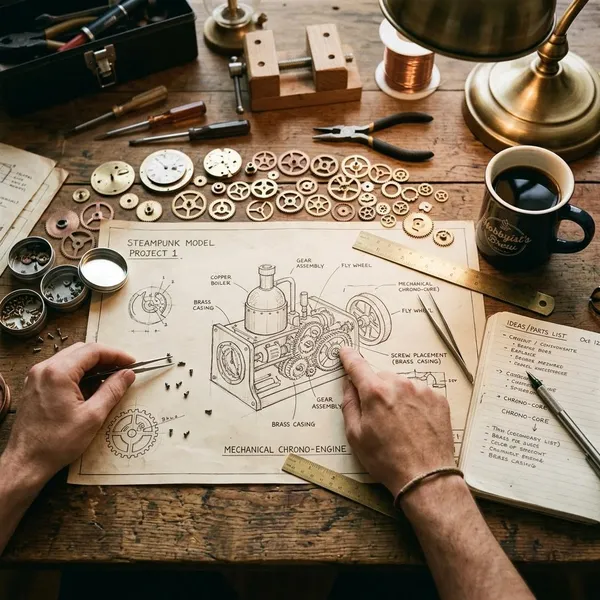
Planning does not need to be formal, but it should stop you from building a cluttered object with no clear identity. Decide what the model is, how big it will be, where the main visual interest goes, and how it will stand before you start gluing.
For a first weekend project, a model about the size of a book or small desk ornament is a good target. It gives you enough room for details but stays easy to support, paint, and display.
Choose one clear theme
Pick one idea and let it reject the wrong parts for you. A clockwork cart, mini airship, steam-powered generator, mechanical beetle, or explorer's instrument can all work, but mixing all of those ideas into one small build usually weakens the result.
Set the size and scale
Scale decides whether your details look believable. A large washer can look like a hatch on a small model but like a bolt on a larger one. Place a few sample gears, caps, and tubes beside the body before committing.
- Beginner-friendly: small enough to hold in two hands.
- More difficult: tall, narrow, or top-heavy shapes.
- Best for display: compact models with a wide base or mount.
Sketch the main shapes
A useful sketch can be rough. Draw the front and side using simple boxes, cylinders, domes, tanks, wheels, or fins. The point is not to make art; it is to notice balance problems before the materials are cut.
Plan the detail placement
Give the viewer a path through the model. Put the strongest cluster of details in one main area, add a smaller secondary area, and leave a few surfaces quieter. Empty space is not wasted; it makes the detailed areas easier to appreciate.
Test the balance and supports
Dry-fit the main pieces with tape or temporary putty before final gluing. Set the model on a flat surface and check for wobble, leaning, or parts that pull one side down.
This matters most for airships, tall machines, insects with thin legs, or anything with side-mounted tanks. If it already feels unstable before paint, mount it on a base or add hidden supports now rather than hoping the final glue layer will solve it.
How to build a DIY steampunk model
Build in the same order a sturdy object needs to exist: core structure first, major shapes second, details third, reinforcement fourth, paint preparation last. Painting too early is tempting, but it makes trimming, strengthening, and repositioning much harder.
Think of the build as layers. The first layer must be strong, the second layer must explain the silhouette, and the final detail layer should make the object feel mechanical instead of random.
Create the base structure
Start with the strongest central form: a box, cylinder, tank, cabin, or engine body. Keep it simple and square, and let the glue cure before adding weight to it. If this part flexes or twists, every later detail becomes harder to align.
Add the main shapes
Main shapes define what the model is from across the room. Add side tanks, smokestacks, wings, fins, cabins, wheels, support arms, or domes only after the core body is stable.
Check the model from the front, side, and top after each addition. A piece that looks good from one angle may make the whole build feel lopsided from another.
Layer gears, pipes, and panels
Begin with larger panels or housings, then add gear groups and pipe runs, then finish with small accents such as rivets, bolts, and wire clips. This order creates depth and keeps the surface readable.
Reinforce weak joints
Reinforce any part that sticks out, carries weight, or has a tiny contact point. Hidden backing pieces, internal tabs, extra glue inside seams, or epoxy at stress points can prevent breakage during painting and display.
- Watch closely: side tanks, long pipes, thin legs, and top-mounted parts.
- Fix early: wobble before paint usually becomes worse later.
- Hide support: strength inside the model matters more than neatness.
Prepare the surface for paint
Clean the build before primer. Remove glue strings, trim fuzzy cardboard edges, sand rough cuts, and fill gaps that distract from the design. Some irregular texture can look aged, but accidental mess usually looks accidental.
After the first primer coat, inspect the model under good light. Primer reveals seams, rough patches, and glue blobs that were easy to miss on raw materials. Correcting them now gives the metallic paint a much better surface.
How to display and protect the finished model
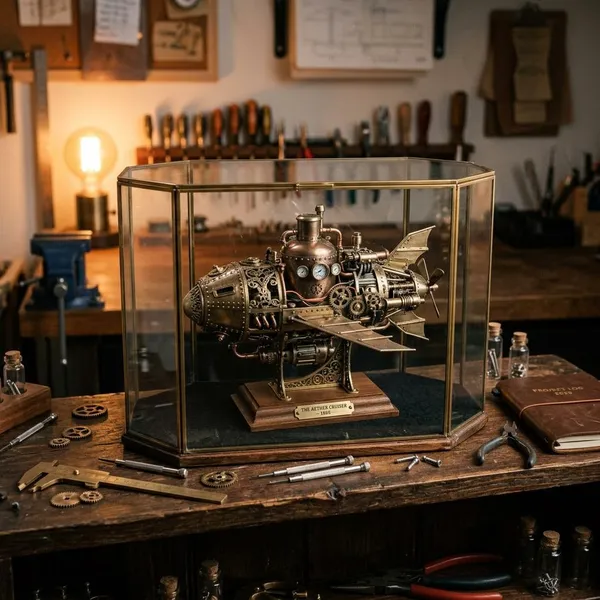
A finished steampunk model is often more fragile than it looks because the raised details are the parts most likely to catch, loosen, or collect dust. Good display is not complicated: keep it stable, dry, shaded, and easy to clean without grabbing the decorative pieces.
If the model is a quick seasonal craft, basic shelf care may be enough. If you want it to sit out for months or become part of a collection, spend more time on the base, sealer, and dust protection.
Mount it on a stable base
A stable base is worth adding when the model is tall, narrow, uneven underneath, or likely to be moved. Wood, MDF, acrylic, or thick craft board can support the footprint and make the piece look more finished.
For homes with pets, children, or shelves that get bumped, a base is more than decoration. It reduces tipping and gives you a safe place to hold the model when moving it.
Keep it away from heat and moisture
Heat and moisture can warp cardboard, soften some glue joints, dull paint, or damage paper-based details over time. Avoid sunny windowsills, damp rooms, radiator shelves, and spots with frequent temperature changes.
A dry interior shelf or display cabinet is usually safer. In a humid home, a cabinet also helps keep dust and moisture from settling into all the tiny mechanical details.
Remove dust with a soft brush
Use a soft, dry brush instead of a cloth. A cloth can snag on rivets, pipes, and gears, while a brush reaches into corners with less pressure.
- Work top to bottom so loose dust falls away.
- Use light strokes around fragile trim and wire.
- Avoid water unless you know the sealer and materials can handle it.
Repair loose parts before moving it
Check projecting details before lifting the model. A slightly loose pipe or gear cluster can break completely once the piece is tilted, packed, or carried.
Hold the model by the base or strongest body section, not by the decorative attachments. If a part moves under gentle pressure, re-glue it and let it cure fully before transport.
Conclusion
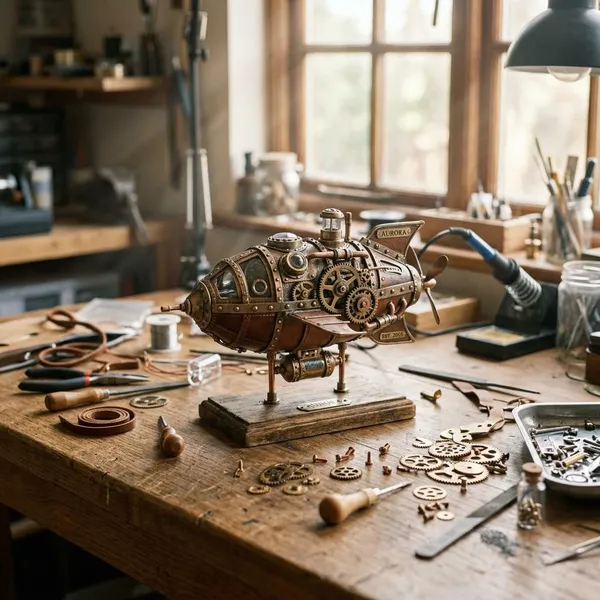
Your first steampunk model does not need moving gears, expensive supplies, or a complicated plan; it needs a clear idea, a strong base, details that seem to belong, and a finish that ties the materials together. Start with a small build you can actually complete, learn where the structure feels weak or crowded, and the next project will improve much faster than if you try to make the first one oversized and perfect.
FAQ
Can recycled materials be used for the whole model?
Yes, as long as the recycled pieces are clean, dry, and strong enough for their role. Use lighter packaging for panels and decoration, but choose sturdier card, wood, or a mounted base if the model needs real support.
Do the gears need to move?
No. Fixed gears are easier for a first model and usually look just as effective. Only make them move if the mechanism is part of the project goal, because moving parts need cleaner alignment and stronger attachment points.
What size steampunk model is easiest to build?
A small desk-display size is usually easiest: large enough for visible details, but not so large that weight and support become the main challenge. If you can hold the main body comfortably while painting, it is probably a practical beginner size.
How long does a DIY steampunk model take?
A simple model can be built over a weekend, but drying time often decides the real schedule. Glue, primer, paint layers, weathering, and sealer all look better when they are not rushed.
Can recycled materials be used for the whole model?
Yes, as long as the recycled pieces are clean, dry, and strong enough for their role. Use lighter packaging for panels and decoration, but choose sturdier card, wood, or a mounted base if the model needs real support.
Do the gears need to move?
No. Fixed gears are easier for a first model and usually look just as effective. Only make them move if the mechanism is part of the project goal, because moving parts need cleaner alignment and stronger attachment points.
What size steampunk model is easiest to build?
A small desk-display size is usually easiest: large enough for visible details, but not so large that weight and support become the main challenge. If you can hold the main body comfortably while painting, it is probably a practical beginner size.
How long does a DIY steampunk model take?
A simple model can be built over a weekend, but drying time often decides the real schedule. Glue, primer, paint layers, weathering, and sealer all look better when they are not rushed.