
A steampunk utility belt diy build works best when you treat it as wearable costume gear first and decoration second. Start with a belt that will not twist, add thrifted pouches that can actually stay attached, then use brass-tone, dark metal, labels, keys, or bottles to make it fit your character. If the belt feels awkward when you sit or walk, fix that before adding more details.
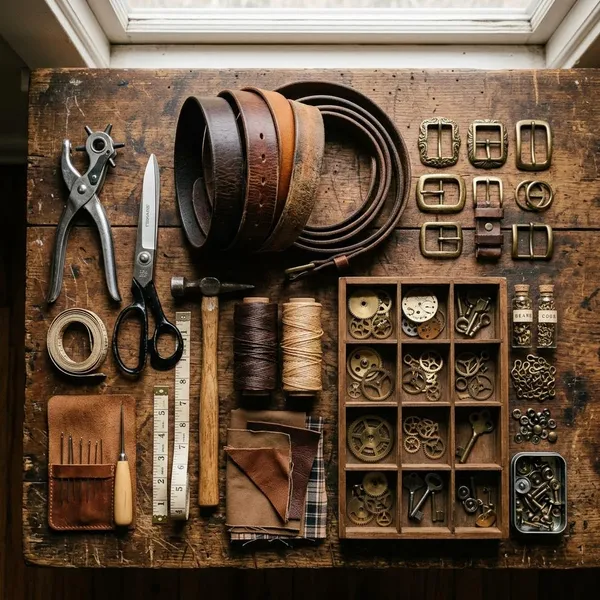
Materials and tools for a steampunk utility belt
You do not need specialty leatherworking supplies for a good costume belt. The most useful thrift-store finds are sturdy belts, small bags with existing closures, old straps, and hardware that already looks aged. Before buying anything, check three things: strength, weight, and whether the color or finish fits the rest of your costume.
A sturdy leather, faux leather, or canvas belt
Choose the base belt before choosing the pouches. A wide leather, faux leather, canvas, or heavy webbing belt usually carries weight better than a thin fashion belt. Hold it in your hands and bend it slightly; if it folds sharply or feels flimsy near the buckle holes, it will probably sag once pouches are added.
Thrifted pouches, purses, and small bags
Look for coin purses, compact crossbody bags, camera cases, cosmetic bags, and small handbags with flaps, snaps, buckles, or zippers. Those built-in details make the finished belt look more believable than plain craft foam pockets.
- Best quick win: a small bag with rear loops or side strap anchors already attached.
- Best for maps or notes: flat pouches that do not bulge when you sit.
- Best for a rugged look: worn brown, black, tan, or olive bags with metal hardware.
Straps, rivets, screws, or strong thread
Old bag straps are perfect for making belt loops because the color and texture already match the pouch. For attachment, use rivets, Chicago screws, or strong hand stitching depending on what your material can handle. Wider pouches should usually have two attachment points so they do not spin or lean while you walk.
Chains, keys, buckles, and empty vials
Steampunk details should look like they belong to the character, not like random objects glued onto a belt. A short chain, a skeleton key, a brass buckle, a paper label, or an empty plastic vial can be enough. Keep real glass and heavy metal pieces to a minimum if the belt will be worn in a crowd.
Scissors, pliers, and basic hand tools
Most builds only need sharp scissors, pliers, a small screwdriver, and possibly a hole punch. Test cuts and holes on scrap material first, especially with faux leather, because some older thrifted pieces crack near the edge.
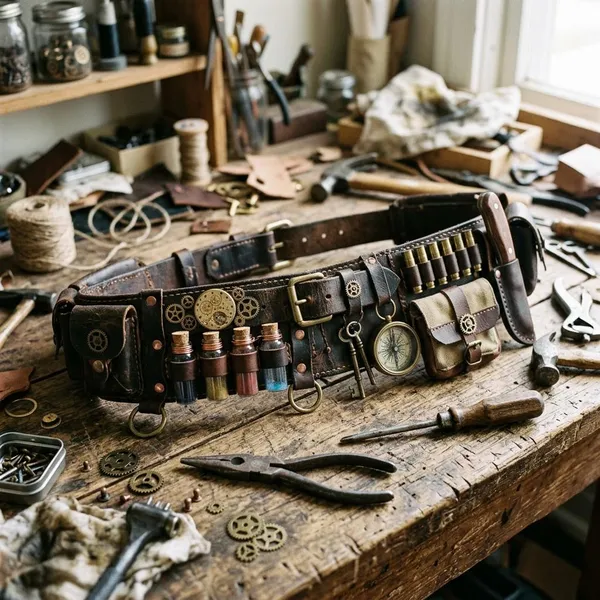
How to make a steampunk utility belt
Build the belt in a practical order: fit the base, prepare the pouches, make the loops, attach everything, then decorate. This prevents the common mistake of spending time on gears, chains, and labels before discovering that the pouch sits badly or pulls the belt to one side.
Prepare and test the base belt
Try the belt on over the exact clothing layers you plan to wear. A belt that fits over a shirt may sit very differently over a vest, coat, corset, or thick skirt waistband. Mark the front, side, and back positions with tape or clips so you know where pouches can sit comfortably.
Remove usable pockets from old bags
Cut slowly around the pockets, flap sections, zippered panels, and strap-anchor areas you want to reuse. Leave extra material around each piece at first; you can trim it later, but you cannot put it back once it is gone.
- Keep original snaps, buckles, and zippers when possible.
- Trim loose lining so the pouch does not look unfinished.
- Save matching scraps for reinforcement and small repairs.
Make loops for each pouch
Cut short strips from old straps or strong fabric and attach them to the back of each pouch as belt loops. The loop should be loose enough for the belt to slide through, but not so loose that the pouch flops forward. For a pouch wider than your palm, two loops usually sit better than one centered loop.
Slide or fasten the pouches onto the belt
Slide the pouches onto the belt and test the layout before making anything permanent. A good starting layout is one main pouch near one side and smaller items balancing the other side. If you want to reuse the same belt for several costumes, keep more pieces removable; if you want one sturdy event belt, fix the main pouch in place with rivets or Chicago screws.
Add rings for lightweight props
D-rings, split rings, and small loops work well for keys, tags, goggles straps, small tools, or empty vials. Attach them near strong seams or existing hardware rather than weak fabric edges. Anything that hangs should be light enough that it does not drag the belt down or slap your leg as you walk.
Decorate the belt with steampunk details
Add decoration after the structure feels stable. Aged brass tones, dark metal accents, stitched labels, short chains, buckles, and weathered tags can all work, but the best choices support a clear role. One labeled vial for an alchemist or one gauge detail for an inventor usually says more than a dozen unrelated gears.
Try it on and adjust the layout
Wear the belt for a short trial with the costume. Walk, sit, turn, reach, and bend slightly. Move any pouch that digs into your hip, shorten chains that swing too much, and tighten loops that slide more than you expected.
This is where temporary-use and long-event builds differ. For a quick party, minor shifting may be acceptable; for a full convention day, anything annoying after ten minutes will feel much worse after several hours.
How to make a no-sew utility belt
A no-sew utility belt is completely workable if the attachments are mechanical rather than just decorative. Choose pouches with existing loops, tabs, straps, or reinforced backs, then use screws, rivets, clips, and rings to hold them in place. Avoid relying on glue alone for anything that will carry weight.
Use existing straps and belt loops
The easiest no-sew method is to reuse the bag's own straps. Cut them into short sections and turn them into rear loops, side ties, or stabilizing bands. Because the material already matches the pouch, the result usually looks cleaner than adding random craft-store strips.
Fasten pouches with screws or rivets
Chicago screws and rivets give a stronger finish than pins or glue. Mark the holes carefully, punch through the loop and pouch backing, then fasten the hardware so the loop lies flat. If the pouch material feels thin, place a washer or backing patch inside before tightening.
Chicago screws are useful if you may want to remove or change the layout later. Rivets are better when you want a more permanent attachment.
Add removable clips and carabiners
Clips and small carabiners are good for lightweight accessories that you may want to swap between characters. Use them for keys, tags, charms, compact bottle holders, or small props, not for the heaviest pouch on the belt.
- Classic inventor: antique brass clips.
- Rogue or mechanic: dark metal clips.
- Explorer: simple, practical hardware with minimal shine.
Reinforce temporary attachments
Temporary does not have to mean fragile. If a clip holds the weight, add a second small loop to control swinging. If an adhesive strip helps position something, back it up with a screw, rivet, or tie point. The goal is one attachment that carries weight and another that controls movement.
Test every connection before wearing it
Tug each pouch downward and sideways, then wear the belt around your home for a few minutes. Older faux leather can look fine but split around new holes, so watch for stretching, cracking, or hardware pulling through. Replace weak parts before the event rather than hoping they survive.
Utility belt ideas for different characters
The same belt base can read as inventor, alchemist, explorer, crew member, or rogue depending on what you attach to it. Start with the character's job or habit: what would they reach for quickly, what would they protect, and what would they never carry because it gets in the way?
Tools and gauges for an inventor
An inventor belt can be slightly busy, but it should still look usable. Try slim tool sleeves, a folded blueprint pouch, pencil loops, fake gauge faces, washers, or small repair tags. A few purposeful details look more convincing than covering every pouch with gears.
Bottles and labels for an alchemist
Use empty vials, corked plastic bottles, ingredient labels, folded notes, and small divided pouches. Amber, green, smoky, or tea-stained tones usually feel more natural than bright craft colors. Keep bottles close to the body so they do not swing or hit chairs.
Maps and compass details for an explorer
An explorer belt works best with flatter storage: a map sleeve, notebook pouch, compass case, pencil holder, or small field tag. Brown, tan, olive, and weathered brass help the belt feel like travel gear rather than stage decoration.
Ropes and badges for an airship crew member
Rope loops, clipped duty tags, badges, work gloves, and compact utility pouches suit an airship crew character. This style often looks better with a cleaner layout than an inventor belt, because repeated hardware and matching pouches suggest uniform gear.
Dark metal accents for a steampunk rogue
A rogue belt should stay low-profile. Use slim pouches, dark canvas or faux leather, blackened metal, short chains, coin purses, hidden-note pockets, or lock-pick-style props. Keep the front relatively clear so the character still looks mobile.
- If the costume is for photos: one bold signature prop can read well on camera.
- If the costume is for walking around: smaller, flatter pieces will be easier to wear.
- If the character is stealthy: avoid long chains that jingle with every step.
How to keep the belt comfortable
Comfort comes down to weight, balance, and movement. A belt can look great on a table and still be miserable once you sit down or walk through a crowded event. Check comfort before final decoration, because it is much easier to move a pouch than to rebuild a finished belt.
Use lightweight pouches and props
Choose soft pouches and hollow or lightweight props whenever possible. Painted plastic, foam, resin, and empty containers can create the same visual effect as heavy metal or glass with much less pull on the belt.
Keep bulky items away from the hips
Large pouches often feel worst directly on the side hip, where they bump your arm, chairs, and coat seams. Move bulky pieces slightly forward or slightly behind the hip and test again. A few inches can make the difference between wearable and annoying.
Leave space for sitting and bending
Keep the front center of the belt fairly clear if you need to sit, lean, or bend. Hard pouches, buckles, and bottle holders can press into your stomach or catch on layered clothing. Sit in a normal chair for a few minutes during testing; standing in front of a mirror is not enough.
Secure anything that swings while walking
Shorten chains, add a second tie point, or tuck hanging items closer to the body if they tap your leg while walking. A little movement can look good, but constant swinging becomes distracting fast.
Test the completed belt with your costume
Put on the full outfit and do a final wear test. Coats, corsets, vests, skirts, and thick shirts can all change where the belt sits. If the belt is for a short photo session, appearance may matter most; if it is for a full event, comfort and stability should win over extra decoration.
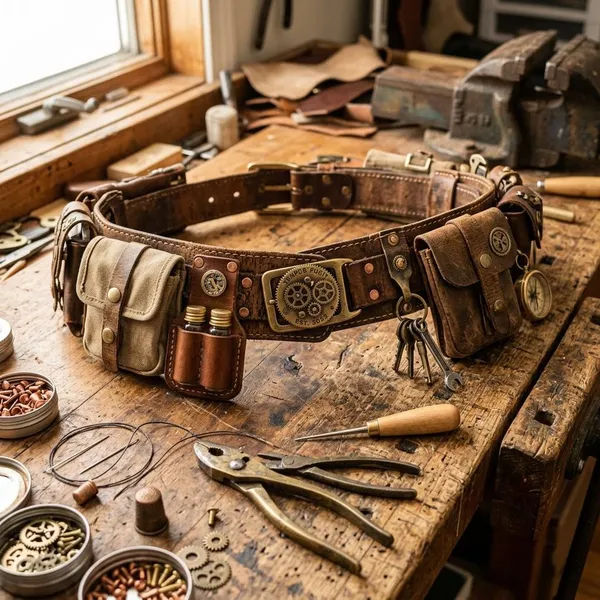
Conclusion
A good thrifted steampunk belt does not need to be packed with props; it needs a strong base, secure pouches, and a few details that make the character easy to read. Build it so it survives walking, sitting, and adjusting first, then add the visual touches. If the belt feels balanced and every piece looks like it has a reason to be there, the costume will look more intentional without becoming uncomfortable.
FAQ
Can you make a steampunk utility belt without sewing?
Yes. Use existing straps, belt loops, rivets, Chicago screws, clips, or carabiners instead. Just avoid making glue or safety pins the only support for a pouch that will carry weight.
What is the best base for a steampunk utility belt?
A wide, sturdy belt is usually best because it spreads weight and gives you room for attachments. Leather, faux leather, canvas, and heavy webbing can all work if they do not twist easily.
Can you make one without real leather?
Yes. Faux leather, canvas, waxed fabric, and cotton webbing are good alternatives. They are also easier to cut and modify, which can make them better for a first build.
Can you make a steampunk utility belt without sewing?
Yes. Use existing straps, belt loops, rivets, Chicago screws, clips, or carabiners instead. Just avoid making glue or safety pins the only support for a pouch that will carry weight.
What is the best base for a steampunk utility belt?
A wide, sturdy belt is usually best because it spreads weight and gives you room for attachments. Leather, faux leather, canvas, and heavy webbing can all work if they do not twist easily.
Can you make one without real leather?
Yes. Faux leather, canvas, waxed fabric, and cotton webbing are good alternatives. They are also easier to cut and modify, which can make them better for a first build.