
A strong steampunk laboratory building should look like it could actually run experiments, not just display gears on the walls. Start with the lab's purpose, give the building a readable power source, then add Victorian industrial materials, glass, pipes, vents, and worn details where they make sense.
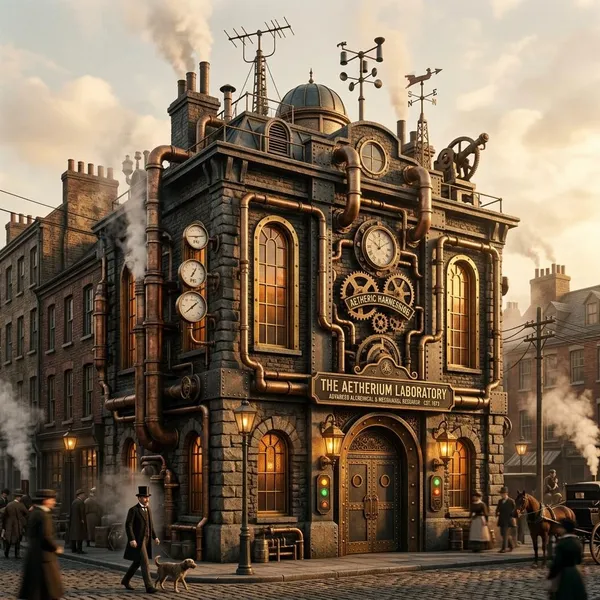
What makes a building look like a steampunk laboratory?
The quickest way to make the design convincing is to combine three things: an old industrial shell, visible machinery, and clear signs of research. If one of those is missing, the building may read as only a factory, only a mansion, or only a fantasy workshop.
Before adding decorative details, decide what a visitor would understand at a glance. A storm-energy lab, a medical experiment house, and an automaton workshop should not have the same exterior, the same room layout, or the same kind of equipment.
Victorian industrial architecture
Victorian industrial architecture gives the building its base: brick walls, arched windows, cast-iron columns, riveted beams, steep roofs, and heavy doors. These features make the fantasy feel grounded before any unusual invention is added.
Visible steam-powered machinery
Steam machinery should show how the building works. Boilers, tanks, flywheels, pistons, pressure gauges, and pipe runs are useful when they appear to feed real rooms or devices.
- Put major boilers near fuel access, not in a random decorative corner.
- Run pressure lines toward workshops, testing rooms, or powered lifts.
- Use large tanks or engines only when the lab's purpose feels ambitious enough to need them.
Experimental science details
The science details tell people what kind of experiments happen inside. A botanical lab might need glass growing chambers and specimen cabinets; an automaton lab needs limbs, brass casings, tool racks, and blueprint walls; a weather lab benefits from coils, rooftop instruments, and insulated control panels.
This is where many designs become too generic. A scorched test bench, a labeled specimen shelf, or one half-finished machine says more than covering every surface with random cogs.
A worn, story-rich atmosphere
A believable steampunk lab usually looks repaired, upgraded, and slightly stressed by use. Soot near vents, polished handrails, patched brickwork, stained floors, and replaced metal panels suggest years of experiments without making the whole place look abandoned.
Steampunk laboratory exterior features
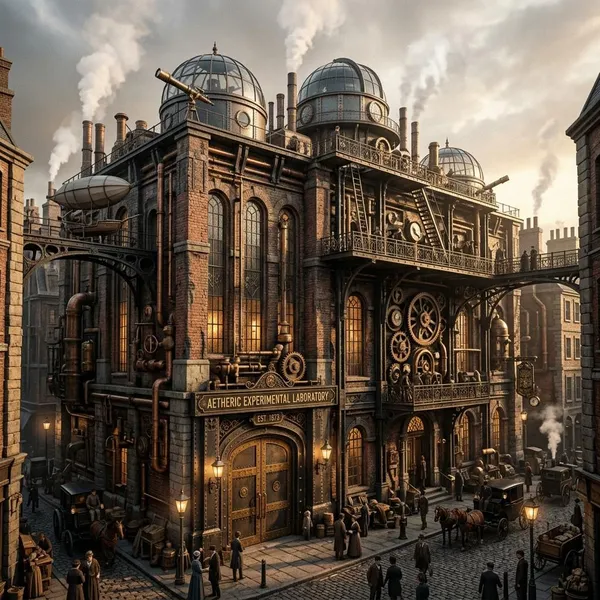
The exterior should make the building's job visible before anyone enters. Focus first on silhouette and function, then add smaller details: towers where observation happens, chimneys where heat escapes, glass where light or sky access matters, and loading areas where fuel or equipment arrives.
Towers and uneven rooflines
Towers are useful when they have a job: holding telescopes, lightning rods, water tanks, observation rooms, or isolated experiments. Uneven rooflines also help the building feel expanded over time, as if each new discovery required another wing or platform.
For a small game build or illustration, one tower and one raised roof section may be enough. For a larger complex, vary the height with a central hall, rear boiler stack, side workshop wing, and glass-topped research space.
Brick walls and iron framing
Brick and iron are the safest material pairing for this style because they feel old, heavy, and industrial. Deep red or brown brick, dark iron braces, rivets, and oxidized metal details usually work better than clean modern surfaces.
Use stronger framing around rooms that carry visual weight, such as engine halls, suspended walkways, or tall glass chambers. The structure should look capable of supporting the inventions inside.
Chimneys, pipes, and vents
Chimneys, pipes, and vents should trace heat, smoke, pressure, or fumes through the building. They become much more convincing when a viewer can guess where they start and where they go.
- Tall chimneys suggest major boilers or furnaces.
- Short vents suit chemistry rooms, workshops, and small heating systems.
- Exterior pipe clusters can mark high-energy or restricted wings.
Large windows and glass domes
Large windows bring in daylight and make research spaces feel grand. Glass domes work especially well for observatories, greenhouse labs, central testing halls, or rooms where strange equipment should be visible from outside.
Match the glass to the risk level. Tall arched windows fit formal research rooms, while smaller reinforced panes make more sense near explosive, hot, or chemical work.
Walkways, signs, and loading areas
Service details make the lab feel used. Iron stairs, catwalks, loading docks, cargo lifts, warning signs, and fenced yards show how coal, crates, specimens, and machine parts move around the site.
Think through one normal working day: fuel arrives at the rear, assistants carry parts to the workshop, researchers cross a raised walkway to observe a test, and maintenance staff inspect valves near the tower. That kind of movement turns exterior details into useful design choices.
Rooms to include inside a steampunk laboratory
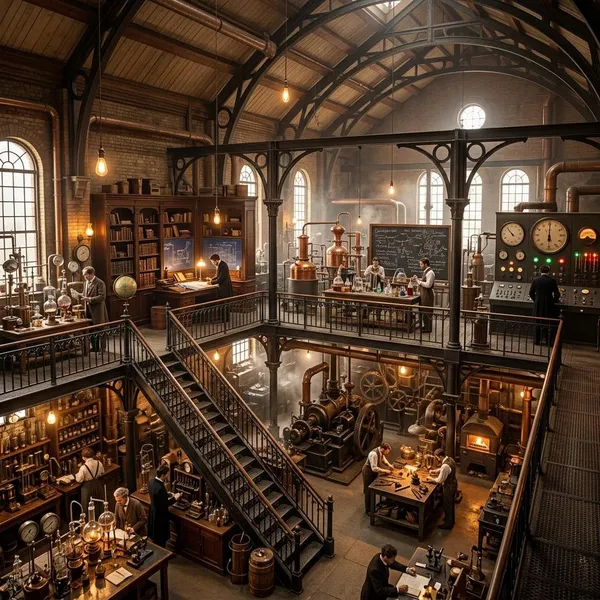
The interior should separate thinking, making, powering, storing, and testing. That layout gives the building logic and helps readers, players, or viewers understand where they are without needing an explanation.
Main research room
The main research room is where the lab's ideas are visible: worktables, notes, measuring instruments, chalkboards, reference books, cabinets, and one or two important prototype devices. It should feel busy but not impossible to work in.
Boiler and power room
The boiler and power room should sit where heat, noise, and fuel access make sense: a basement, rear annex, or separated lower wing. Include furnace doors, pressure gauges, tanks, condensers, valve wheels, and main pipe junctions.
This room matters because it explains the rest of the design. Once the power source is clear, pipes, vents, lifts, and machines stop feeling decorative.
Workshop and assembly area
The workshop is the practical counterpoint to the research room. Use benches, vises, hoists, tool racks, spare tubing, scrap metal, gear bins, and half-built machines to show ideas becoming physical objects.
- Place it near loading access if heavy parts arrive often.
- Give it tougher surfaces than the research room.
- Leave room for large objects, not just tiny tabletop devices.
Specimen and blueprint storage
Storage adds history. Blueprint drawers, locked cabinets, journals, labeled jars, mechanical models, sealed crates, and restricted shelves show that the lab has records, failures, discoveries, and possibly secrets.
Keep fragile storage away from damp boiler spaces or dirty workshops unless the contrast is intentional. A well-kept archive beside a scorched testing wing can create a useful sense of order under pressure.
Testing and observation chamber
The testing chamber is where danger belongs. Reinforced doors, thick walls, viewing windows, floor anchors, cage barriers, remote switches, and emergency shutoff levers help the room feel designed for risk instead of random drama.
Do not forget the observation area. Scientists need a safe place to watch what happens, so an upper gallery or protected control room often makes the chamber more believable than an open floor with machines in the middle.
How to design a steampunk laboratory building
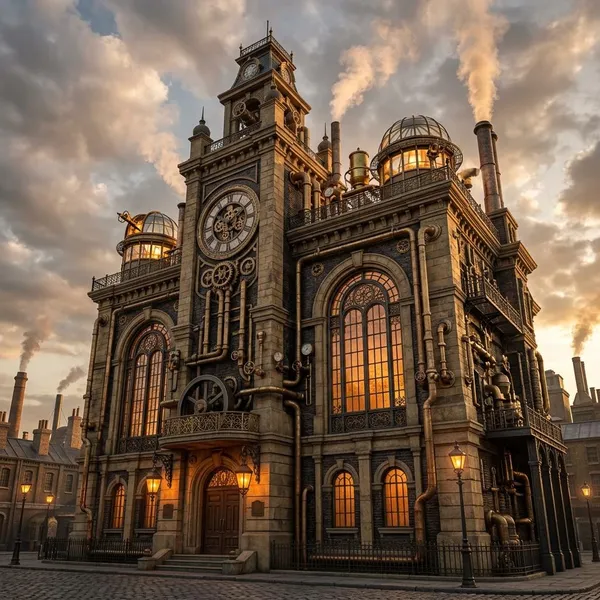
Designing the building is easier if you work from big decisions to small details. Purpose comes first, then shape, room flow, power systems, pipes, lighting, and story clues.
Choose the laboratory's purpose
Pick one main field of research before drawing the building. Electricity, medicine, automata, botany, weather control, chemistry, and engine testing all lead to different rooms and exterior features.
Sketch the main building shape
Block the structure with simple forms: a central hall, one tower, a side workshop, a rear boiler annex, a glass dome, or a lower furnace level. At this stage, the silhouette matters more than rivets and trim.
If the building needs to look modest, keep the shape tight and vertical. If it needs to feel official or dangerous, spread it into multiple wings with visible service areas and a taller power stack.
Plan the rooms and walkways
Arrange rooms by access, heat, noise, and danger. Research and archives usually work better near calmer areas; workshops need service routes; boilers belong lower or farther back; testing chambers need controlled entry and observation points.
| Design choice | Best when | Avoid when |
|---|---|---|
| Compact vertical lab | Private inventor, city setting, small game build | You need heavy deliveries or large test machines |
| Wide industrial complex | Institutional research, engines, dangerous experiments | The design should feel secretive or hidden |
| Glass-domed research hall | Botany, astronomy, public-facing science | The lab handles constant explosions, smoke, or impact tests |
Add machinery and power systems
Decide how the building runs before adding small pipes. Boilers need fuel access, tanks need support, pressure lines need destinations, and vents need somewhere to release heat or fumes.
For a ground-based lab, coal furnaces, water tanks, steam manifolds, and heavy chimneys feel natural. For an airship-linked lab, rooftop moorings, lighter pressure systems, suspended walkways, and transfer pipes can make the design feel more airborne.
Layer in pipes and smaller details
Add detail in clusters instead of spreading it evenly everywhere. A service corner with gauges, patched pipework, warning labels, and valve wheels is more readable than a wall covered in identical gears.
- Use gauges where pressure would be checked.
- Put ladders near tanks, roof hatches, and maintenance platforms.
- Add labels to storage, specimens, and restricted doors.
- Save gears for lifts, clocks, driveshafts, and visible mechanisms.
Finish with lighting and story clues
Lighting should guide attention. Warm gas lamps suit desks and corridors, furnace glow works near boilers, skylight beams fit research halls, and harsh electrical flashes can mark unstable test areas.
End with a few clues that raise questions: a cracked containment window, a sealed brass door, a missing prototype, a scorched warning sign, or fresh repair plates over older damage. If someone can guess the lab's purpose and sense what might have gone wrong there, the design is doing its job.
Conclusion
A memorable steampunk lab starts with function and earns its atmosphere from there. Decide what the building studies, make the power and room layout believable, then use Victorian materials, glass, machinery, lighting, and worn details to give it character. If the design still makes sense before the decorative gears go on, it will feel far stronger once the steampunk layer is added.
FAQ
What lighting works best in a steampunk laboratory?
Warm amber lighting works best for the base mood. Add sharper electrical light only around experiments or machinery so the dangerous areas stand out.
Can this design work in Minecraft or other building games?
Yes. Focus on silhouette first: brick walls, dark framing, chimneys, layered roofs, glass domes, and clear room zones will read better than tiny decorative details alone.
Does every steampunk laboratory need visible gears?
No. Gears help only when they belong to a mechanism such as a lift, clock, door, or drive system. Pipes, boilers, vents, gauges, ironwork, and room planning usually do more to sell the style.
What lighting works best in a steampunk laboratory?
Warm amber lighting works best for the base mood. Add sharper electrical light only around experiments or machinery so the dangerous areas stand out.
Can this design work in Minecraft or other building games?
Yes. Focus on silhouette first: brick walls, dark framing, chimneys, layered roofs, glass domes, and clear room zones will read better than tiny decorative details alone.
Does every steampunk laboratory need visible gears?
No. Gears help only when they belong to a mechanism such as a lift, clock, door, or drive system. Pipes, boilers, vents, gauges, ironwork, and room planning usually do more to sell the style.