
You can make a wearable diy steampunk gauntlet without metalworking if you keep the base light, leave the wrist free, and build the "machinery" as decorative layers. Start with fit first, then add foam or cardboard panels, small mechanical details, and an aged brass or copper paint finish. If it feels comfortable before painting, it has a much better chance of looking good when you wear it.
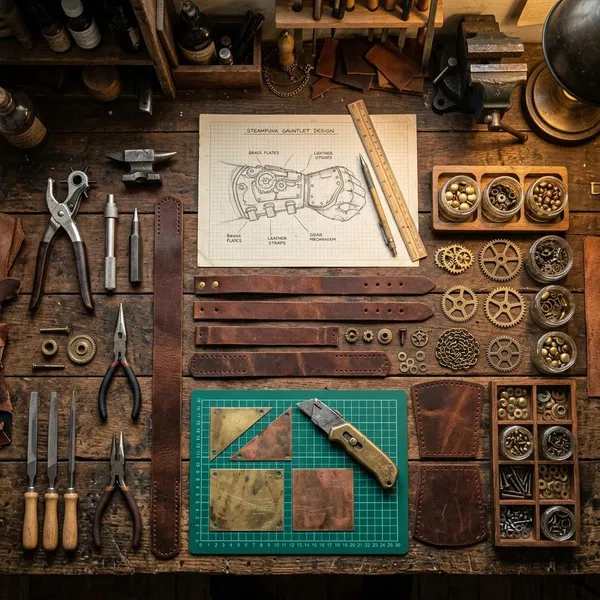
Materials and tools for a steampunk gauntlet
The best materials are the ones you can cut cleanly, glue securely, and wear without feeling weighed down. For a one-night costume, cardboard and hot glue can be enough. For a gauntlet you want to wear to several events, EVA foam and flexible adhesive are usually worth the extra effort.
A fitted glove or forearm base
A glove keeps hand plates from sliding around, especially if the gauntlet covers the back of the hand. Choose one that fits snugly but does not pull tight when you make a fist. Faux leather, canvas, or thick fabric works well because it suits the steampunk look and gives glue more surface to grip.
EVA foam or sturdy cardboard
EVA foam is the safer choice for repeated wear because it bends, holds curves, and resists cracking better than cardboard. Use thinner foam for hand plates and thicker foam for forearm armor or raised panels.
Cardboard still works for a first attempt or a low-cost costume. Reinforce narrow tabs, seal the cut edges, and avoid placing cardboard across areas that bend often. If the gauntlet needs to survive rain, sweat, or a full convention weekend, foam is the better material.
Flexible glue and cutting tools
Use glue that matches the stress of the part. Contact cement is strong for EVA foam, flexible craft glue is useful for light details, and hot glue can work on cardboard or decorations that do not flex much.
- Keep blades sharp: dull blades tear foam and crush cardboard.
- Use a metal ruler: it gives cleaner mechanical-looking edges.
- Dry-fit before gluing: tape pieces in place and test movement first.
Gears, wires, tubes, and rivets
Steampunk details look best when they seem to have a purpose. A few wires leading into a raised panel or a gear cluster mounted on a backing plate will look more convincing than random parts spread everywhere. Keep everything lightweight; heavy metal hardware can pull the gauntlet out of position.
Good substitutes include foam circles for rivets, plastic beads for bolts, drinking straws or aquarium tubing for pipes, and washers for mechanical accents. Avoid sharp edges or loose wire ends that could scratch your skin or snag fabric.
Primer, metallic paint, and sealer
Primer or a brush-on sealer helps foam and cardboard stop looking porous before metallic paint goes on. A dark base coat then creates shadow, while brass, bronze, copper, or dark steel paint builds the metal effect.
How to build the gauntlet base
The base decides whether the finished gauntlet is actually wearable. Check comfort before decoration: the hand should close, the wrist should bend, and the forearm piece should not twist when you move. Decoration can hide simple materials, but it cannot fix a base that pinches.
- Make paper templates first.
- Test them on your hand or forearm.
- Cut the final panels only after the shapes feel right.
- Shape and layer slowly instead of gluing everything at once.
- Test movement again before adding details.
Cut the hand and forearm panels
Start with a hand plate that sits on the back of your hand without crossing the knuckles. For the forearm, separate panels are often easier than one large wraparound piece because they follow the arm more naturally.
Trace the final templates onto foam or cardboard and cut slightly outside the line if you are unsure. You can trim material away later, but a panel cut too small usually has to be remade.
Shape the pieces to fit
Warm EVA foam gently and curve it over a bottle, rolling pin, or rolled towel. Let it cool in that shape before checking the fit. Cardboard should be curved slowly by hand; if it starts to crease, switch to narrower panels.
Pay closest attention to the wrist. A display piece can sit stiffly, but a wearable gauntlet needs space where your hand bends. If the front edge digs in when you point your hand down, trim it now.
Layer the panels for depth
Layering is what makes a simple base look like armor or machinery. Add smaller foam or cardboard shapes over the main panels to create raised sections, seams, and places for rivets.
| Layer choice | Best use | Watch out for |
|---|---|---|
| Large forearm plate | Main visual shape | Can become stiff if it wraps too far |
| Small angled panels | Mechanical depth | Too many can look cluttered |
| Thin strips | Seams, borders, and raised edges | Edges need clean cutting |
Smooth the visible edges
Clean edges make painted foam or cardboard look much more like metal. Lightly sand rough foam, trim cardboard fibers, and seal exposed cardboard edges with glue or primer. Focus on the hand plate, cuff openings, and any raised panels that will catch light.
Test movement before gluing
Put the base on and move as if you were actually wearing it: make a fist, bend your wrist, rotate your forearm, and reach forward. Mark any area that lifts, rubs, or blocks movement.
How to add steampunk details
Steampunk detail works best in planned clusters, not as a covering for every empty space. Pick one main focal point on the forearm, then add a smaller detail area on the hand or side. The design will read better from a distance and stay easier to wear.
Add faux rivets and bolts
Use foam dots, beads, small plastic studs, or trimmed dowel pieces to fake rivets and bolts. Place them along panel edges, corners, and raised strips where real fasteners would make sense.
Keep the spacing fairly even. Random rivets can make the gauntlet look busy, while a clean line of them can make a plain panel look assembled from metal plates.
Layer gears and washers
Gears and washers should be treated like a feature, not filler. Mount one strong cluster on a backing plate near the forearm, then use smaller washers or gears to support it elsewhere.
Attach wires and small tubes
Wires and tubes can suggest steam lines, pressure hoses, or electrical channels. Run them along stable panels rather than across bending areas, and glue both ends securely so they do not peel away while you move.
- Side of the forearm: good for longer tubes.
- Raised panel to gear cluster: good for short "functional" connections.
- Wrist crease: usually best left clear.
Create raised mechanical panels
Raised panels give you the look of vents, access covers, pressure housings, or reinforced armor without needing many found objects. Simple rectangles, angled strips, and stacked shapes can look surprisingly detailed after paint.
For a cleaner result, mix busy and quiet areas. A smooth forearm plate beside a gear cluster gives the eye a place to rest and makes the detailed section stand out more.
Leave flexible areas clear
Leave the wrist crease, finger bases, and any tight cuff edge mostly clear. Use paint shading or very thin flexible strips there instead of bulky gears, bolts, or tubes. This matters most for long wear, but even a short Halloween costume feels better when the gauntlet can move with you.
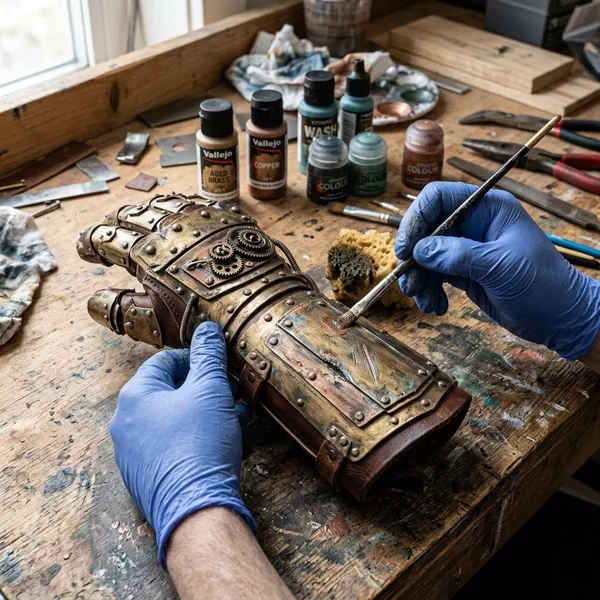
How to paint an aged metal finish
The paint finish turns craft materials into something that reads as old metal. Do not start with a bright metallic coat on bare foam or cardboard; it often looks flat and toy-like. Build the finish in thin layers: dark base, dry-brushed metal, shadows, edge wear, and sealer.
Apply a dark base coat
Paint the whole gauntlet black, dark brown, charcoal, or a mix of those tones. The dark color should reach into seams, under gears, and around rivets because those shadows create most of the depth.
Use thin coats rather than one heavy coat. Thick paint can fill panel lines and soften the small details you spent time adding.
Dry-brush brass or copper
Dip a brush lightly into brass or copper paint, wipe most of it off on a paper towel, then skim it across raised surfaces. The metallic color should catch edges, rivets, gears, and texture while leaving dark paint in the low spots.
Build the shine slowly. For a classic steampunk look, use brass as the main tone and add copper only on selected panels or pipes. For a darker industrial style, use bronze or gunmetal with warmer highlights.
Add shadows around the details
A thin dark wash around gears, rivets, tubes, and panel seams helps separate the layers visually. Brush it into the recesses, then wipe the highest areas before the wash dries too heavily.
Highlight worn edges
Add a lighter metallic touch to the corners, raised ridges, rivet tops, and outer hand plate edges. These are the places that would naturally get rubbed if the gauntlet were real metal.
Use restraint here. If every edge is equally bright, the wear pattern looks fake. A few sharp highlights can do more than a full outline of silver or gold.
Seal the finished surface
Seal the gauntlet once the paint is fully dry, especially if it will be worn more than once. Light coats of matte or satin sealer help protect the finish from handling, sweat, and storage scuffs.
Test the sealer on a painted scrap if possible. Some sealers slightly darken metallic paint, and it is better to find that out before spraying the finished piece.
Conclusion
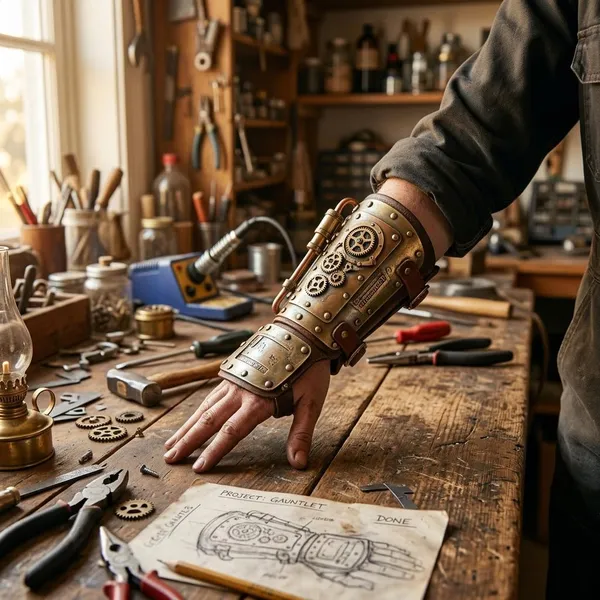
A good steampunk gauntlet is not the one with the most gears; it is the one that fits, moves, and has a clear mechanical look. Keep the base comfortable, place details where they make sense, and let the paint do a lot of the visual work. If this is your first build, make a simple wearable version before trying a heavier, more elaborate design.
FAQ
Can you make a steampunk gauntlet without EVA foam?
Yes. Sturdy cardboard is the easiest substitute for a low-cost or one-time costume, but it should be sealed before painting and kept away from high-flex areas.
How do you make cardboard look like metal?
Seal the surface, paint it dark, then dry-brush metallic paint over the raised areas. The dark layer creates shadow, and the light edge highlights make the cardboard read more like worn metal.
How long does a DIY steampunk gauntlet take to make?
A simple version can take about 4 to 8 hours of hands-on work, plus drying time. A more detailed gauntlet with layered panels, tubes, washes, and sealing is better treated as a weekend project.
Can you make a steampunk gauntlet without EVA foam?
Yes. Sturdy cardboard is the easiest substitute for a low-cost or one-time costume, but it should be sealed before painting and kept away from high-flex areas.
How do you make cardboard look like metal?
Seal the surface, paint it dark, then dry-brush metallic paint over the raised areas. The dark layer creates shadow, and the light edge highlights make the cardboard read more like worn metal.
How long does a DIY steampunk gauntlet take to make?
A simple version can take about 4 to 8 hours of hands-on work, plus drying time. A more detailed gauntlet with layered panels, tubes, washes, and sealing is better treated as a weekend project.