
Steampunk nails look best when they feel intentional: a dark or antique base, a few clockwork details, and enough empty space for the design to read clearly. You can go dramatic with gears and charms, but the most wearable sets usually keep the 3D pieces limited and let color, texture, and placement do most of the work.
What makes nail art look steampunk
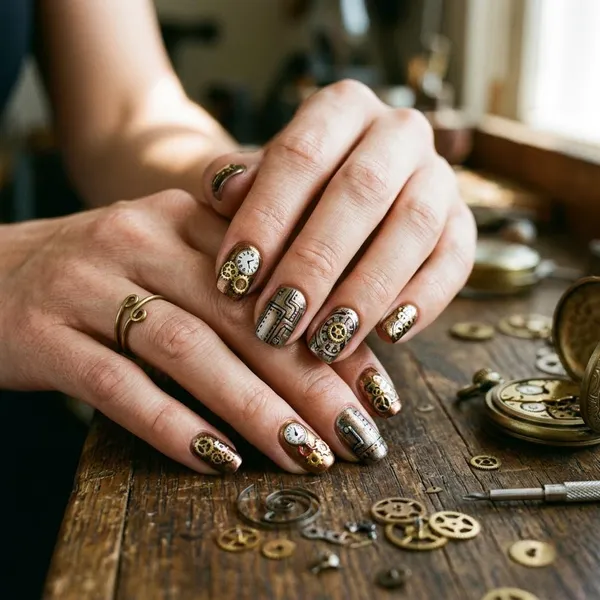
Steampunk nail art works when it mixes old-world detail with mechanical elements. The fastest route is a warm metallic palette, a dark base, and one clear motif such as gears, clocks, Roman numerals, or Victorian filigree.
Gears clocks and mechanical motifs
Gears, cogs, pocket-watch faces, clock hands, and Roman numerals are the clearest steampunk signals. On long nails, these can be layered for a clockwork effect; on short nails, one partial clock face or a single gear decal often looks cleaner than several tiny details fighting for space.
- Best for subtle sets: one gear accent nail with metallic tips on the rest.
- Best for dramatic sets: layered clock faces, charms, and shadowed gear art.
- Best for short nails: Roman numerals, thin linework, or a small corner motif.
Brass copper gold and bronze tones
Warm metals make the style feel antique. Brass, copper, bronze, and muted gold usually look more convincing than bright silver chrome because they suggest aged machinery rather than futuristic metal.
Victorian patterns and antique details
Victorian-style details soften the industrial side of the manicure. Lace stamping, filigree lines, damask patterns, cameo frames, and corset-inspired lacing all work well, especially when the rest of the set is quite dark or mechanical.
For an event, these details can make the nails look dressed-up without relying on bulky charms. A matte black base with antique gold filigree is often easier to wear than raised gears on every finger, but it still gives the same vintage mood.
Distressed metallic and matte finishes
A slightly worn finish makes steampunk nails feel more natural. Try matte top coat, dry-brushed bronze, uneven foil, smoky shading, or a sponge-applied metallic edge. Small imperfections can actually help here, as long as the final layout still looks controlled.
Industrial accents with a polished layout
Rivets, chain lines, plated sections, bolts, and gridded patterns add the industrial part of the look. Keep them placed neatly, not scattered randomly. A good layout is usually one focal nail, one or two supporting nails, and a few simpler nails that repeat the same colors.
Best nail shapes for steampunk designs
The best shape depends on how much detail you want and how much daily comfort matters. Long shapes give more room for clocks, layers, and charms. Shorter or softer shapes work better if you type often, work with your hands, or want the design to feel less costume-like.
- Choose longer nails for layered artwork, encapsulated pieces, or a strong themed look.
- Choose medium nails if you want detail but still need practical hands.
- Choose short nails for flatter art, small decals, and easier maintenance.
Almond nails for elegant details
Almond nails are a strong middle ground for steampunk designs. The tapered shape suits filigree, clock hands, bronze gradients, and delicate metallic outlines without looking as sharp as stiletto nails.
Coffin nails for layered artwork
Coffin nails give you the most useful canvas for layered steampunk art. The flat tip and longer surface can hold foil, stamping, painted shadows, gear decals, and small charms without the design looking squeezed.
The trade-off is daily convenience. Coffin nails are better if you already like longer enhancements or want a statement manicure for photos, events, or a themed outfit. If you need low-maintenance nails for constant typing or hands-on work, keep the length moderate.
Stiletto nails for dramatic sets
Stiletto nails push steampunk into a darker, more theatrical direction. They suit black, bronze, gothic accents, sharp metallic striping, and dramatic clockwork details.
Place heavier decorations closer to the center or cuticle area, not near the pointed tip. The narrow end has less support and is more likely to catch. This shape is best when impact matters more than convenience.
Square nails for structured patterns
Square nails suit the architectural side of steampunk: panels, grids, rivets, framed clocks, and clean symmetrical placement. They are also beginner-friendly because decals, stamping, and striping tape are easier to align on a straighter edge.
Oval nails for softer everyday looks
Oval nails are the easiest way to keep the trend wearable. A short or medium oval shape looks good with dark jewel tones, tiny gear decals, faded bronze tips, or one watch-inspired accent nail.
How to create steampunk nails at home
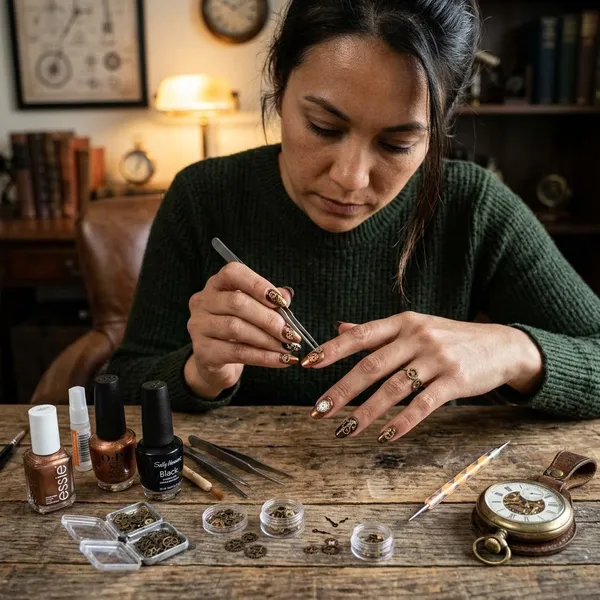
At home, the easiest plan is to build the design in layers: prep the nails, apply a dark base, add flat metallic detail, then use 3D pieces only where they will not get in the way. Beginners usually get a cleaner result with stamping, foil, decals, and striping tape than with tiny freehand gears on every nail.
Prepare and shape the nails
Start with clean, dry nails. Remove old product, push back the cuticle area gently, file the shape, and lightly smooth the surface if needed. Dark polish and metallic foil show uneven edges quickly, so basic prep matters more than adding extra decoration later.
If your nails peel easily, use a base coat or a stronger nail structure before adding charms. Raised pieces need a secure foundation; otherwise, they may lift even if the artwork itself looks good.
Apply a dark or metallic base
Black, deep brown, burgundy, navy, forest green, charcoal, bronze, and copper all work well. Use two thin coats rather than one heavy coat so the base dries or cures evenly.
- For a moody look: matte black with bronze details.
- For a richer look: burgundy with antique gold accents.
- For a softer vintage look: brown with copper foil.
Add stamping foil or painted details
Once the base is set, add the details that carry the theme. Gear stamps, lace plates, Roman numerals, foil patches, thin borders, and clock-hand lines are easier to control than full miniature scenes.
Attach gears and charms securely
Use nail glue, builder gel, or another product suited to the charm size and nail type. Place heavier pieces near the center of the nail or slightly closer to the cuticle, where they have better support.
Avoid the sidewalls and very tip. Those areas catch on hair, sweaters, bags, and bedding first. If you want the look of raised detail without the snagging, use flat metal decals or encapsulate very small pieces under clear product.
Seal the design with a strong top coat
Float top coat over stamping or painted lines so the brush does not drag the design. Around charms, seal the base edges carefully instead of drowning the whole piece in product.
For regular polish, add a fresh layer of top coat after a few days if the surface starts looking dull. For gel or acrylic, check raised pieces early; a loose charm is easier to fix before it pulls up the surrounding design.
How to keep steampunk nails wearable
Wearable steampunk nails are mostly about editing. The design can still be bold, but the bulk, length, and placement need to match your routine. Someone wearing the set for a weekend party can get away with more charms than someone who types, cooks, cleans, or uses gloves every day.
Limit 3D pieces to accent nails
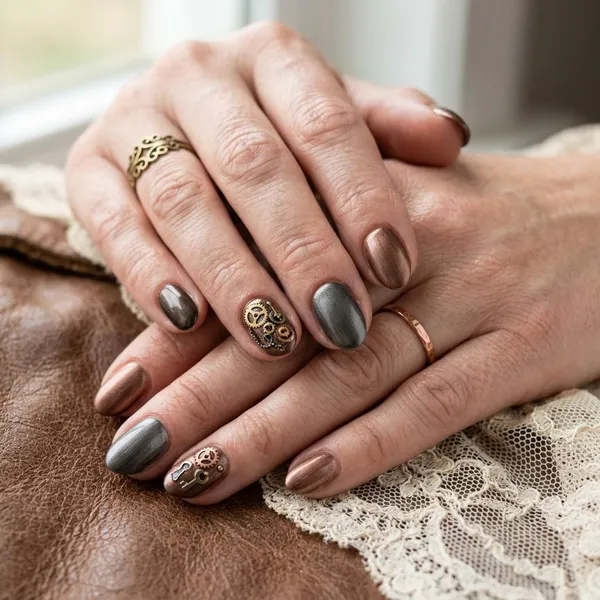
Raised gears, studs, and watch parts have the most impact when they are used sparingly. One or two accent nails per hand usually give enough drama, while the remaining nails can carry the theme with matte polish, foil, stamping, or metallic tips.
Keep charms away from nail edges
Charms placed on the edges are the first to snag. Keep them away from the tip and sidewalls, especially on long coffin or stiletto nails. A gear placed slightly above the midpoint of the nail usually wears better than the same gear placed near the free edge.
Repeat a small color palette
Limit the palette to one dark base, one warm metal, and one optional support shade. This makes detailed nails look more expensive and keeps the set easier to match with clothes and jewelry.
- Classic: black, bronze, and burgundy.
- Soft antique: brown, copper, and cream.
- Dramatic: deep green, brass, and black.
Balance detailed nails with plain nails
Plain nails are not wasted nails. They give the eye a break and make the detailed accents stand out more. A solid matte nail, a brushed metallic nail, or a simple bronze tip can support the theme without adding more clutter.
For everyday wear, try two detailed nails, two lightly textured nails, and one plain coordinating nail per hand. For a short-term event set, you can add more detail, but expect more careful handling.
Match the length to your daily routine
Length matters as much as design. Short to medium nails are better for keyboards, childcare, cleaning, and hands-on work. Longer nails are better for layered scenes, encapsulated pieces, and a stronger visual silhouette.
If you are unsure, choose a medium almond or oval shape first. It gives enough room for steampunk details without making every daily task feel like you need to protect your nails.

Conclusion
The most successful steampunk nails are not the ones with the most gears; they are the ones with the clearest plan. Start with an antique color story, choose one or two clockwork details, and keep the length and 3D placement realistic for your hands. That way the manicure still feels creative and dramatic, but you can actually enjoy wearing it.
FAQ
What colors work best for steampunk nails?
Black, burgundy, deep green, brown, bronze, copper, brass, and antique gold work best. If the set starts to look too bright or modern, swap shiny chrome for a muted or matte metallic finish.
Can you create steampunk designs on short nails?
Yes. Short nails look best with compact details such as tiny gears, Roman numerals, foil corners, or one small clock accent instead of heavy layered charms.
Are gel or acrylic nails better for 3D details?
Acrylic, hard gel, or builder gel usually supports raised pieces better than regular polish. For flat stamping, foil, and decals, gel polish or regular polish can still work well.
What colors work best for steampunk nails?
Black, burgundy, deep green, brown, bronze, copper, brass, and antique gold work best. If the set starts to look too bright or modern, swap shiny chrome for a muted or matte metallic finish.
Can you create steampunk designs on short nails?
Yes. Short nails look best with compact details such as tiny gears, Roman numerals, foil corners, or one small clock accent instead of heavy layered charms.
Are gel or acrylic nails better for 3D details?
Acrylic, hard gel, or builder gel usually supports raised pieces better than regular polish. For flat stamping, foil, and decals, gel polish or regular polish can still work well.