
You can make a DIY steampunk bustle skirt without a complicated historical pattern if you start with a full base skirt and use adjustable ties inside the back. The first things to check are simple: enough fabric to lift, a waistband that fits over your costume layers, and strong attachment points so the pickups do not tear out after one wear.
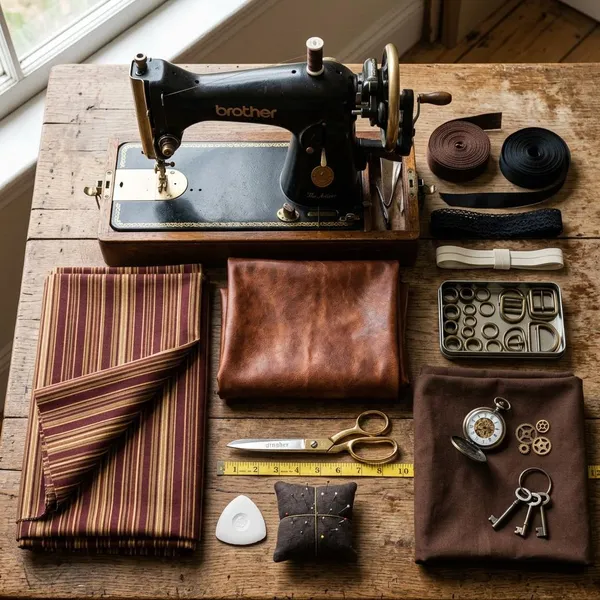
What you need for a steampunk bustle skirt
The useful supplies are not fancy. What matters is choosing a skirt or fabric that can actually form folds, then using ties and reinforcement that can handle being adjusted more than once. A thin decorative ribbon may look pretty, but if it slips open or frays inside the skirt, the bustle will not stay where you want it.
A full skirt or fabric for a simple base
A-line, gored, gathered, circle, and paneled skirts can all work, but the back needs enough width and length to lift into folds. If you are converting an existing skirt, hold up the back by hand before cutting or sewing anything. If it only forms one tight lump, it is probably too narrow for this project.
For a one-night costume, a thrifted full skirt may be enough. For repeated convention wear or stage use, sewing a simple base with extra back width is usually worth the effort because it gives you cleaner drape and fewer fitting surprises.
Ribbon or twill tape for adjustable ties
Twill tape is the safer choice for hidden structural ties because it has grip and does not usually slide loose as quickly as satin ribbon. Ribbon can still work for lighter fabric or visible decorative bows, but the ties inside the skirt should be chosen for strength first.
- Shorter ties: higher lift and more dramatic volume.
- Longer ties: softer swags and easier adjustment.
- Extra length at first: useful while testing the final shape.
Thread and fabric for reinforcement
Use matching thread plus small scraps of fabric or lightweight interfacing to back each pickup point. The patches do not need to be large; they just need to spread the strain so the outer fabric does not ripple, stretch, or tear around the stitches.
Pins, scissors, measuring tape, and sewing tools
Pins or clips let you test the bustle before committing to stitches. A measuring tape helps keep left and right lift points reasonably balanced, while chalk or a washable marker makes the inside markings easier to find later.
Keep a seam ripper nearby. Adjustable ties are forgiving, but pickup points sometimes need to move slightly after the first fitting, especially if the skirt will be worn over a petticoat or bulky boots.
Plan the bustle shape
Planning the shape before sewing ties saves the most frustration. Decide whether you want a soft everyday costume drape, a high photo-friendly bustle, or something in between. A dramatic back can look great while standing still, but it still has to survive walking through a crowded event or sitting in a chair.
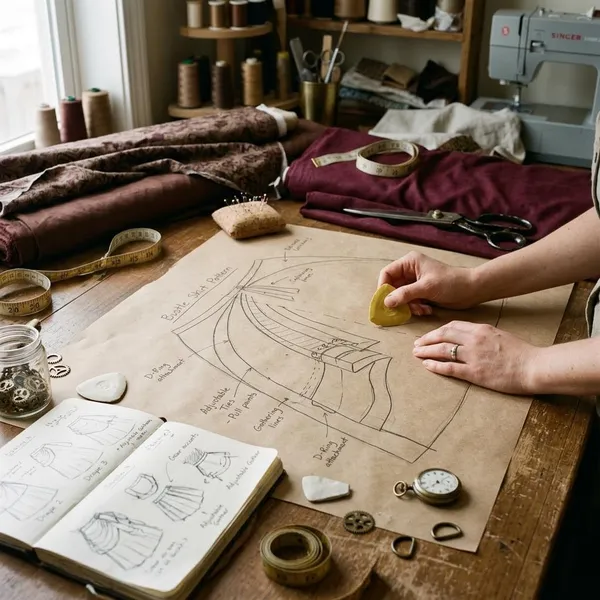
Choose the back length and volume
Longer back fabric gives you more to lift, but it also creates more weight. An ankle-length bustle is easier for stairs and crowded rooms, while a floor-skimming back looks more theatrical but needs careful hem control.
If you want the skirt to be comfortable for several hours, avoid tying all the volume into one high center-back lump. Spread the lift across the side-back and center-back areas so the skirt looks shaped rather than yanked upward.
Allow room for an underskirt
Leave space for an underskirt if you want the lifted outer layer to look intentional. A contrast layer, even a plain cotton one, helps the pickups read as costume styling instead of fabric caught in random folds.
Check fabric drape and weight
Clip up a section of the fabric and watch how it falls. Soft fabric usually looks better with fewer broad pickups. Firmer fabric can hold stronger shapes, but if it is too heavy, the ties and reinforcement need to work harder.
- Fluid folds: use wider, gentler lifts.
- Sharp folds: avoid over-tight pickups that create bulky corners.
- Heavy fabric: reinforce more carefully and test whether the back sags after a short walk.
Leave extra length for pickups
Do not cut the final hem too early. The back rises once the pickups are tied, and a skirt that looked long enough while flat can suddenly look too short after shaping.
Prepare the base skirt
The base skirt has to hang cleanly before the bustle will behave. If the waistband twists, the seams pull off grain, or the hem is already uneven, the adjustable ties will exaggerate those problems instead of hiding them.
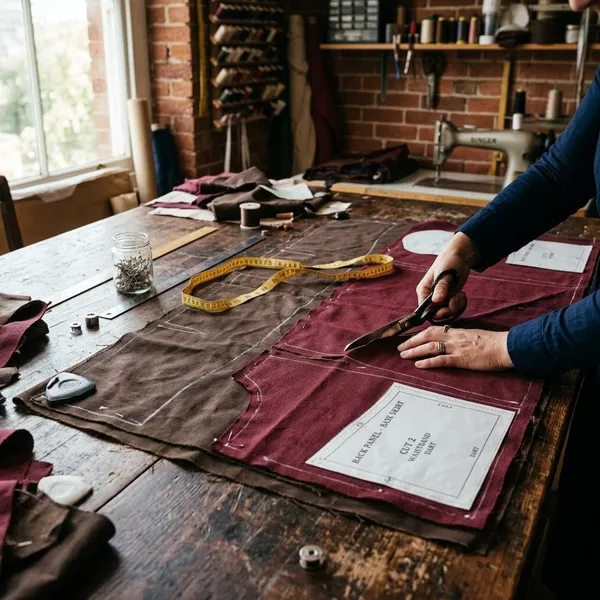
Sew the panels or adjust an existing skirt
If you are sewing from scratch, press each seam as you go and keep the panels on grain so the skirt hangs evenly. A paneled or gored skirt is a good option because it gives fullness without making the waist too bulky.
If you are altering an existing skirt, check the side seams and center back before adding ties. Side-back seams can be useful reference points for balanced pickups, but an asymmetrical skirt may need more test-pinning so the finished drape looks deliberate.
Fit the waistband over your costume layers
Fit the waistband over the actual layers you plan to wear, not over thin everyday clothing. A corset, blouse, petticoat waistband, or bloomers can all change where the skirt sits.
Leave enough ease to sit and breathe comfortably. A waistband that is too tight often rides up, and that can make the back folds pull strangely even if the tie placement is correct.
Finish seams and raw edges
Finish the seams before installing the tie system. A zigzag, serged edge, pinked edge, or bound seam can all work depending on the fabric. The goal is not couture perfection; it is a clean inside that will not fray around the areas you keep adjusting.
Mark the hem while wearing your shoes
Put on the shoes or boots that belong with the costume before marking the hem. This is especially important if the front of the skirt is long, because a dragging front hem is more annoying than a slightly imperfect back fold.
If you are unsure, mark a safe provisional hem first. After the ties are installed and the back lift is tested, you can refine the line so the skirt clears the floor without looking accidentally short.
Add adjustable bustle ties
The adjustable ties are what turn the plain skirt into a bustle skirt. Shape the folds from the outside first, then build the inside tie system to match that drape. This keeps the visible fabric looking natural and makes later corrections much easier.
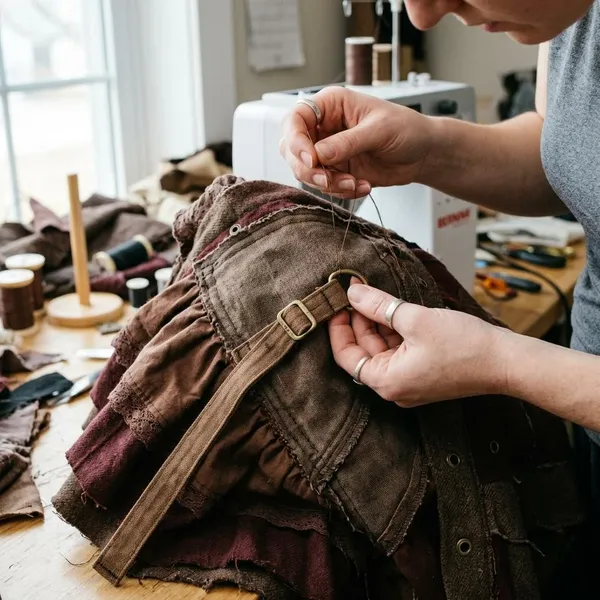
Begin with two or three pickup zones across the back. More ties are not automatically better; too many small lifts can make the skirt fussy to put on and harder to balance.
Pin the back into loose folds
Pin the skirt while it is on your body or on a dress form with the correct underlayers. Lift the back into loose swags rather than tight knots of fabric, then step back and check the side view.
Mark matching lift points inside
Once the outside shape looks right, mark the matching points on the inside immediately. Chalk, thread tacks, safety pins, or tiny fabric tabs all work as long as you can find the marks again after the skirt is taken off.
Do not guess these points later from memory. Even a small shift can pull a swag forward, flatten the center back, or make one side sit noticeably higher than the other.
Reinforce the attachment areas
Reinforce each marked spot before sewing on the ties. A small fabric patch stitched to the wrong side is usually enough for medium-weight cloth; delicate or loosely woven fabric may need lightweight interfacing as well.
- Use a box or square of stitching to spread the strain.
- Keep patches flat so they do not show as bumps from the outside.
- Reinforce before trimming ties so you can still adjust the lift safely.
Sew ties to the marked points
Sew twill tape, ribbon, or narrow fabric strips to the reinforced areas with secure backstitching. Leave the ties longer than the final length at first so you can test a low drape, a higher bustle, and a middle option without reattaching everything.
If several ties sit close together, mark pairs temporarily. This small step prevents the common dressing-room problem of tying the wrong points together and wondering why the bustle suddenly looks lopsided.
Tie and adjust each pickup
Tie the pickups loosely first, then tighten them little by little. Adjust the full back shape rather than perfecting one tie at a time, because one tight pickup can pull the rest of the skirt out of balance.
A good finished shape should look lifted, not strained. If the folds look pinched, lengthen that tie slightly. If the back sinks after a few steps, shorten the tie or check whether the fabric needs stronger reinforcement.
Test the drape while sitting and walking
Walk, turn, and sit before calling the bustle finished. A shape that looks beautiful in a still photo may catch on your shoes, crush awkwardly in a chair, or pull hard at one attachment point.
Conclusion
A strong bustle skirt comes from the order of work: fit the base first, test the drape over real layers, reinforce the lift points, and only then commit to trim. If the skirt moves comfortably and the ties let you correct uneven folds, the decorative details can stay fun instead of covering up construction problems.
FAQ
Can I make the bustle removable?
Yes. Make a separate overskirt or bustle panel that attaches at the waistband with buttons, snaps, ties, or hooks. That is usually easier than trying to remove only the internal pickup system from a finished skirt.
Should I add lace before or after shaping the bustle?
Add most lace after the bustle shape is tested. Trim that looks well placed on a flat skirt can disappear into the folds once the back is lifted.
How do I wash a skirt with adjustable bustle ties?
Untie the pickups first, then clean the skirt according to the most delicate fabric or trim used. Air drying is usually safer than machine drying because it puts less stress on the tie points and reinforcement patches.
Can I make the bustle removable?
Yes. Make a separate overskirt or bustle panel that attaches at the waistband with buttons, snaps, ties, or hooks. That is usually easier than trying to remove only the internal pickup system from a finished skirt.
Should I add lace before or after shaping the bustle?
Add most lace after the bustle shape is tested. Trim that looks well placed on a flat skirt can disappear into the folds once the back is lifted.
How do I wash a skirt with adjustable bustle ties?
Untie the pickups first, then clean the skirt according to the most delicate fabric or trim used. Air drying is usually safer than machine drying because it puts less stress on the tie points and reinforcement patches.