
Realistic steampunk gauges are mostly about three things: a dial that looks readable, a housing that fits cleanly, and aging that matches the rest of the prop. You do not need antique instruments; printable faces, cheap hardware parts, and a clear lens can look convincing if the proportions and finish are handled carefully.
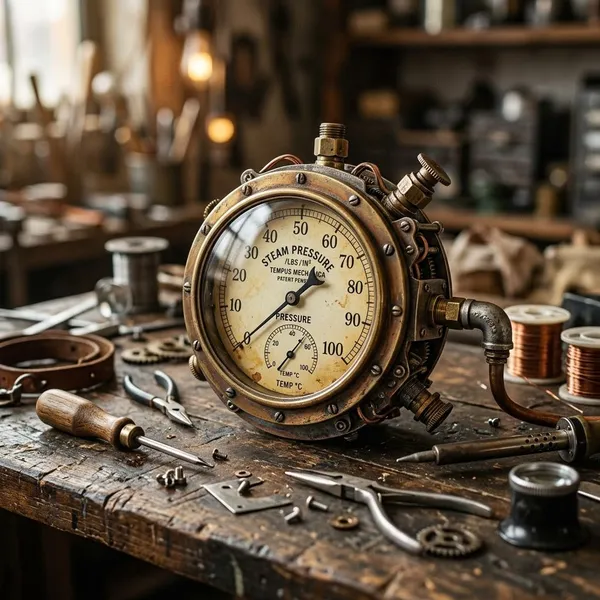
How to design a steampunk gauge face
The dial face does most of the work, so start there before buying or cutting anything. A good face should look like it could be read quickly, even if it is only decorative.
Decide the gauge's job first, then design around the size of the housing and the viewing distance. A chest piece for cosplay needs bolder markings than a small display gauge photographed close up.
Choose pressure temperature or fuel markings
Pressure, temperature, fuel, vacuum, voltage, and steam output all make sense on steampunk props because they suggest a working machine. For a fantasy build, labels such as "Aether Pressure" or "Core Heat" can work too, as long as the dial still follows a believable instrument layout.
- Use one main label: avoid crowding the face with too many fake technical notes.
- Add one unit or category: PSI, TEMP, FUEL, or a fictional equivalent is enough.
- Keep decorative text small: serial numbers and maker marks should support the design, not compete with the scale.
Match the scale to the prop
A large gauge can overpower a small ray gun, while a tiny dial may disappear on a backpack or wall panel. Print a few paper test circles and place them on the prop before committing to the final version.
Use readable numbers and tick marks
Readable markings matter more than ornate fonts. Use clear numbers, strong contrast, and a visible difference between major and minor tick marks. If every line has the same weight, the face looks busy rather than functional.
Add a printed or raised needle
A printed needle is fine for shallow housings or tiny gauges. A raised needle looks more convincing because it casts a small shadow under the lens.
Good needle materials include thin styrene, sealed cardstock, wire, a trimmed clock hand, or a small metal offcut. Add a tiny center cap from a bead, pin head, or drop of thick glue if the gauge will be seen close up.
Age the paper without hiding the details
Age the outer edge more than the center. Tea staining, diluted brown ink, or a light glaze can remove the fresh white-paper look, but the numbers still need to stay readable.
How to make a steampunk gauge
Build the gauge as a small stack: housing, dial, needle or details, lens, then backing. The first thing to check is fit, not decoration. If the face buckles, the lens sits too high, or the needle touches the cover, the finished piece will look homemade in the wrong way.
Measure the inside of the housing
Measure the inner opening, not the outside rim. The dial has to fit inside the lip, and a difference of even a millimeter can cause wrinkles or gaps.
- Check diameter: make a paper test circle before printing the final face.
- Check depth: shallow housings may only allow a printed needle and thin lens.
- Check shape: some caps and pulls are tapered, uneven, or slightly oval.
Print and cut the dial face
Matte paper or light cardstock usually looks better than glossy paper. Cut slowly with sharp scissors, a craft knife, or a circle cutter, then dry-fit the face before aging or gluing it.
If you are making several gauges for one prop, label the backs. It is easy to mix up similar dials once they are cut and weathered.
Add the needle and raised details
Use a printed pointer when the gauge is very shallow or will only be seen from a distance. Use a raised needle when the gauge is a focal point, especially on a chest panel, control box, or handheld hero prop.
Before gluing, place the future lens over the needle to check clearance. A pointer that touches the lens can shift, bend, or press the cover out of place.
Fit the face inside the housing
Dry-fit the dial from the front and look for an even border. If the face sits too deep, add a spacer behind it using foam, cardstock, thin plastic, or a wood disc.
Use glue sparingly. Excess adhesive can seep onto the printed face or fog clear plastic, especially in small enclosed housings.
Install the clear lens
The lens adds the "real instrument" look. Choose the material based on the build: thin plastic for lightweight costume pieces, acrylic for cleaner rigid fronts, resin for awkward shapes, and watch glass for small display-quality gauges.
Dry-fit the lens before sealing anything. If it rattles, add a thin hidden lip or backing support; if it sits proud of the rim, switch to a thinner material rather than forcing it down.
Seal and finish the back
The back can be plain, but it should not be loose. A backing plate made from plastic, wood, card, or thin metal keeps the dial in place and gives you a better surface for mounting.
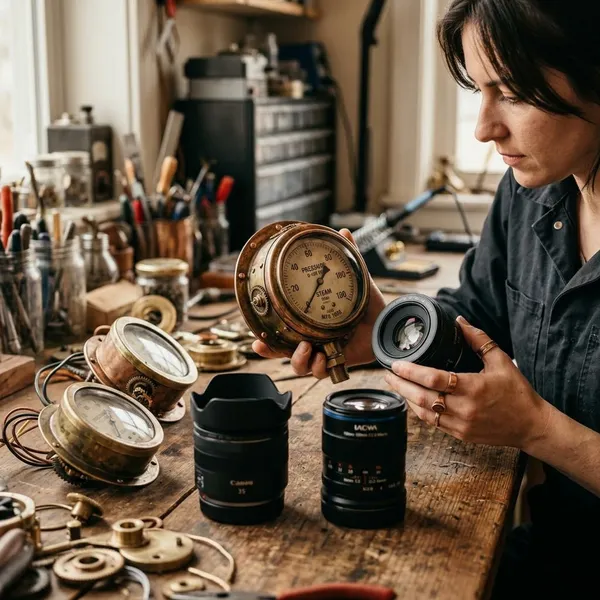
Best lens options for faux gauges
The best lens is the one that matches how the prop will be used. A beautiful glass lens may be wrong for a costume that gets packed in a suitcase, while thin plastic may be too flimsy for a close-up display piece.
| Lens material | Best use | Main caution |
|---|---|---|
| Clear resin | Irregular housings and glossy domed effects | Leaks, bubbles, and cure time |
| Thin plastic | Lightweight cosplay and batch builds | Scratches more easily |
| Acrylic | Medium or large rigid gauges | Neat circles can be hard to cut |
| Watch glass | Small hero gauges and display props | Fragile and size-dependent |
How to create a realistic aged finish
Good aging is placed, not smeared everywhere. Dirt gathers in recesses, edges get rubbed, protected areas stay cleaner, and parts near screws or seams collect the most grime.
Match the finish to the story of the prop. A polished airship control panel should not have the same damage as a soot-stained boiler backpack, and a single dirty gauge on an otherwise clean build will look like it came from another project.
Darken edges and recessed areas
Start with a thin dark wash around bezels, seams, screw heads, and cast texture. Wipe the raised areas back before it dries completely so the shadows stay in the low spots instead of turning the whole housing muddy.
This is usually the highest-impact weathering step. Even a freshly painted brass part can look more like metal once the edges and recesses have depth.
Add patina to copper and brass tones
Use blue-green patina sparingly on copper and brass finishes. Put it in creases, around fasteners, and in damp-looking low points rather than brushing it evenly over the whole gauge.
For a well-maintained prop, keep most of the warm metal visible. Heavy patina makes more sense on neglected machinery, outdoor display pieces, or props meant to look abandoned.
Use grime around screws and seams
Screws, panel joins, and mounting plates are good places for grime because they suggest vibration, repairs, and handling. Apply a small amount with a fine brush or cotton swab, then soften the edge so it does not look painted on.
- Vertical props: add faint downward streaks only where residue would run.
- Horizontal panels: keep grime tighter around joins and fasteners.
- Handled areas: use rubbed highlights as well as dirt.
Keep wear lighter on protected surfaces
Protected areas should not be as worn as exposed edges. The dial center, the space under the bezel, and recessed surfaces usually stay cleaner, which helps the aging look intentional.
This also protects readability. A gauge can look old without making the numbers hard to read; if the scale disappears, the prop starts looking decorative rather than functional.
Match the finish to the surrounding prop
Place the finished gauge on the prop before sealing it and compare the colors. If the nearby leather is warm brown, the wood is polished, and the metal is only lightly aged, the gauge should share that restraint.
For rougher builds, repeat the same soot, brass, copper, or rubbed-steel tones in more than one place. Shared colors make the gauge feel installed, not glued on at the end.

Conclusion
The most convincing faux gauge is not the most expensive one; it is the one that fits the housing, reads clearly, sits under a clean lens, and wears the same visual history as the prop around it. Make one test piece first, especially for costumes or handled props, and fix the fit before spending time on fancy aging.
FAQ
What is the cheapest way to make steampunk gauges?
Use printable dial faces, cheap hardware housings, and thin clear plastic lenses. This is usually the best low-cost method for cosplay sets or large panels with several gauges.
Can you use resin as a fake glass lens?
Yes, resin can make a convincing fake glass lens. It works best when the housing is sealed tightly and can sit level until the resin fully cures.
What can you use for a gauge needle?
A printed pointer is the easiest option, while sealed cardstock, thin plastic, wire, trimmed clock hands, or small metal pieces add more depth. Choose raised materials only if the housing has enough clearance.
Can a faux steampunk gauge measure real pressure?
No, a decorative faux gauge should not be used to monitor real pressure. Use a properly rated working gauge if the build involves actual pressure, heat, or functional equipment.
What is the cheapest way to make steampunk gauges?
Use printable dial faces, cheap hardware housings, and thin clear plastic lenses. This is usually the best low-cost method for cosplay sets or large panels with several gauges.
Can you use resin as a fake glass lens?
Yes, resin can make a convincing fake glass lens. It works best when the housing is sealed tightly and can sit level until the resin fully cures.
What can you use for a gauge needle?
A printed pointer is the easiest option, while sealed cardstock, thin plastic, wire, trimmed clock hands, or small metal pieces add more depth. Choose raised materials only if the housing has enough clearance.
Can a faux steampunk gauge measure real pressure?
No, a decorative faux gauge should not be used to monitor real pressure. Use a properly rated working gauge if the build involves actual pressure, heat, or functional equipment.