
You can make a convincing steampunk top hat from cardboard or EVA foam if you get the fit and silhouette right before decorating. For a one-night costume, cardboard is fine; for conventions, repeated wear, or a hat that needs to survive packing, foam is usually the better choice. The safest order is simple: measure, build the base, reinforce the seams, add details, then paint and weather.
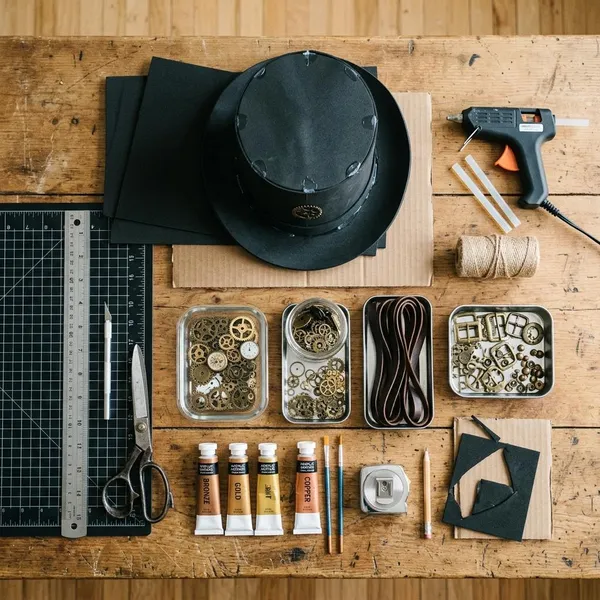
Materials and tools for a steampunk top hat
Start with the base materials, not the accessories. Gears and chains can make a hat look more steampunk, but they cannot fix a crown that leans, a brim that pinches, or seams that lift after the first wear.
| Use case | Better choice | Why it matters |
|---|---|---|
| Quick Halloween or party hat | Cardboard | Cheap, easy to cut, and good enough for short wear. |
| Convention or repeated costume use | EVA foam | Lighter, more flexible, and less likely to crease. |
| Display prop | Either | Comfort matters less, so you can choose based on the finish you want. |
Cardboard or EVA foam
Cardboard is the easiest beginner material because it is cheap, stiff, and forgiving when you are learning the shape. Choose thin, dense cardboard rather than thick corrugated box board, which can show ridges and bend unevenly.
EVA foam is better when the hat needs to be worn for several hours. It flexes with movement, weighs less on the head, and handles bumps better. If you are unsure about the size, make a quick cardboard test pattern first, then copy the improved version onto foam.
Strong craft glue
Match the glue to the job. Hot glue is useful for fast cardboard joins and small hidden supports, while contact cement is cleaner for EVA foam and broad panels. For hard raised accents such as rivets or badges, dimensional glue, epoxy, or small glued-on foam circles usually looks neater than large blobs of hot glue.
Cutting and measuring tools
- Flexible tape measure: Measure where the hat will sit, not high on the scalp.
- Ruler and pencil: Mark center lines so the brim and crown stay balanced.
- Sharp craft knife: Cleaner for straight cuts and thick foam.
- Scissors: Useful for curves, thin card, fabric, and trim.
- Cutting mat: Protects the table and helps keep edges controlled.
Do not cut the head opening to the exact head measurement. Leave a little room for glue, seam tabs, lining, and the natural oval shape of a head.
Black and metallic paints
A dark base coat is what makes cheap materials stop looking like craft supplies. Black gives a colder industrial look, while very dark brown works well under bronze or antique gold. Metallic paint should be layered lightly so the darker color remains in seams, corners, and around rivets.
Straps, gears, and trim
Choose lighter decorations than you think you need. Plastic gears, foam buckles, painted cardboard plates, ribbon, faux leather, and small chains are easier to wear than real hardware. For a child's costume or a long convention day, avoid sharp pieces and heavy side clusters that can pull the hat crooked.
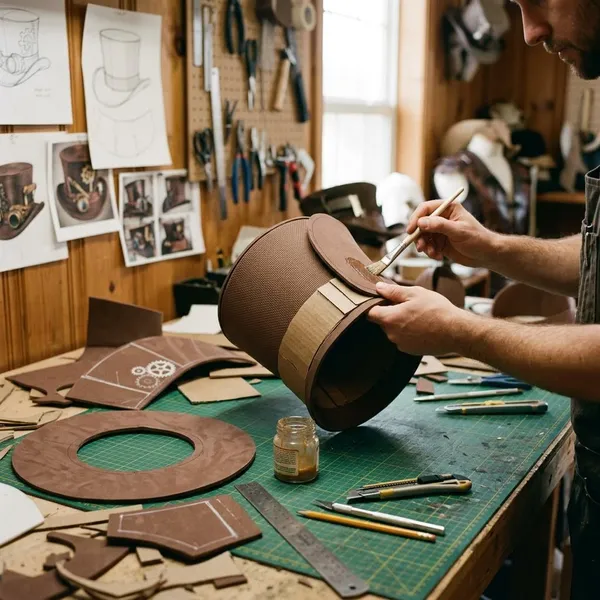
How to build the top hat
Build the plain hat first and decorate only after it fits. The most common beginner mistake is adding paint, gears, and trim too early, then discovering the opening is tight or the crown sits at an angle.
- Measure your head and draw an oval opening.
- Cut the brim before forming the crown.
- Test the crown size while it is still adjustable.
- Attach the crown, then add the top panel.
- Reinforce seams before painting.
- Wear-test the bare hat for a few minutes.
Cut the brim
Draw the inner opening as an oval, not a perfect circle. Most heads are longer from front to back, and a round opening often feels tight at the forehead while leaving gaps at the sides.
For the outer brim, decide how dramatic you want the shape to be. A narrow, even brim looks more traditional; a wider front and back feels more theatrical. Mark a center line before cutting so both sides stay reasonably symmetrical.
Form the crown
Cut a rectangle long enough to wrap around the brim opening with a small overlap for the seam. A straight cylinder gives a classic top-hat look, while a slight flare toward the top feels more costume-like.
- For cardboard: Add an inside joining strip behind the seam.
- For EVA foam: Use contact cement on both edges and press together only when tacky.
- For either material: Test the wrap before gluing; it is easier to trim than to rescue a crown that is too small.
Attach the crown to the brim
Set the crown over the brim opening and check it from the front, side, and back before committing glue. A small lean becomes much more obvious once a band or rivet line is added.
If you made tabs around the inner brim, glue them gradually inside the crown instead of forcing the whole curve at once. Test the fit partway through; glue can pull the opening inward and make a hat suddenly feel tighter.
Add the top panel
Turn the crown upside down, trace the opening, and cut the top panel slightly larger than needed. Glue it in place, then trim the edge cleanly. Beginners usually get a better result this way than by trying to cut a perfect top piece on the first pass.
Cover and reinforce the seams
Use thin strips of card or craft foam to cover the join between the crown and brim, the top edge, and the vertical crown seam. These strips do two jobs: they hide uneven cuts and make the hat stronger before heavier decorations are added.
Check the shape and fit
Wear the plain hat for a few minutes before decorating. It should sit securely without pressing hard against the forehead or the back of the head. If it slips, add a thin foam strip inside like a simple sweatband; if it pinches, adjust the opening before the structure becomes too decorated to change.
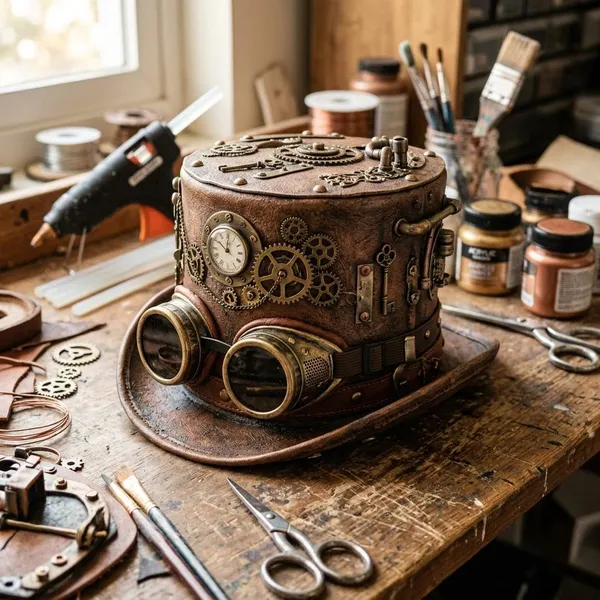
How to add steampunk details
Steampunk details work best when they look built into the hat rather than scattered on top. Start with surface texture, add a band, then choose one main accent area. Leaving some open space usually looks more polished than covering every inch.
Add raised panels
Cut thin cardboard or craft foam into plates, strips, trapezoids, or patch shapes and glue them onto the crown and top. Vary the size slightly so the panels look like fitted metal pieces instead of a repeated craft pattern.
Panels are also a practical fix. A visible crown seam or uneven top edge can become part of the design once it is covered with a raised strip and later highlighted with metallic paint.
Make faux rivets
Faux rivets can be made with dimensional paint, puffy paint, hot glue dots, tiny foam circles, or small epoxy dots. Place them along panel edges and seam covers, not randomly across the whole hat. Consistent spacing matters more than perfect spacing.
Wrap a band around the crown
A crown band gives the hat a finished shape and hides the lower seam. Faux leather, ribbon, fabric, foam, or painted card can all work. If the band wrinkles, divide it into shorter sections rather than fighting a stiff strip around the curve.
- Cleaner Victorian style: Use fabric or faux leather with one small badge.
- Industrial style: Add rivets, buckle shapes, and painted metal trim.
- Beginner shortcut: Use a dark band first, then add only one side detail.
Attach gears and chains
Arrange gears and chains while the hat is on a table, then test the layout while wearing it before gluing. A side cluster near the band usually looks stronger than evenly spaced gears all around the crown.
Keep chains short and light. A long drape may look good in a photo, but it can catch on hair, collars, or shoulders when you move.
Add goggles, feathers, or badges
Large accessories should tell the style story without overwhelming the base. Goggles suggest an inventor or airship look, feathers make the hat more theatrical, and badges or keys add a collected-object feel. Choose one strong focal feature if the hat already has panels, rivets, and weathering.
How to paint and weather the hat
Paint is where the hat becomes one object instead of cardboard, foam, glue, and decorations. The finish should have depth: dark low spots, metallic raised areas, and brighter worn edges. A perfectly even metallic coat usually looks less realistic.
Apply a dark base coat
Cover the whole hat with black or very dark brown paint. Use thin coats so you do not soften cardboard, fill rivet detail, or leave drips around trim. Let the base dry fully, especially around seam covers and layered panels.
Add the main metal color
Apply bronze, copper, gunmetal, pewter, or antique gold with a brush or sponge, but do not cover every dark area. Let shadow remain around rivets, under the band, and between raised panels. If you want a leather-and-metal look, keep the brim darker and make the crown hardware more metallic.
Dry-brush the raised details
Load a brush with a small amount of metallic paint, wipe most of it off, and drag it lightly over rivets, plate edges, buckle corners, and trim. Several light passes look better than one heavy pass. This is the step that makes the raised pieces read as metal.
Darken seams and corners
If the hat looks too bright or too freshly painted, add shadow back into the recesses. Use a thin black or brown wash and wipe most of it off the open surfaces, leaving darker color in corners, overlaps, and around hardware.
Highlight worn edges
Use a lighter metallic paint or wax only on the most exposed edges: the brim rim, top rim, rivet tops, raised panel corners, and buckle edges. Keep this controlled. If every surface shines equally, the hat loses the aged, handled look that makes steampunk finishes convincing.
A tiny amount of rust brown or green-blue patina can work on selected hardware, but use it sparingly. For most builds, dark seams plus bright edge wear are enough.
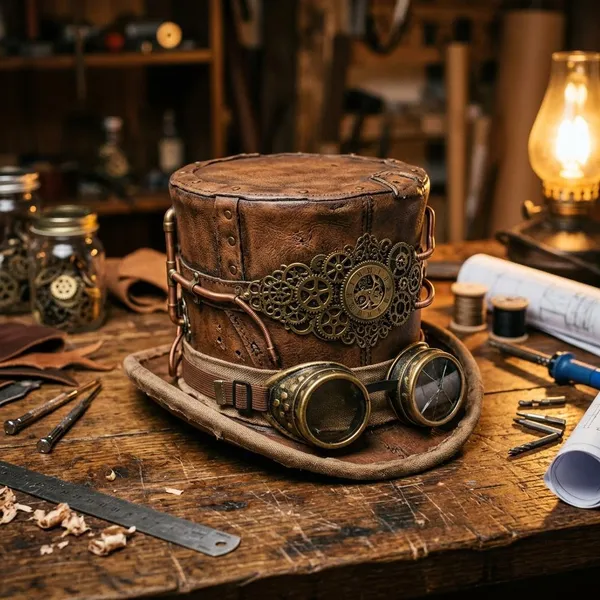
Conclusion
A good steampunk top hat starts with fit, not decoration. Cardboard is a smart first build or short-event choice, while EVA foam is better when comfort and durability matter. Once the brim and crown sit properly, a few raised panels, controlled accessories, and layered weathering will do more than a pile of heavy gears ever could.
FAQ
What is the best material for a steampunk top hat?
EVA foam is usually best for a wearable hat because it is light and flexible. Cardboard is better for a cheap first attempt, a display piece, or a one-night costume.
How do you make cardboard look like metal?
Use a dark base coat, then add metallic paint lightly so the recesses stay dark. Dry-brushed edges and rivets create the metal effect more convincingly than one solid shiny coat.
How long does a steampunk top hat take to make?
A simple cardboard version can take an afternoon if drying time is short. A foam hat with panels, rivets, accessories, and careful weathering is more realistically a weekend project.
What is the best material for a steampunk top hat?
EVA foam is usually best for a wearable hat because it is light and flexible. Cardboard is better for a cheap first attempt, a display piece, or a one-night costume.
How do you make cardboard look like metal?
Use a dark base coat, then add metallic paint lightly so the recesses stay dark. Dry-brushed edges and rivets create the metal effect more convincingly than one solid shiny coat.
How long does a steampunk top hat take to make?
A simple cardboard version can take an afternoon if drying time is short. A foam hat with panels, rivets, accessories, and careful weathering is more realistically a weekend project.