
You can make a wearable steampunk mask from craft foam or thick cardboard if you keep the base light, test the fit early, and treat the "metal" look as a paint effect rather than a material choice. For a first build, foam is usually easier on the face; cardboard works when it is reinforced and sealed before painting.
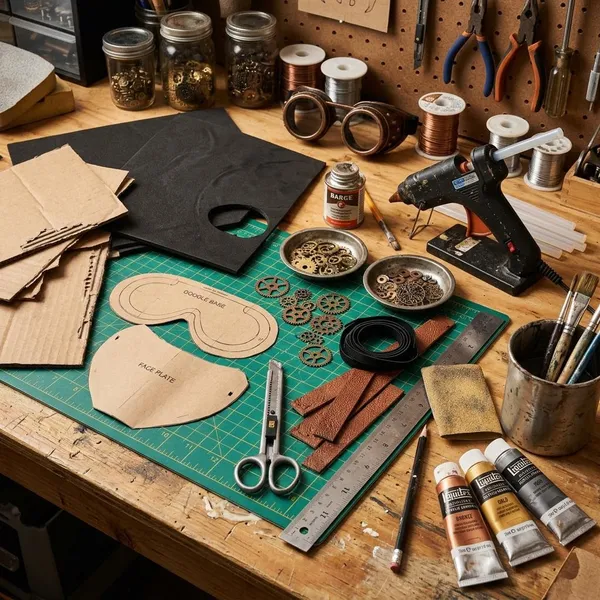
Materials and tools for a steampunk mask
The safest way to keep this project beginner-friendly is to separate the materials into three jobs: structure, decoration, and finish. The structure needs to be light and comfortable. The decorations should look mechanical without making the mask front-heavy. The finish is what makes foam, cardboard, plastic caps, and washers look like one aged metal piece.
Craft foam or thick cardboard
Craft foam is the easier choice if you plan to wear the mask for more than a quick photo. It curves better around the face, weighs less, and is more forgiving if the mask gets bumped. Foam sheets around 2 mm to 6 mm thick are useful because thin pieces can layer into trim, while thicker pieces can hold the main shape.
Strong glue and cutting tools
A sharp craft knife matters more than most beginners expect. Clean cuts make eye openings, filters, and layered panels look intentional instead of rough. Use scissors for simple outside shapes, but switch to a knife for curves, circles, and small details.
Hot glue is convenient for fast assembly, especially with cardboard and small decorations. For foam seams that need to sit smoothly, contact cement can give a neater bond, but line up the pieces carefully before pressing them together.
Gears, wire, caps, and washers
These parts create the steampunk personality, but they should look placed rather than scattered. Caps can become filters, washers can frame vents or eyes, and wire can visually connect one "mechanical" section to another. A few layered details usually look stronger than covering every empty space.
Black and metallic paints
Do not start with full metallic coverage. A dark base coat gives the mask depth, then brass, copper, bronze, or silver can be added lightly over raised areas. That dark-under-metal approach is what makes craft materials read as aged metal.
Elastic, ribbon, or leather straps
Elastic is the most forgiving strap choice for beginners because it stretches as you move and is easy to adjust. Ribbon can work for a very light party mask, while faux leather looks more in style but needs stronger anchor points.
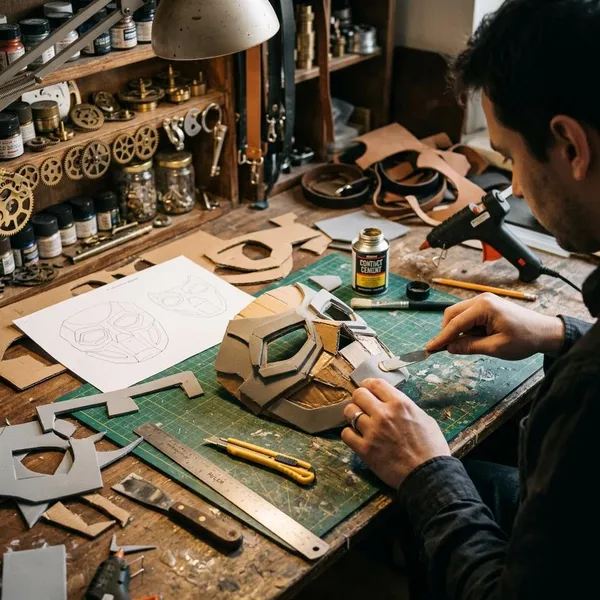
How to build the mask base
The base decides whether the finished mask feels wearable or annoying. Before adding gears or paint, make sure the shape sits evenly, leaves room for your nose and mouth, and gives you enough space for eye openings. A mask for a short photo shoot can be more dramatic; a mask for a convention or party should be lighter, cooler, and easier to see through.
Trace and cut the pieces
Start with a paper template. Fold the paper in half if you want both sides to match, draw one side, cut it out, and hold it to your face. Check the nose bridge, cheeks, and eye placement before transferring the shape to foam or cardboard.
- Cut slightly outside the line if you are unsure about the size.
- Label separate pieces such as cheek panels, nose plates, or filter mounts.
- Save offcuts for reinforcement strips, rivets, and raised trim.
Shape the mask to your face
A flat mask rarely looks good once worn. Foam can be warmed gently with a heat gun or hair dryer and curved by hand. Cardboard can be bent gradually over a table edge, but avoid sharp creases unless they are part of the design.
Glue the seams
Glue the main pieces in small sections rather than trying to force the whole mask together at once. If the design has a center seam, align that first, then work outward toward the cheeks and sides.
Reinforce weak areas
The nose bridge, strap anchors, filter mounts, and side seams take the most stress. Add hidden strips of foam or cardboard behind those areas before attaching heavy details. This is especially important for cardboard, which can tear where straps pull.
Cut the eye openings
Mark the eye openings while checking the mask against your face, not just while it lies flat on the table. Cut small first and enlarge gradually. Leave enough material around the eyes if you plan to add rings, goggles, mesh, or decorative trim.
Test the fit
Fit testing should happen before paint and before final decorations. Hold the base in place, turn your head, speak, and smile. Mark any rubbing spots on the inside with pencil so you know where to trim or pad later.
- Check whether both eye openings sit level.
- Make sure the nose and mouth area does not feel cramped.
- Hold temporary elastic in place to test slipping.
- Trim small amounts, then test again.
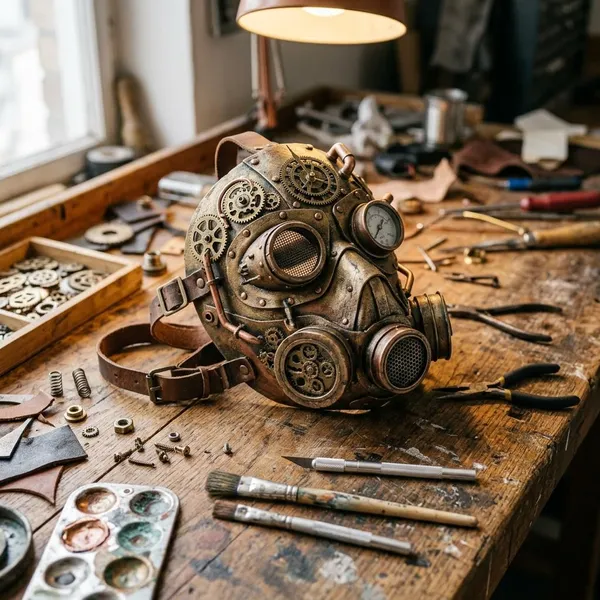
How to add steampunk details
Steampunk details work best when they suggest a believable machine, even if the parts are only decorative. Choose one direction before gluing: a brass respirator, a worn workshop mask, a plague-inspired mask with mechanical eyes, or a scavenged gas-mask style. That choice keeps the finished piece from looking like random objects stuck to the front.
Build filters from caps and foam
Filters are the fastest way to create a gas-mask look. Stack a bottle cap, foam ring, washer, mesh circle, or small lid to make a lightweight cylinder with depth. Open-backed filters are usually more comfortable because they reduce weight and allow more airflow.
Add rings around the eyes
Eye rings give the mask a goggle-like shape. Cut rings from foam or cardboard, use plastic lids with the centers removed, or layer washers and trim pieces around the openings.
Hold the rings in place before gluing and check your view. A ring that looks impressive on the table may block more vision than expected once it sits close to your face.
Attach wires and small tubes
Wires and tubes make separate details feel connected. Run a short piece from a filter toward a cheek plate, temple, or side panel. Curved lines usually look more natural than stiff straight lines because they follow the mask shape.
Use only a few. Too many wires can catch on hair, collars, or costume pieces, and the mask starts to look cluttered rather than engineered.
Layer gears and mechanical parts
Gears look better when they sit on a backing plate, ring, or raised panel instead of being glued alone to a flat surface. Place the strongest mechanical details near the temples, filters, or side profile where they will be visible from more than one angle.
- Good use: one gear partly layered over a washer and side plate.
- Weak use: five identical gears spread evenly just to fill space.
- Better balance: one detailed side plus a smaller matching accent on the other side.
Make faux rivets
Faux rivets make foam and cardboard look like assembled metal plates. Use small foam dots, half beads, cut straw pieces, or tiny rounded drops of hot glue. Place them along seams, around filters, and on panel edges where real fasteners would make sense.
How to paint the mask like aged metal
Paint is where the illusion comes together. The goal is not to make every surface shiny; it is to create dark depth, worn metallic edges, and a few signs of age. Work in thin layers so the details stay sharp.
Apply a dark base coat
Cover the whole mask with black, dark brown, charcoal, or deep bronze. Push the paint into seams, around rivets, and inside filter details so the low areas stay shadowed later.
If you used cardboard, seal or prime it first so the paint does not soak in unevenly. Foam may also need sealing depending on the surface and the paint you use.
Dry-brush brass or copper
Load a brush with a small amount of brass or copper paint, wipe most of it off, then drag it lightly over raised edges. The color should catch the texture without filling every dark recess.
Brass gives a classic Victorian look, while copper feels warmer and more handmade. Using both can work, but keep one as the main metal so the mask does not become visually noisy.
Add darker shadows
After the metallic layer, add a thin dark wash around rings, filters, rivets, and panel overlaps. Brush it into the details, then wipe the high points so the shadow stays mainly in the recesses.
Create rust or patina
Rust and patina should look like age, not spilled paint. Dab burnt orange or dark brown near iron-like areas, and use green-gray or blue-green sparingly on copper or brass sections. Corners, undersides, and areas around rivets are the most believable spots.
Highlight worn edges
Use a brighter metallic color on the places that would be handled or scraped first: filter rims, eye ring tops, raised corners, and rivet heads. A few precise highlights will look more convincing than bright paint on every edge.
Seal the finish
Seal the mask after the paint is fully dry. Matte or satin sealer usually suits an aged steampunk finish better than gloss. Test the sealer on a scrap if you can, especially if the mask is foam, because some finishes can change the color or flexibility slightly.
How to make the mask wearable
A good costume mask should stay in place, let you see, and leave enough room to breathe comfortably. This matters most if you plan to wear it at a party, convention, school event, or during a warm outdoor costume day. A display mask can be heavier and more dramatic; a wearable mask needs restraint.
Attach adjustable straps
Attach straps to reinforced points, not just the outer skin of the mask. Elastic with an adjuster is the easiest option for most builds. Faux leather straps can look excellent, but they need secure holes, buckles, or glued-and-backed anchor patches.
Try the straps after the decorations are attached. Filters and side pieces can change the balance, so the final strap tension may be different from the bare base test.
Pad the inside edges
Add thin foam, felt, soft fabric, or sponge only where the mask touches too hard: nose bridge, cheeks, brow, or jawline. Too much padding can push the mask away from your face and make it less stable.
Keep the eye openings clear
Clear vision is not optional. If you add mesh, plastic, or tinted lenses, test them in the kind of light where you will wear the mask. Something that looks fine under bright craft-room lighting can feel too dark in a hallway, at night, or in a crowded room.
Leave enough space for breathing
Do not build the front so close to your nose and mouth that it feels stuffy. Keep an air gap, use open-backed filters, or hide small vent openings in the design. The mask should look like a gas mask, but it should not try to seal like one.
Balance heavy decorations
Weight balance is easy to overlook until the mask starts twisting on your face. Mirror larger side details when possible, hollow out bulky pieces, and use foam for volume instead of solid objects.
For a quick Halloween costume, a few lightweight caps and foam rings are usually enough. For repeated cosplay wear, spend more time on balance and strap support because small discomforts become very noticeable after an hour.
Use it only as a costume prop
A handmade steampunk mask is only for costume use, photos, display, or themed events. Foam, cardboard, craft glue, and decorative filters do not provide certified protection from dust, fumes, smoke, chemicals, impacts, or workshop hazards.
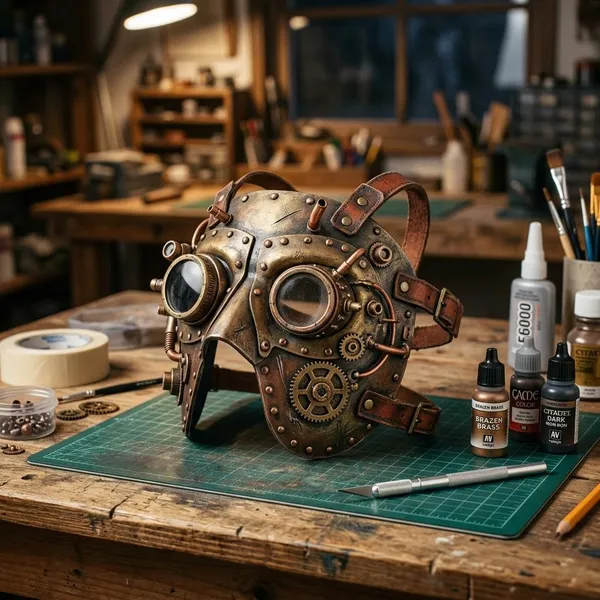
Conclusion
The best steampunk masks usually come from a light, comfortable base and a few details that look intentional rather than expensive. Choose foam if wearability matters most, choose reinforced cardboard if you want a low-cost build, and keep checking the fit before paint makes changes harder. If the mask sits well, lets you see, and has enough breathing space, the weathered metal finish will do most of the visual work.
FAQ
Can you make a steampunk mask from cardboard?
Yes, thick cardboard can work well for a costume mask. Reinforce strap points and seal the surface before painting so it holds its shape and does not absorb paint unevenly.
Is craft foam good for a steampunk mask?
Yes, craft foam is usually the best beginner material because it is light, flexible, and easy to layer. It is especially useful if you plan to wear the mask for more than a short photo session.
What can you use for steampunk filters?
Bottle caps, plastic lids, foam rings, cardboard tubes, washers, mesh, and small jar tops all work. Pick lightweight pieces and stack them in layers so the filters look deep without pulling the mask forward.
Can you make a steampunk mask from cardboard?
Yes, thick cardboard can work well for a costume mask. Reinforce strap points and seal the surface before painting so it holds its shape and does not absorb paint unevenly.
Is craft foam good for a steampunk mask?
Yes, craft foam is usually the best beginner material because it is light, flexible, and easy to layer. It is especially useful if you plan to wear the mask for more than a short photo session.
What can you use for steampunk filters?
Bottle caps, plastic lids, foam rings, cardboard tubes, washers, mesh, and small jar tops all work. Pick lightweight pieces and stack them in layers so the filters look deep without pulling the mask forward.