
A steampunk hat works best when it looks intentional, not overloaded. If you want to learn how to decorate a steampunk hat, start with one clear theme, one main focal piece, and a few supporting details that still let the hat sit comfortably on your head. The easiest mistake is adding every gear, chain, and feather you own; the better result usually comes from editing.
What you need to decorate a steampunk hat
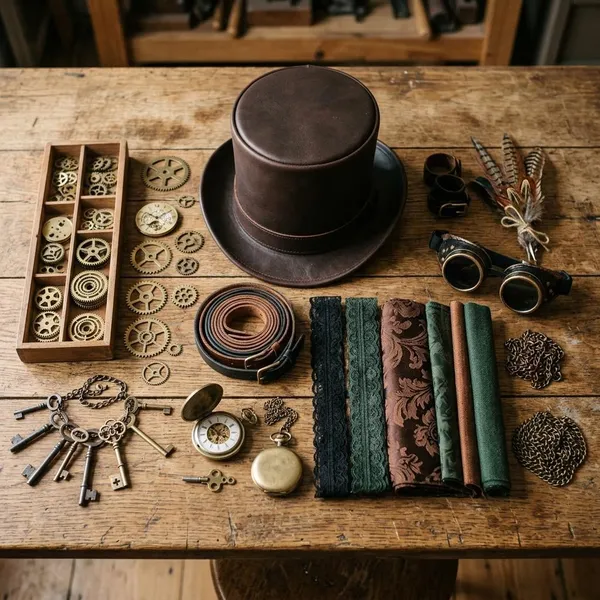
Gather more supplies than you expect to use, then choose only the pieces that fit the same mood. A good steampunk hat usually combines a sturdy base, a soft trim layer, one noticeable feature, and a few aged metal-looking accents.
A top hat, bowler, or mini hat
A top hat gives the classic dramatic steampunk shape, a bowler feels more understated, and a mini hat works well when you want a lighter costume accent rather than a full headpiece. Choose the base by where you plan to wear it: a tall top hat can look great for a convention or photo outfit, while a bowler is easier to keep on during a long party or outdoor event.
Test the fit before decorating. If the hat already slides, squeezes, or tilts, gears and goggles will make the problem worse.
Ribbon, leather strips, or lace
Ribbon, leather, and lace form the hatband and make the design look anchored. Ribbon gives a cleaner Victorian finish, leather looks more rugged and mechanical, and lace softens the hat if the rest of the decorations are dark or heavy.
- Use ribbon for a neat, dressier hat.
- Use leather strips for an explorer, mechanic, or airship look.
- Use lace when the hat needs a softer antique detail.
Goggles, gears, keys, and chains
These are the easiest pieces to overuse. One pair of goggles or one strong gear cluster is usually enough to make the hat read as steampunk. Add keys, watch parts, or chains only where they support that main feature.
Feathers, charms, or brooches
Feathers, charms, and brooches add character. A compass charm can suggest travel, a cameo can make the hat feel more Victorian, and a feather spray can add height without much weight.
Glue, wire, paint, and basic tools
Hot glue is useful for light trim, but heavier pieces need more support. Keep craft glue, thin wire, pliers, scissors, a needle and thread, and acrylic paint nearby so you can fasten and finish the hat properly.
Use glue for placement and wire or stitching for security. This matters most on pieces that hang, swing, or carry weight, such as goggles, buckles, chains, and brooches.
How to plan the hat design
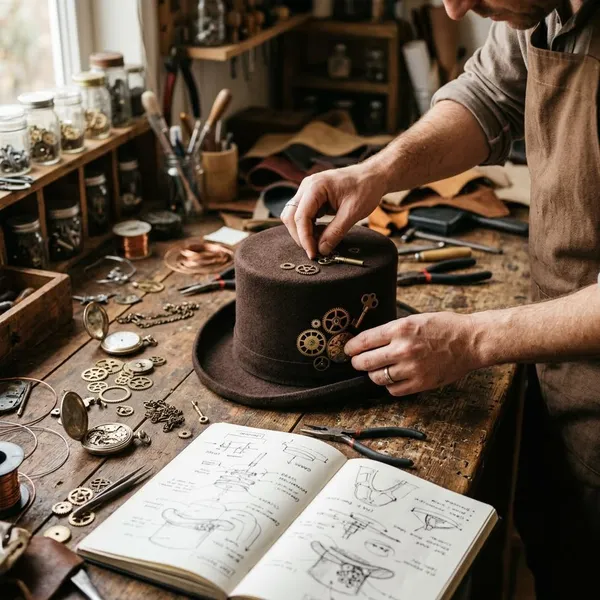
Planning keeps the hat from turning into a crowded craft project. Decide the story first, pick the strongest feature, limit the colors, and test the layout while wearing the hat before you glue anything permanently.
Choose one steampunk theme
Choose one direction before choosing decorations. An airship captain might suit goggles, brass, leather, and crisp ribbon. A Victorian botanist might look better with lace, muted greens, a small specimen charm, and softer feathers.
Pick one main focal piece
The focal piece is the first thing people should notice. It could be goggles, a large brooch, a buckle, a clock face, or a feather arrangement.
Hold the hat at arm's length and check where your eye goes first. If three large decorations compete, remove or shrink one of them. A clear centerpiece makes the whole hat look more confident.
Limit the color palette
Most steampunk hats look best with one dark base color, one main metal tone, and one small accent shade. Black with brass and burgundy, brown with copper and cream, or dark green with antique gold all work well.
This is especially useful when your supplies come from different places. New ribbon, thrifted jewelry, and plastic gears can clash until paint and color limits pull them together.
Arrange everything before gluing
Place the decorations on the hat and take a quick front, side, and full-outfit photo. Photos reveal crowded spots and strange angles faster than staring at the hat on a table.
Try the hat on during this stage. A chain that looks charming while flat may touch your cheek, and a feather that looks dramatic may block your sight when you turn your head.
Balance the weight on both sides
Balance does not mean both sides must match. It means the hat should not twist, slide, or feel heavier on one side. If one side has goggles or a metal brooch, keep that weight close to the hatband and use lighter accents on the opposite side.
How to decorate a steampunk hat
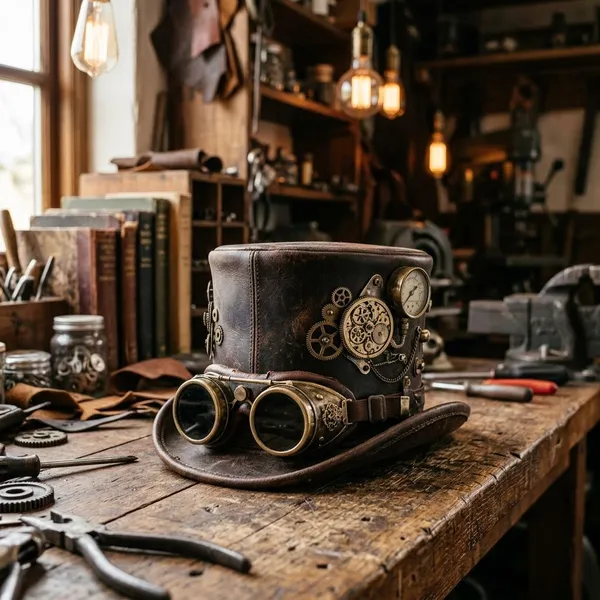
Decorate in layers: prepare the base, add the hatband, secure the focal piece, build smaller details around it, then finish with aging and comfort checks. This order keeps the hat neat and makes it easier to stop before the design becomes too busy.
Clean and prepare the hat
Brush off dust, trim loose threads, and reshape any dents before adding decorations. Glue and paint sit better on a clean surface, and a damaged base will be harder to fix once chains or trim are attached.
If the hat is foam or cardboard, press gently on the crown and brim to find weak spots. Reinforce soft areas before adding anything heavy.
Wrap the crown with a hatband
Wrap ribbon, leather, lace, or layered trim around the base of the crown where it meets the brim. This band gives the design a natural starting point and hides many attachment points later.
- Overlap the join at the back or side so it is less noticeable.
- Keep the band proportional to the hat size.
- Use the band as an anchor for chains, charms, and brooches.
Attach the main focal piece
Set the main piece where it is visible when worn, often near the front side of the crown. Goggles usually look more natural slightly off-center, while a brooch or buckle can work well at the side of the hatband.
Do not rely on glue alone for anything heavy. Add hidden wire, stitching, or a backing piece so the focal decoration survives movement and transport.
Layer gears, chains, and small details
Add smaller pieces in clusters instead of spreading them evenly around the whole hat. A medium gear, two small gears, and one short chain usually look more designed than a full row of identical parts.
Leave some empty space. Negative space is what stops the hat from looking like every supply was used just because it was available.
Add feathers or fabric accents
Use feathers, netting, lace scraps, or fabric folds to soften the metal details. Place them behind the focal piece, under the band, or toward the back so they add movement without covering your face.
If the hat is for outdoor wear, avoid very tall or loosely fixed feathers. Wind turns dramatic height into a practical problem quickly.
Secure every decoration
Gently tug each decoration before finishing. Check wire ends, glue strings, sharp corners, and loose chains. Anything that moves too much now will become more annoying after an hour of wearing the hat.
Pay special attention where different materials meet, such as metal on fabric or plastic on felt. Those joins often need extra support.
Finish with paint or weathering
Use paint to blend the decorations into one older-looking piece. Dark brown or black in seams adds depth, while brass or copper on raised areas makes plastic or cardboard details look more convincing.
How to make the hat look aged
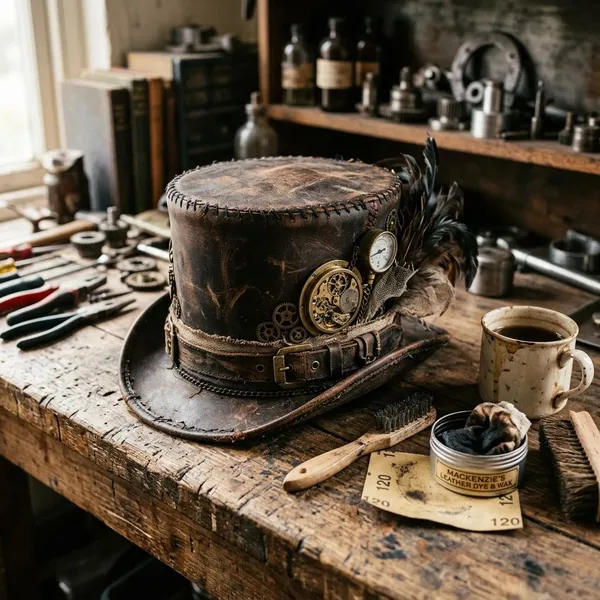
Aging is what helps modern craft supplies look like they belong in the same world. The best effects are small, uneven, and placed where real wear would naturally happen.
Do not age everything equally. If every edge is dark, every gear is rusty, and every fabric strip is distressed, the hat starts to look painted rather than lived-in.
Darken seams and edges
Add diluted black or brown paint to seams, brim edges, folds, and areas under the hatband. Wipe away the excess so the color settles into recesses instead of covering the surface.
Dry-brush brass or copper
Put a tiny amount of brass or copper paint on a brush, wipe most of it off, and lightly sweep it over raised areas such as gear teeth, buckle edges, and textured trim. A nearly dry brush gives the most believable worn-metal finish.
Add small rust and patina marks
Rust and patina should be accents, not the main decoration. A tiny reddish-brown mark near a faux rivet or a faint green-blue touch beside a copper detail can suggest age without making the hat look cartoonish.
Place these marks where moisture or rubbing would make sense. Random rust across clean fabric usually looks less convincing.
Distress fabric and leather lightly
Soften fabric edges, dull shiny ribbon, or rub a little dark paint into leather strips where hands might touch them. Small changes are enough.
If you are decorating for a polished costume party, keep the distressing very light. If the look is more scavenger, explorer, or workshop inventor, rougher leather and uneven fabric can make sense.
Keep the wear uneven and subtle
Step back while aging the hat and look at the whole shape. The front brim might be a little darker, one strap might look more handled, and one gear cluster might have more metallic highlights than the rest.
How to keep the hat comfortable
Comfort is not a separate step at the end; it affects where every decoration should go. A hat that looks amazing but slips, pokes, or blocks your view will probably spend most of the event in your hand.
Keep heavy pieces near the base
Place heavier goggles, buckles, brooches, and gear clusters near the hatband rather than high on the crown. Lower weight pulls less and puts less strain on the hat material.
Use feathers, netting, or thin chains higher up if you want height without making the hat unstable.
Avoid blocking your view
Check the hat in a mirror while standing, sitting, and turning your head. Feathers, veils, and dangling chains should frame your face, not brush your eyes or cheeks.
If you wear glasses, a wig, or a high collar, test them with the hat before the final glue sets. These are the details that often create problems only after the outfit is complete.
Add an inner sweatband
An inner sweatband or sizing strip can make a cheap hat feel much better. Soft fabric, foam, or adhesive hat strips can reduce slipping and cover rough inner seams.
Secure loose chains and feathers
Chains can move, but they should not swing into your face or catch on earrings, curls, collars, or shoulder pieces. Tack them at two points if one attachment point gives too much movement.
Feathers should be fixed firmly at the base and partly hidden under the band or another trim layer. That keeps them looking intentional instead of stuck on at the last minute.
Test the hat while moving
Wear the finished hat for ten to fifteen minutes before calling it done. Walk, bend, sit, turn your head, and check whether anything slips, taps, scratches, or catches.
If one decoration causes trouble, remove it or move it lower. A slightly simpler hat that stays comfortable will look better in real use than an impressive hat you keep adjusting.
Conclusion
The best steampunk hat has a clear story, a strong focal point, and enough empty space for the details to matter. Start with fit and balance, add decorations in layers, and stop when the hat feels wearable as well as interesting. If you hesitate between adding one more piece or refining what is already there, refining is usually the better choice.
FAQ
How do you make a plain hat look steampunk?
Add a hatband first, then one recognizable feature such as goggles, a brooch, or a gear cluster. A little dark paint in the seams and a brass or copper finish on small details will do more than covering the whole hat in parts.
What glue works best for hat decorations?
Hot glue is fine for light trims, but fabric glue, craft adhesive, stitching, or wire is safer for heavier decorations. If a piece has weight or movement, use glue only as part of the attachment, not the whole attachment.
Can you decorate a cardboard steampunk hat?
Yes, cardboard can work well if it is reinforced before decorating. Keep heavy metal pieces to a minimum and use paint, dry-brushing, and lightweight trims to create the steampunk effect without bending the crown.
How do you make a plain hat look steampunk?
Add a hatband first, then one recognizable feature such as goggles, a brooch, or a gear cluster. A little dark paint in the seams and a brass or copper finish on small details will do more than covering the whole hat in parts.
What glue works best for hat decorations?
Hot glue is fine for light trims, but fabric glue, craft adhesive, stitching, or wire is safer for heavier decorations. If a piece has weight or movement, use glue only as part of the attachment, not the whole attachment.
Can you decorate a cardboard steampunk hat?
Yes, cardboard can work well if it is reinforced before decorating. Keep heavy metal pieces to a minimum and use paint, dry-brushing, and lightweight trims to create the steampunk effect without bending the crown.