
A DIY steampunk shoulder armor build is very doable as a first EVA foam project if you keep the pauldron lightweight, test the fit early, and save the heavy visual drama for paint and surface details. Start with one shoulder piece, not a full armor set, because it lets you learn shaping, straps, rivets, and aged metal effects without fighting a bulky costume.
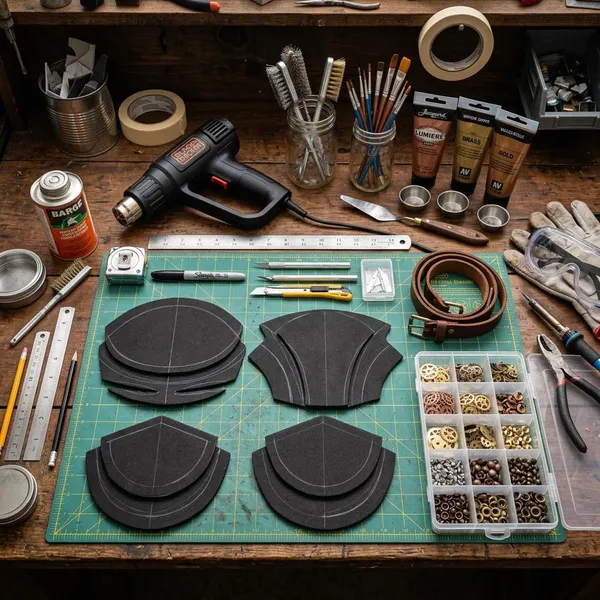
Materials and tools for steampunk shoulder armor
You do not need a workshop full of cosplay tools for a good-looking pauldron. The essentials are foam that holds a curve, glue that can handle movement, a sharp cutting tool, a heat source, straps, and paint supplies that create depth instead of one flat metallic layer.
- Best beginner setup: 5 mm EVA foam, 2 mm foam for trim, contact cement, a sharp utility knife, metal ruler, heat gun, elastic or nylon straps, buckles, sealer, and acrylic paints.
- Useful extras: sandpaper, a rotary tool, masking tape, foam scraps for testing, faux rivets, small gears, tubing, and half-beads.
- Skip for a first build: very thick foam, oversized hardware, and complex strap systems unless the costume needs them.
EVA foam for the armor shell
For the main shell, 5 mm EVA foam is the safest choice. It bends over the shoulder without feeling flimsy, and it still has enough structure to look like armor once painted.
Use 2 mm foam for raised borders, small plates, and decorative bands. If you want a chunky "battle mechanic" look, 8 mm foam can work, but it is harder to shape and may need stronger straps to stop the pauldron from tipping outward.
Adhesive for seams and layers
Contact cement is the better option for the main shell and any plate that carries tension. It makes flatter, cleaner seams than hot glue, which matters once metallic paint starts catching every ridge.
Cutting and shaping tools
A sharp knife is more important than an expensive tool kit. Replace the blade as soon as it drags, because ragged foam edges become very obvious after dry brushing.
- Metal ruler: keeps trim strips and plate edges straight.
- Paper templates: let you adjust the shape before wasting foam.
- Heat gun: curves the shell so it sits naturally on the shoulder.
- Rotary tool: helpful for bevels and grooves, but optional.
Rivets, gears, and tubing
Steampunk details look best when they seem to belong on the armor. Put rivets along seams, plate overlaps, and trim lines rather than scattering them everywhere.
Gears and tubing should be used sparingly. One small gear cluster near the front or a short tube running toward a harness can suggest a mechanical purpose; covering the whole pauldron with random parts usually makes it look less believable.
Paint, sealer, and straps
Paint supplies should include a sealer, a dark base color, one or two metallic shades, and darker wash colors such as black or brown. Aged metal comes from contrast, not from making the whole piece bright silver.
For straps, elastic is comfortable and forgiving, while nylon webbing feels more secure. A simple setup is one underarm strap plus one front or back anchor to a vest, harness, or jacket. Test those attachment points before painting, especially if the pauldron is large or asymmetrical.
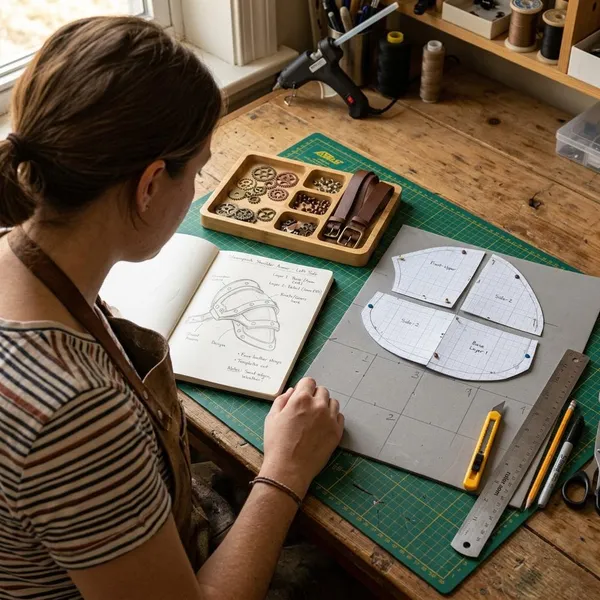
How to plan the shoulder armor
Planning should answer three questions before you touch the foam: how big the pauldron will be, how it will move with your shoulder, and how it will stay attached. Most beginner problems come from making the piece too large or leaving the strap plan until the end.
Measure your shoulder
Measure from the base of your neck to the outer shoulder, then from the top of your shoulder down toward the upper arm. Those two measurements give you the rough footprint of the pauldron.
Choose the pauldron size
A medium pauldron is usually the best first build: large enough to change the silhouette, small enough to stay comfortable. It works well for a vest, long coat, or blouse where you want a strong accent without building a full armor harness.
- Small: better for subtle outfits, lightweight wear, and indoor parties.
- Medium: best for beginners and most cosplay looks.
- Oversized: dramatic in photos, but needs better support and more fit testing.
Sketch the armor shape
Draw the top curve, front edge, back edge, and lower edge before cutting. The sketch does not need to be artistic; it only needs to show the silhouette and where the plates will overlap.
Rounded edges feel more Victorian and decorative. Sharper plates feel more industrial or military. A single asymmetrical shoulder piece often suits steampunk better than a perfectly matched pair, especially when worn with a harness or long coat.
Plan the layered plates
Layered plates should add depth without blocking movement. Keep the busiest details toward the outside of the shoulder and upper arm, not near the neck.
Leave small gaps between the plates so shadows and paint washes can settle there later. If every layer sits too close together, the design turns muddy after weathering.
Mark the strap points
Mark strap points while the armor is still paper or plain foam. You need at least one anchor that holds the pauldron in place and another point that stops it from rotating.
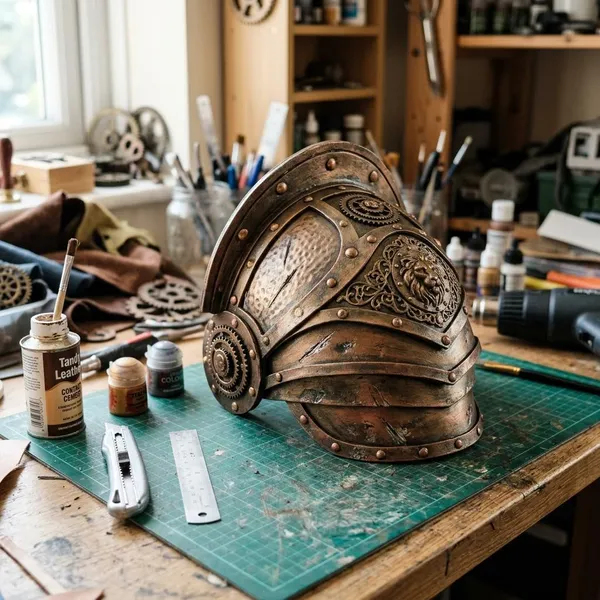
How to make the EVA foam pauldron
Build the pauldron in small checks: pattern, cut, shape, glue, layer, clean, fit. Rushing straight to paint is the easiest way to lock in a strap problem or an uncomfortable edge.
Trace the pattern
Place the paper pattern on the foam and trace with a fine silver marker, white pencil, or light stylus mark. Label the front, back, overlap edges, and left or right side if you are making only one shoulder.
Cut the foam pieces
Cut with long, steady strokes instead of sawing. Start with the main shell, then cut plates, borders, and decorative pieces after you know the base size works.
- Keep blades fresh: dull blades tear foam.
- Group matching parts: it prevents mix-ups during gluing.
- Trim lightly: small corrections are safer than cutting too much at once.
Heat-shape the curves
Warm the foam evenly with a heat gun until it becomes flexible, then bend it over a rolled towel, bowl, dress form shoulder, or your own protected hand. Hold the curve while it cools.
A gentle curve usually wears better than an exaggerated one. If the pauldron is for photos only, you can push the silhouette bigger; if you plan to walk around for hours, keep the curve closer to your actual shoulder shape.
Glue the main shell
Apply contact cement to both joining edges, wait until it turns tacky, then press the seam together carefully. Contact cement grabs fast, so line up the edges before they touch.
If you use hot glue, work in short sections and keep visible seams as flat as possible. A raised glue ridge can be sanded a little, but it is better not to create one in the first place.
Add the layered plates
Attach the largest extra plates first, then add trim, rivet strips, hinge shapes, or small mechanical accents. This keeps the design balanced and stops the surface from becoming crowded.
Smooth the edges
Clean rough cuts with sandpaper, a sanding block, or a rotary tool on a light touch. Focus on the outer rim, plate edges, and any seam that will catch highlights.
Do not over-sand thin trim. A few imperfect marks can disappear under weathering, but melted or frayed detail pieces are harder to hide.
Test the fit
Wear the plain foam pauldron with temporary straps before sealing it. Move around for several minutes, not just one mirror pose.
- Check whether the lower edge hits your upper arm.
- Check whether the neck edge rubs when you turn your head.
- Check whether the outside edge tips away from your body.
- Adjust strap points before paint, not after.
How to paint the armor like aged metal
The paint job should make the foam look layered, worn, and handled. Real aged metal is not one smooth color, so work from dark shadows to controlled metallic highlights.
Seal the foam
Seal the EVA foam before painting so it does not drink in the paint unevenly. Heat sealing can help close the surface, and brush-on or spray sealers can make the final finish smoother.
Use thin coats. Heavy sealer can soften engraved detail, fill shallow grooves, or leave brush ridges that become obvious under metallic paint.
Apply a dark base coat
Cover the whole pauldron with black, charcoal, deep brown, or dark bronze. This base creates the shadows that make the plates, rivets, and gaps read as depth.
Make sure the paint reaches into seams and under raised details. Those areas should stay darker after the metallic layers go on.
Build the metal color
Add metallic color slowly with dry brushing or sponging. Gunmetal and silver work for steel; bronze, brass, and copper feel more classic for steampunk.
Mixed metal often looks better than one color everywhere. For example, use a dark steel shell with brass trim and copper accents, or a bronze shell with blackened iron rivets. Keep some of the dark base visible so the armor does not turn shiny and toy-like.
Add shadows and grime
Use thin black or brown washes around rivets, under trim, inside grooves, and along plate overlaps. Wipe the raised areas clean so the grime stays where dirt would naturally collect.
For an airship engineer or scavenger look, you can push the grime heavier. For a cleaner Victorian costume, keep the weathering softer and focus on the seams and corners.
Highlight worn edges
Finish with a nearly dry brush on the outer rim, raised trim, rivet heads, and front corners. Silver works on steel; pale gold or bright brass works on warmer metal colors.
Keep the brightest highlights limited. They should show where the armor would rub against straps, clothing, hands, or movement, not cover every surface evenly.
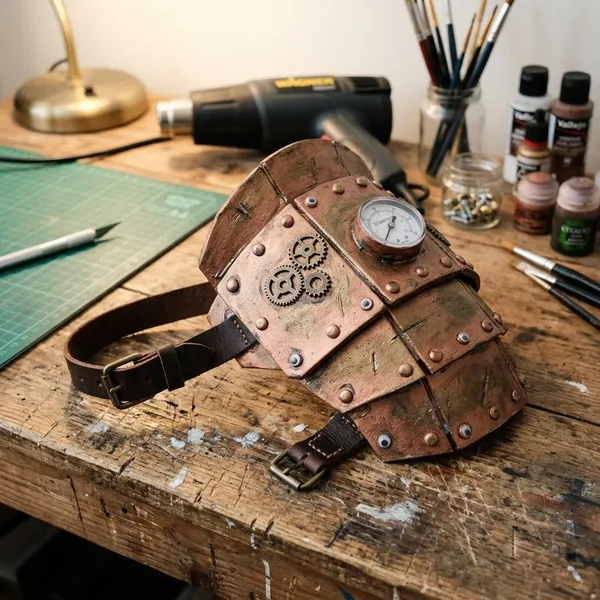
Conclusion
A good steampunk pauldron does not need to be huge or complicated; it needs a comfortable footprint, clean foam work, believable strap points, and paint with enough shadow to sell the metal effect. If this is your first build, make one shoulder piece, wear-test it before painting, and let the rivets, trim, and weathering add the drama instead of relying on oversized foam.
FAQ
What foam thickness works best for shoulder armor?
Use 5 mm EVA foam for the main shoulder shell. It is thick enough to hold shape but still easy for beginners to cut and heat-form.
Can craft foam replace EVA foam?
Craft foam is fine for trim and small raised details, but it is usually too soft for the main pauldron. Use it as decoration over an EVA foam base.
Can you use hot glue on foam armor?
Yes, but keep it mostly for light details or quick costume pieces. Contact cement is cleaner and stronger for seams that need to hold a curved shape.
What foam thickness works best for shoulder armor?
Use 5 mm EVA foam for the main shoulder shell. It is thick enough to hold shape but still easy for beginners to cut and heat-form.
Can craft foam replace EVA foam?
Craft foam is fine for trim and small raised details, but it is usually too soft for the main pauldron. Use it as decoration over an EVA foam base.
Can you use hot glue on foam armor?
Yes, but keep it mostly for light details or quick costume pieces. Contact cement is cleaner and stronger for seams that need to hold a curved shape.