
Steampunk makeup works best when it looks planned, not like random gears added at the end: start with matte skin, warm metal tones, dark definition, then add just enough weathering or mechanical detail for the event you are dressing for. A soft party version can be done with copper eyes and a muted lip, while cosplay or Halloween makeup needs stronger contrast, safer adhesive choices, and more time for details.
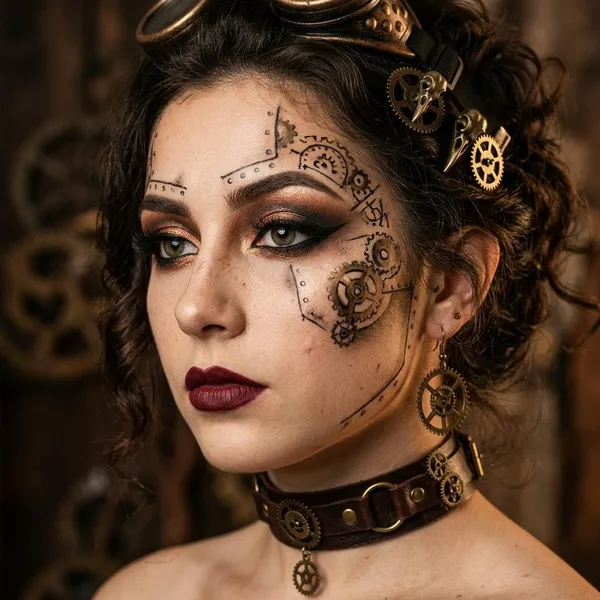
What does steampunk makeup look like?
Steampunk makeup combines vintage beauty with machine-inspired details. The main visual cues are warm antique colors, smoky depth, matte or softly powdered skin, and touches that suggest brass, leather, clocks, engines, or workshop dust.
Victorian-inspired colors
Victorian-inspired colors give steampunk makeup its old-world mood. Think bronze, copper, antique gold, rust, cocoa brown, burgundy, muted plum, and deep rose rather than bright neon or icy silver. These shades work especially well with corsets, lace, velvet, goggles, leather accessories, and brass-toned jewelry.
Industrial metal details
Industrial details turn vintage glam into steampunk. They can be tiny painted rivets, sharp panel lines, gear shapes near one temple, faux screws along the cheekbone, or a small cluster of metal-look decals beside the eye.
- For comfort: paint details with liner or cosmetic paint.
- For speed: use skin-safe face decals.
- For photos: choose one clear focal area instead of scattering pieces everywhere.
Polished and weathered textures
The best steampunk looks balance polish with wear. A smooth matte base and metallic copper eyes feel elegant; a little smoky shading near the temples, jaw, or around a decal makes the design look lived-in. If everything is shiny, it can look more modern glam than steampunk. If everything is dirty, the Victorian side disappears.
Steampunk makeup products and colors
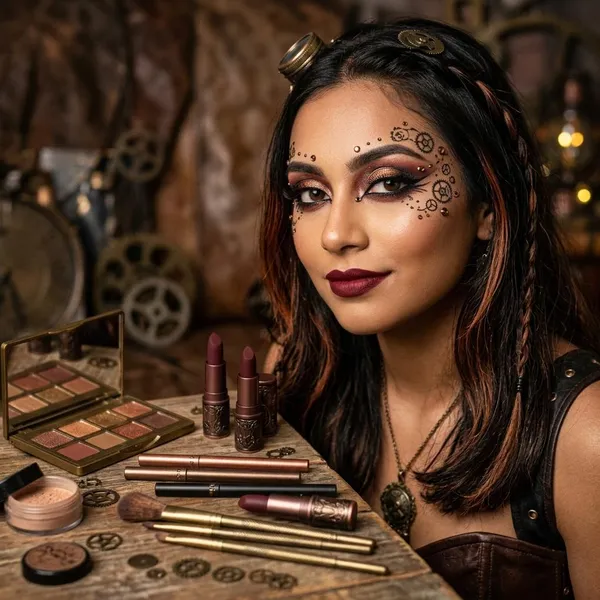
You do not need a huge kit for steampunk makeup. The most useful products are a matte base, warm metallic eyeshadows, brown and black definition, a muted lip color, cosmetic-safe detail products, and setting products that can handle the length of your event.
- Base that stays put: foundation, powder, and primer if your skin gets oily.
- Color palette: bronze, copper, gold, brown, black, burgundy, or plum.
- Detail tools: fine liner, cosmetic paint, decals, or lightweight embellishments.
- Wear-time support: skin-safe adhesive and setting spray.
Matte foundation and setting powder
A matte or soft-matte base gives metallic shadows and mechanical details something to stand out against. Apply foundation in thin layers, then press powder over areas that crease, shine, or touch accessories, such as the nose, forehead, cheeks, and under the eyes.
For a short indoor party, a lightly powdered base may be enough. For a hot room, dance floor, convention hall, or Halloween night outdoors, use primer and powder more carefully because smudged black liner and lifting decals are much harder to fix once the design is finished.
Bronze, copper, and gold makeup
Bronze adds depth, copper brings warmth, and gold creates the antique brass effect people associate with steampunk. Use powder shadows when you want soft blending, and cream or foil metallics when you need the eyes to show up clearly in photos.
Keep the shine controlled. Place the brightest gold or copper on the lid, inner corner, or a small highlight point, then leave the rest of the face more matte so the look still feels vintage rather than glossy and modern.
Brown and black eye products
Brown and black products do different jobs. Brown is better for smoky softness, sketching details, and creating an aged look. Black is better for sharp liner, stronger lashes, rivets, seams, and dramatic Halloween or cosplay definition.
Cosmetic paint and safe face decals
Use products labeled for cosmetic or face use when painting gears, bolts, cracks, panels, or mechanical lines. Water-activated paints are useful for fine linework; cream paints can look richer but usually need more setting.
Face decals are a good shortcut for beginners or anyone getting ready quickly. They help with symmetry and give the look a clean mechanical shape without requiring advanced freehand drawing.
Skin-safe adhesive and setting spray
Only use adhesive made for skin, such as lash glue or theatrical adhesive, when attaching small decorative pieces. Household glue, craft glue, and heavy metal parts are not worth the risk around the eyes or on moving areas of the face.
How to do steampunk makeup step by step
Build steampunk makeup in layers: base first, shape second, eyes and lips next, then soot, painted details, attached pieces, and setting spray. This order keeps the clean parts clean and prevents you from trying to blend eyeshadow around glued-on decorations.
- Make the skin stable before adding dark or metallic products.
- Create the steampunk mood with bronze, copper, brown, and black.
- Add character last with soot, rivets, decals, gears, or panel lines.
Prep and mattify the skin
Start with clean, moisturized skin. If you need long wear, apply a mattifying or gripping primer to the T-zone and any area where decals may sit. Blend foundation thinly, then press powder into the skin instead of leaving the base tacky.
Add bronze contour
Use a warm matte bronzer or contour shade under the cheekbones, around the temples, and along the jaw. The goal is not a harsh stripe; it is a slightly sculpted, antique shadow that supports the copper and brass tones.
For a softer party look, keep the contour close to your usual makeup. For a character look, deepen one side of the face a little more so it feels like soot, workshop shadow, or dramatic stage lighting.
Create copper smoky eyes
Place copper over the lid, blend bronze or rust into the outer corner, and deepen the crease with brown. Smudge brown or black along the lower lash line so the eyes do not look too clean compared with the rest of the design.
Define the liner and lashes
Use brown liner for a softer Victorian look or black liner for drama. A small wing works well, but it does not have to be perfect if the final look includes smoke and worn texture.
- Glam look: clean wing, fuller lashes, sharper edges.
- Workshop look: smudged liner, lighter lashes, more soot.
- Cosplay look: liner plus small seams, rivets, or graphic extensions.
Choose a dark or muted lip
Choose a lip color that supports the eyes rather than competing with them. Brick red, muted berry, cocoa, brown-plum, burgundy, or deep rose usually fit better than glossy pale nude or bright pink.
If the eye makeup and face details are already heavy, keep the lip satin or matte and slightly softened. If the eyes are simple, a deeper lip can carry more of the mood.
Add soot and worn effects
Add soot with grey, brown, or black shadow using a soft brush. Good placement points are the hairline, temples, under the cheekbones, outer eye area, and around mechanical details. Build slowly and step back from the mirror; weathering often looks stronger from a distance than it does up close.
Paint or attach mechanical details
Paint or attach mechanical details after the main makeup is finished. The temple, outer forehead, and upper cheekbone are usually better than the mouth area because they move less and hold designs more cleanly.
For beginners, one painted gear, a few rivets, or a short panel line is enough. For cosplay, you can build a stronger one-sided design with faux metal plates or a gear cluster, but keep pieces lightweight and test placement before adding adhesive.
Set the finished makeup
Mist setting spray evenly over the finished look and let it dry before touching your face or putting on goggles, hats, veils, or collars. If you attached pieces, check the edges after the spray dries and reinforce only the spots that are lifting.
Steampunk makeup ideas for different looks
The right steampunk makeup depends on where you are wearing it. A close-up party look needs to be flattering and comfortable. A cosplay or Halloween look needs to read from a distance, survive heat and movement, and match the character or costume.
| Situation | Best focus | Keep light on |
|---|---|---|
| Themed party or dinner | Copper eyes, muted lip, one small detail | Heavy soot and bulky pieces |
| Glam event or photos | Polished metallics, lashes, clean liner | Messy weathering |
| Cosplay convention | Durable base, stronger contrast, character details | Heavy real metal parts |
| Halloween | Dark shadows, rust tones, dramatic texture | Too-soft definition |
Conclusion
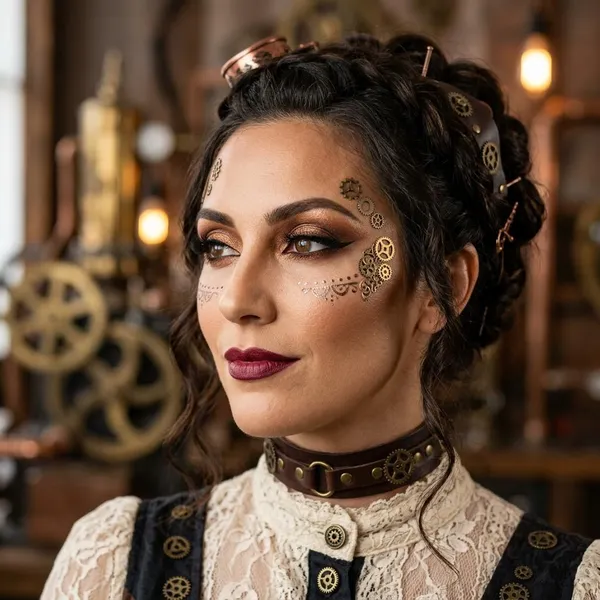
A strong steampunk makeup look does not need dozens of gears; it needs a clear balance between antique color, matte structure, metal shine, and controlled wear. Start with the version that matches your event, keep anything attached to the face lightweight and skin-safe, and add detail only where it makes the whole look sharper rather than busier.
FAQ
Can you put real watch parts on your face?
It is usually better not to. Real watch parts may be sharp, heavy, or uncomfortable, especially near the eyes; lightweight cosmetic pieces or decals are a safer choice for most looks.
How long does steampunk makeup take?
A simple version can take about 30 to 40 minutes. A detailed cosplay or Halloween look with painting, adhesive, and touch-ups can easily take more than an hour.
How do you keep steampunk makeup from smudging?
Use primer where you get oily, set the base with powder, apply dark products in thin layers, and finish with setting spray. For glued details, avoid placing them on areas that move a lot.
Can beginners create a steampunk makeup look?
Yes. Start with copper smoky eyes, brown or black liner, matte skin, and a muted lip before trying decals or painted gears. One small detail is enough for a first attempt.
Can you put real watch parts on your face?
It is usually better not to. Real watch parts may be sharp, heavy, or uncomfortable, especially near the eyes; lightweight cosmetic pieces or decals are a safer choice for most looks.
How long does steampunk makeup take?
A simple version can take about 30 to 40 minutes. A detailed cosplay or Halloween look with painting, adhesive, and touch-ups can easily take more than an hour.
How do you keep steampunk makeup from smudging?
Use primer where you get oily, set the base with powder, apply dark products in thin layers, and finish with setting spray. For glued details, avoid placing them on areas that move a lot.
Can beginners create a steampunk makeup look?
Yes. Start with copper smoky eyes, brown or black liner, matte skin, and a muted lip before trying decals or painted gears. One small detail is enough for a first attempt.