
Designing a steampunk cyborg works best when the machine parts feel necessary, not pasted on. Start with one strong modification, decide what it helps the character do, then make the materials, power source, and wear marks support that choice. If you are building a costume, comfort and attachment matter just as much as brass paint and gears.
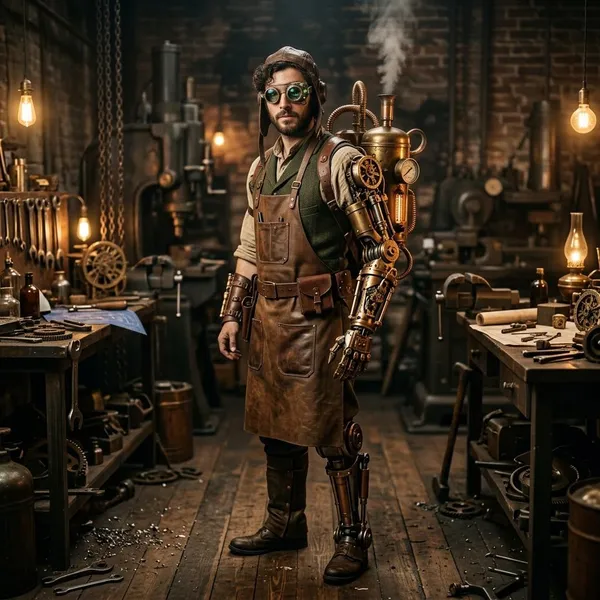
Popular steampunk cyborg modifications
The best modifications are easy to read from a distance. A viewer should be able to tell whether the character has lost a limb, enhanced their senses, protected an injury, or built machinery into the body for work or survival.
Avoid covering every surface with gears. One mechanical arm, one artificial eye, or one torso rig usually looks stronger than a body full of unrelated parts. The first check is simple: can you explain what the modification does in one sentence?
Mechanical arms and hands
A mechanical arm is the clearest cyborg feature because it changes the silhouette immediately. For a costume, a slightly oversized forearm shell often reads better than a realistic slim prosthetic, especially once you add faux pistons, hinge plates, leather straps, and a few visible bolts.
Monocles goggles and artificial eyes
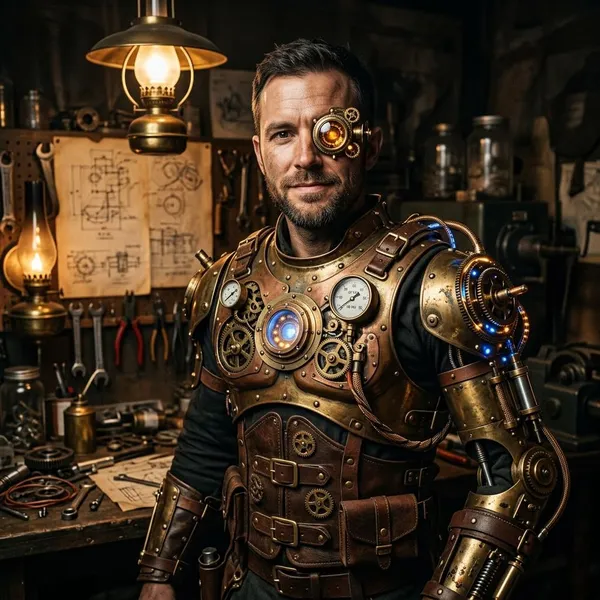
An artificial eye is a good choice when you want a strong focal point without building a full-body costume. A brass monocle, rotating lens, smoked glass eyepiece, or small side-mounted dial can suggest magnification, targeting, night vision, or chemical analysis.
One machine eye is usually more expressive than two. Keeping one human eye visible lets the face still show emotion, while the mechanical side adds mystery or menace. For a quick convention look, this is one of the easiest upgrades to combine with normal steampunk clothing.
Masks and facial plates
A mask or facial plate works when the character needs breathing support, injury protection, voice alteration, or a more unsettling identity. Half masks are often the safest design choice because they leave part of the face visible and keep the character from becoming a full robot.
- Use vents to imply filtered air or pressure release.
- Follow the cheek and jawline so the plate looks fitted, not stuck on.
- Keep vision clear if the piece will be worn at an event.
Armored torsos and shoulder rigs
The torso can explain how the rest of the machinery is supported. A shoulder rig might carry straps for a mechanical arm, a back-mounted tank, or a small fictional boiler. Wide leather belts, buckles, and back plates make the build look stable.
Mechanical legs and joint braces
Mechanical legs suggest speed, recovery, endurance, or battlefield repair, but they are harder to wear than arms. A full prosthetic-style leg can look dramatic in art, while a knee brace, shin guard, or ankle mechanism is more practical for cosplay.
Asymmetry helps. One modified leg with a clear brace and visible hinge often looks more believable than two bulky legs that make walking difficult. Thick armor implies power; exposed springs and lighter pistons imply agility.
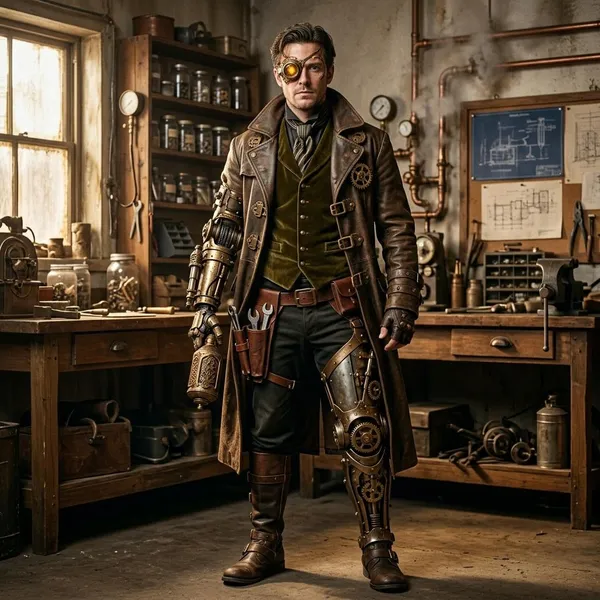
How to design a steampunk cyborg character
Design the character before decorating the machinery. The role, injury, job, social status, and daily routine should decide which parts are replaced or enhanced. That keeps the design from turning into a pile of brass pieces with no reason to exist.
Choose the character's role
Start with what the character does every day. A railway engineer may need heat-resistant gloves and a pressure-assisted arm. A noble duelist may have a polished hand with delicate finger control. A factory worker may show patched repairs, soot, and practical reinforcement rather than elegant engraving.
Pick one main body modification
Choose one feature that carries the design: arm, eye, mask, chest engine, leg brace, or shoulder rig. Everything else should support that focal point instead of competing with it.
| Main feature | Best when the character needs | Design risk to avoid |
|---|---|---|
| Mechanical arm | Strength, tools, combat, craft work | Adding gears where joints should move |
| Artificial eye | Precision, scouting, navigation, research | Making the face too crowded with lenses |
| Chest rig | Power supply, life support, status display | Building something too bulky to wear |
| Leg brace | Recovery, endurance, climbing, speed | Blocking natural walking or sitting |
Define how the machinery works
You do not need real engineering, but you do need visible logic. Pick one main power idea: steam pressure, compressed air, clockwork tension, hydraulics, alchemy-assisted machinery, or a miniature boiler. Then show that choice through tubes, valves, springs, gauges, wind-up keys, or pressure seams.
- Show the path of power: tank to tube, tube to joint, joint to moving part.
- Add one limitation: overheating, winding, fuel, noise, leaks, or slow pressure build-up.
- Keep the system readable: too many power ideas make the character look confused.
Match materials across the design
Pick two or three core materials and repeat them. Brass, aged copper, dark leather, iron, smoked glass, canvas, and worn steel all fit the style. A limited palette makes separate parts feel like they came from the same workshop.
Connect each part to the backstory
Every visible machine part should answer a small story question: why was it needed, who built it, and what does it cost the character? A pressure arm that must be vented before heavy lifting says more than a perfect arm with no drawback.
For a writer, that drawback can create tension. For an artist, it gives posture and gesture. For a costume maker, it suggests props such as a valve key, maintenance pouch, fuel canister, or spare lens case.
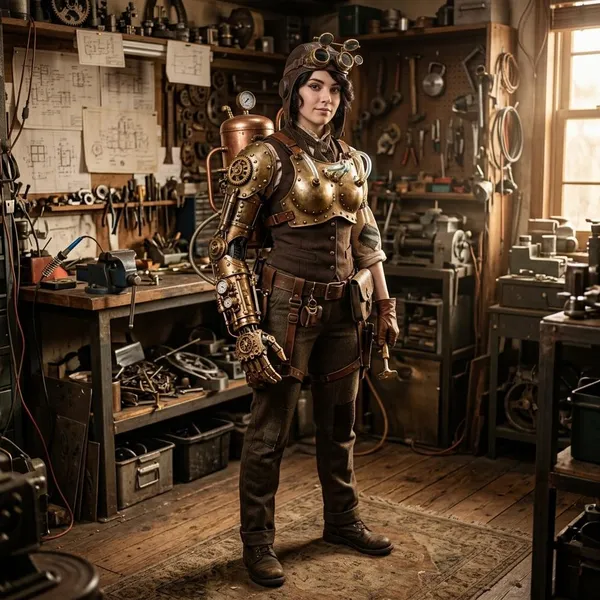
How to build a steampunk cyborg costume
A good costume should survive movement, heat, crowds, and repeated wear. The practical priority is fit first, weight second, finish third. Real metal may sound appealing, but lightweight materials usually look better because you can actually wear them long enough to enjoy the costume.
Start with lightweight foam or plastic
EVA foam, craft foam, thermoplastic, and thin plastic sheets are easier to cut, shape, and repair than metal. They are especially useful for forearm shells, armor plates, braces, masks, and decorative housings.
Before painting anything, test the piece against the body. Check whether it rubs the wrist, traps heat near the face, blocks elbow movement, or pulls clothing out of place. These small problems become big ones after an hour of wear.
Shape the main mechanical parts
Build the largest form before adding detail. For an arm, that means the forearm shell, shoulder connection, or hand guard. For a mask, it means the profile around the nose, cheek, and jaw.
- Make a paper template.
- Tape it on and test movement.
- Cut the final material only after the fit feels right.
- Add raised panels after the base shape works.
Add gears tubes and fasteners
Details should sit where a machine would need force, support, or control. Put tubes near joints, dials near a power source, bolts along plate edges, and cable bundles where a hand or brace would move.
Paint an aged metal finish
Paint sells the illusion. Start with a dark base coat, dry-brush brass, copper, bronze, or gunmetal over raised edges, then add a dark wash into seams. This creates depth without needing real metal.
Weathering should follow use. Add grime around vents, worn edges where hands would touch, and scratches on exposed corners. Seal flexible pieces so the paint does not crack when the costume bends.
Test comfort and movement
Do a home test before the final event. Walk, sit, crouch, raise your arms, turn your head, and pretend you are carrying a bag or holding a drink. A costume that only works while standing still is fine for a short photoshoot, but not for a full convention day.
Watch for slipping straps, blocked vision, sharp edges, heat build-up, and pressure on the nose, ears, shoulders, or knees. If anything hurts after ten minutes, it will probably be worse after two hours.
Secure every wearable component
Use straps, buckles, elastic, snaps, Velcro, or magnets with backup support. Glue alone is not enough for a piece that moves, hangs from the body, or might be bumped in a crowd.
- Arm pieces: leave space at the wrist and elbow.
- Shoulder rigs: use cross-body support so the weight does not slide.
- Masks: avoid pressure points and keep breathing comfortable.
- Leg braces: test walking and sitting before painting.
Where steampunk cyborgs are used
Steampunk cyborg designs work across costumes, art, fiction, games, and decor because they combine a clear human-machine contrast with handmade texture. The same idea can feel heroic, tragic, gothic, elegant, or dangerous depending on the setting.
Convention costumes and roleplay
For conventions, scale the build to the day you expect to have. A mask and arm brace may be perfect for walking, posing, and talking for hours. A heavy torso rig with a backpack boiler might be better for a short photoshoot or stage appearance.
Roleplay becomes easier when the machinery creates habits: adjusting a valve before lifting, cleaning a lens before reading a map, or winding a hand before delicate work. Small actions make the character feel more alive than extra decoration.
Character art and illustration
Artists can push shapes further than costume makers. Long piston limbs, delicate clockwork fingers, exposed rib machinery, and glowing pressure chambers can work beautifully on the page even if they would be impossible to wear.
Keep the silhouette clear before adding texture. If the character is recognizable as a one-armed engineer, masked noble, or lens-eyed scout in a small thumbnail sketch, the design is probably strong enough for more detail.
Fantasy and alternate-history fiction
A steampunk cyborg fits naturally in alternate history, fantasy, and gothic science fiction. In one world, the machinery might come from advanced steam engineering; in another, alchemy or magic might stabilize the body's connection to metal.
The more powerful the augmentation is, the more interesting its cost should be. Noise, maintenance, social stigma, fuel, pain, dependence on a mechanic, or legal restrictions can all keep the character from feeling overpowered.
Games and tabletop settings
In games, visible modifications should translate into simple abilities and drawbacks. A mechanical arm might grant strength but make stealth harder. A lens eye might improve perception but be vulnerable to glare, smoke, or damage.
Sculptures prints and themed decor
Steampunk cyborg imagery works well as sculpture, wall art, prints, skull designs, desk pieces, and themed room decor. Brass tones, patina, glass lenses, pipes, and mechanical anatomy create a strong industrial-gothic mood.
Conclusion
The strongest design starts with a practical reason for the machinery and ends with details that support that reason. If the character's role, main modification, power source, materials, and limitations all point in the same direction, even a simple arm, mask, or eyepiece can feel memorable and believable.
FAQ
Is a steampunk cyborg still human?
In most stories, yes. The character usually remains human but depends on mechanical parts for survival, work, power, or identity, which is where much of the drama comes from.
How do you make a simple mechanical arm?
Use EVA foam or thin plastic for a forearm shell, add straps and raised plates, then place a few tubes or faux joints near the elbow and wrist. Test bending before painting so the arm stays wearable.
Can steampunk cyborgs exist in fantasy stories?
Yes. Fantasy settings can explain the machinery through alchemy, runes, enchanted metal, or steam engineering, as long as the design still has rules, limits, and a clear reason to exist.
Is a steampunk cyborg still human?
In most stories, yes. The character usually remains human but depends on mechanical parts for survival, work, power, or identity, which is where much of the drama comes from.
How do you make a simple mechanical arm?
Use EVA foam or thin plastic for a forearm shell, add straps and raised plates, then place a few tubes or faux joints near the elbow and wrist. Test bending before painting so the arm stays wearable.
Can steampunk cyborgs exist in fantasy stories?
Yes. Fantasy settings can explain the machinery through alchemy, runes, enchanted metal, or steam engineering, as long as the design still has rules, limits, and a clear reason to exist.