
For a practical steampunk boots diy project, make removable boot cuffs instead of altering the boots themselves. Start with a pair that already fits comfortably, build cuffs that sit close to the shaft, then add buckles, brass-toned hardware, and a little weathering after the fit works. The smartest order is fit first, decoration second.
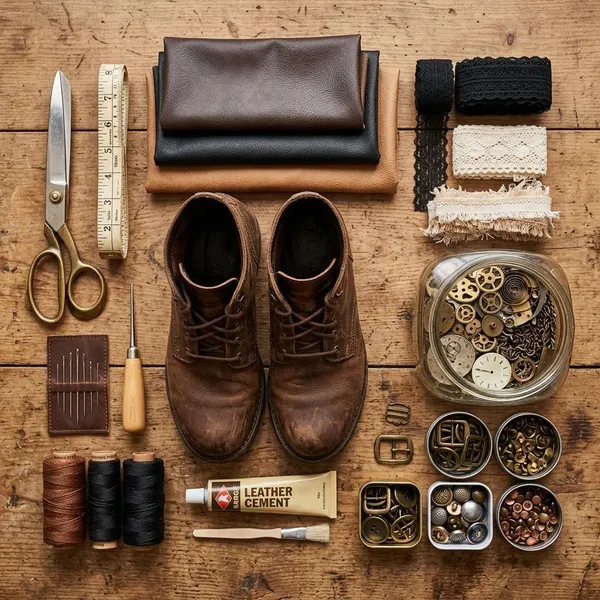
What you need for DIY steampunk boot cuffs
The basic project is simple: boots, cuff material, closures, and a few tools for cutting and attaching straps. If you are making cuffs for a one-night costume, you can keep the materials lightweight and simple. If you want to wear them at conventions or more than once, spend more attention on stronger closures and cleaner edges.
Regular ankle or mid-calf boots
Ankle boots and mid-calf boots are the easiest base because the cuff has a clear place to sit. Choose boots that are comfortable first; the cuff can make them look steampunk, but it will not fix pinching, rubbing, or a poor fit. Smooth brown, black, oxblood, or tan boots are especially easy to style, while very soft slouchy boots may need extra support to stop the cuff from twisting.
Faux leather or sturdy fabric
Medium-weight faux leather is usually the most beginner-friendly choice. It has the right costume look, holds its shape better than thin cotton, and can often be sewn or assembled with rivets depending on thickness.
Buckles, straps, and closures
Buckles do the most work visually and practically. Brass, bronze, copper, or dark gunmetal finishes usually look more convincing than bright silver. Two straps per cuff are a good starting point because they control both the top and bottom edge without making the cuff look overloaded.
- Best for adjustability: small buckles with punched strap holes.
- Best no-sew option: snaps, rivets, or Chicago screws on sturdy material.
- Best decorative option: buckles that match your chains, studs, or trim.
Basic sewing or no-sew tools
For a sewn version, gather scissors or a rotary cutter, sewing clips, a ruler, chalk or a fabric marker, a suitable needle, and a hole punch for strap holes. Clips are better than pins on faux leather because pin holes may stay visible. For a no-sew version, use strong fabric glue, contact adhesive, rivets, snaps, or screws, and test them on scraps before trusting them on the finished cuffs.
Optional chains and metal details
Chains, studs, keyhole plates, filigree, decorative buttons, and imitation gears can all work, but they should not make the cuff heavy or awkward. A few repeated metal details usually look better than covering the whole cuff. For small ankle boots, choose lighter trim; for chunkier boots, medium hardware can handle the scale better.
How to measure your boots
Good measuring prevents most fitting problems later. Measure the boot itself while it is zipped, laced, or buckled exactly how you will wear it, not while it is open or sitting loosely. If you plan to wear thick socks, leggings, or tucked trousers, test with that setup before cutting.
Measure around the boot shaft
Wrap a soft measuring tape around the part of the boot where the cuff will sit, usually just above the ankle or at the most stable narrow point. Include zippers, seams, or raised details in the measurement because the cuff needs to fit over the real boot surface, not an ideal smooth cylinder.
Choose the cuff height
A height of about 3 to 5 inches works for many ankle and mid-calf boots, but proportions matter more than a fixed number. A shorter cuff is better for walking comfort and subtle outfits, while a taller cuff creates a stronger costume effect. Bend your ankle while holding a paper strip in place; if the paper digs into your leg or buckles, the cuff is too tall for that boot.
Add overlap and seam allowance
Add seam allowance if you are sewing lined panels, folded edges, or turned straps. For no-sew cuffs, still leave extra material where hardware will attach so rivets or screws are not sitting too close to the edge.
Mark the strap positions
Mark strap positions while the paper pattern is on the boot. Side buckles show well in photos, while back buckles keep the front cleaner. Keep the top and bottom straps level across both cuffs; uneven straps are one of the quickest ways to make handmade boot cuffs look crooked.
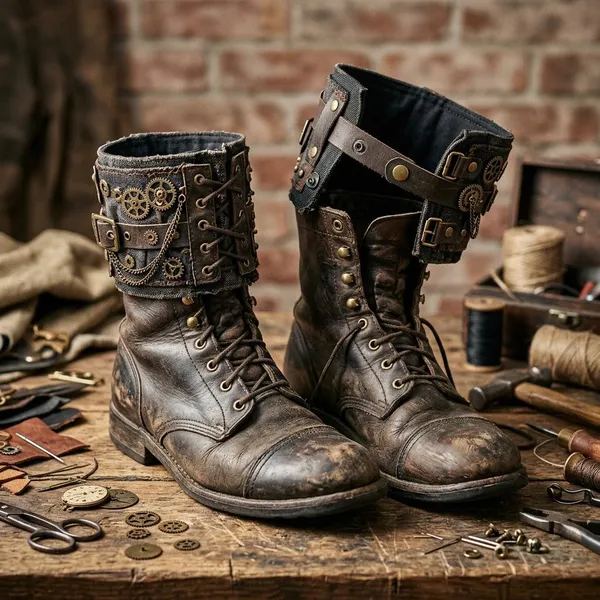
How to make steampunk boot cuffs
Work in this order: cut the panels, finish the edges, make the straps, attach the closures, and test the fit before decorating. That order saves time because chains and trim are much harder to move once they are attached.
Cut the cuff panels
Cut one panel per cuff for a rugged single-layer version, or two matching layers per cuff for a neater lined version. If your boots taper, do not force a perfect rectangle; shape the top or bottom edge slightly so the cuff follows the boot more naturally.
Finish the edges
For a sewn cuff, place layers right sides together, stitch around the edge, leave an opening, turn, and topstitch if the material feeds smoothly. For a no-sew cuff, fold and glue the edge or use a clean raw edge only if the material does not fray. Keep heat low around faux leather because some surfaces can warp or peel.
Make the buckle straps
Cut straps to match the buckle width, leaving enough room for movement through the buckle. One short strap holds the buckle; one longer strap gets several adjustment holes. Reinforce the buckle fold with stitching, a rivet, or a screw because that point takes the most stress when you tighten the cuff.
- For thin faux leather: double the strap or add backing so it does not stretch.
- For thick material: use single-layer straps to avoid bulky folded ends.
- For shared boots: punch extra holes so the cuff can fit slightly different shaft sizes.
Attach the straps and buckles
Place the buckle straps on one side of the cuff and the longer straps on the opposite side. Check alignment on the actual boot before stitching or riveting permanently. The straps should pull straight across rather than diagonally, or the front panel may rotate as you walk.
If you are making cuffs for repeated wear, reinforce the strap attachment area with an extra patch on the inside. It does not need to show, but it helps prevent tearing when the cuff is tightened again and again.
Test the fit and adjust
Fasten the cuffs around the boots and walk around before adding decoration. Look for three things: the front panel stays centered, the edges do not gape, and the straps do not rub against each other or your ankle. If the cuff slides on a very smooth boot, add a small hidden strip of felt, suede, or grippy fabric inside the cuff.
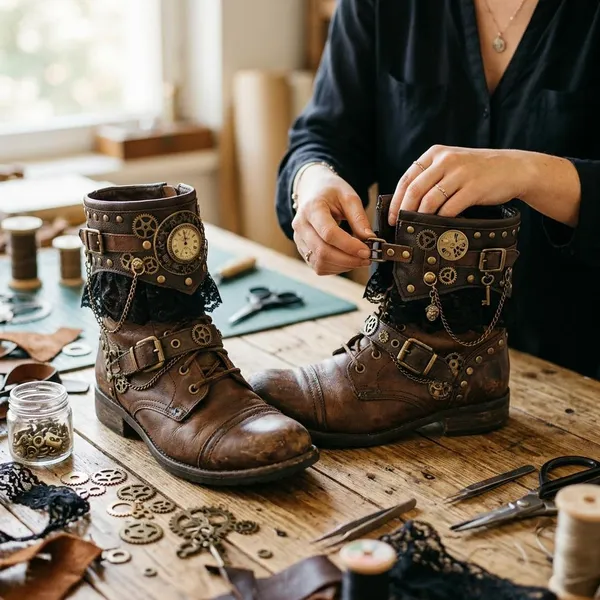
How to create a steampunk look
The steampunk look comes from controlled details, not from adding every gear and chain you can find. Choose one direction first: explorer, aviator, inventor, military, or Victorian dressy. Once that direction is clear, the hardware and weathering choices become much easier.
Use brass or copper hardware
Warm metal tones such as brass, bronze, antique gold, and copper usually suit steampunk boots best. If your buckles, rivets, and chains do not match exactly, repeat each tone on both cuffs so it looks intentional rather than accidental. Bright silver can work, but it often reads more modern unless you darken or age it.
Add light weathering
Weathering should make the cuffs look used, not dirty. Dry-brush a little dark brown, black, or muted metallic paint along strap edges, corners, and raised texture. Wipe back the excess before it dries fully if the effect looks too strong.
Layer chains and metal trim
Add chains where they can hang naturally without hitting the other boot at every step. Short side chains, small studs, corner plates, and filigree pieces are usually easier to wear than large dangling parts. Build the design in layers: straps first, then one main accent, then smaller trim if the cuff still looks too plain.
Match the cuffs to your costume
The cuffs should look like they belong with the rest of the outfit. Brown faux leather with antique brass works well for explorer or aviator costumes, especially with goggles, belts, or a tan coat. Black cuffs with darker metal can suit a more industrial or military look.
If your outfit is already busy, keep the boots calmer so the whole costume does not compete with itself. If your clothing is simple, the cuffs can carry more detail and become the main steampunk element.
Keep decorations balanced
Balance is more useful than symmetry for its own sake. Put heavier pieces lower on the cuff, keep closures clear, and repeat the main visual idea on both boots. Before adding one more charm or gear, take a standing-distance photo; if the cuff shape disappears under the decorations, stop.
- Avoid bulky inner-ankle trim: it can knock together while walking.
- Keep buckle holes usable: decoration should not block adjustment.
- Repeat one motif: two or three matching details look cleaner than many unrelated pieces.
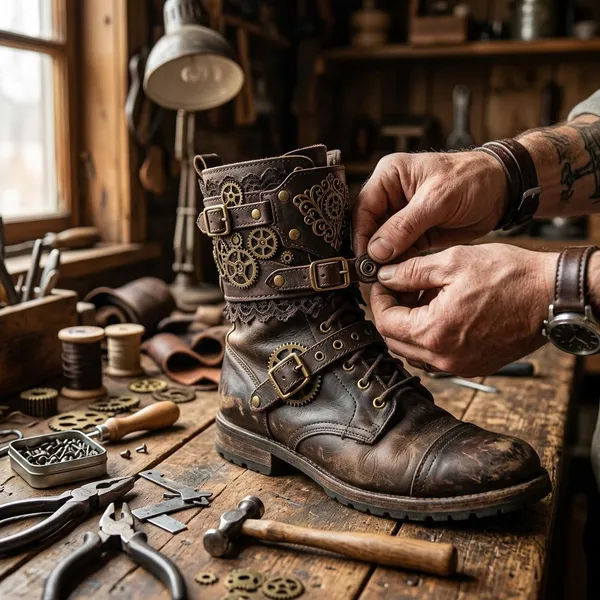
How to keep boot cuffs from slipping
Slipping usually comes from one of three problems: the cuff is too loose, the decorations are too heavy, or the closure pulls unevenly. Fix those before adding more hardware. A slightly simpler cuff that stays put will look better than a dramatic one you keep adjusting all night.
Fit them close to the boot
The cuff should sit close enough that it does not rotate, but not so tight that it dents soft boots or strains the straps. Test the fit while standing because the boot shaft changes shape slightly once your weight is in it.
If the boot tapers, place the cuff where the shaft gives it a natural stopping point. On a very straight or slick boot, add hidden grip inside the cuff instead of over-tightening the buckles.
Add hidden elastic
A short hidden elastic section can make the cuff more forgiving when you walk, sit, or wear thicker socks. Keep it at the back or under a strap so it does not break the steampunk look. Use only enough stretch to add comfort; too much elastic can make the cuff bunch and shift.
Use adjustable closures
Adjustable closures are better than fixed closures for removable boot cuffs. Buckles are the easiest option because they look appropriate and let you fine-tune the fit each time. Snaps can work too, but use more than one placement if you need flexibility.
- Use buckles if you want the most adjustable fit.
- Use snaps if you want a cleaner look and know the exact boot size.
- Use lacing if the cuff needs to fit several boots, but keep the cords short enough not to snag.
Keep heavy decorations low
Heavy details near the top edge can pull the cuff downward or make it tip forward. Place weight closer to the ankle, where the boot gives more support, and keep the top edge lighter with paint, stitching, or flat trim. This matters most for long events, outdoor wear, or costumes with a lot of walking.
Test them while walking
Do a real movement test before the event: walk, turn, sit, climb a few steps, and check whether the cuffs stay centered. Ten minutes indoors can reveal twisting, pinching, noisy chains, or decorations that hit each other.
Conclusion
Removable boot cuffs are the safest and most flexible way to turn plain boots into steampunk costume footwear. Get the fit stable, keep the closures adjustable, and decorate with restraint after the walking test; a clean pair of cuffs with good buckles will usually look more convincing than an overloaded pair that slides around.
FAQ
Can regular boots become steampunk boots?
Yes. Regular boots can look steampunk with removable cuffs, straps, buckles, and aged metal accents, especially if the base boots are dark, structured, and comfortable.
Can you make steampunk boot cuffs without sewing?
Yes. Use non-fraying faux leather or vinyl with rivets, Chicago screws, snaps, or strong adhesive; just test the hold on scraps before relying on it for walking.
What material is easiest for beginners?
Medium-weight faux leather is usually easiest because it looks the part and holds shape without needing advanced leatherworking tools. Avoid very thin fabric unless you add backing or interfacing.
Can regular boots become steampunk boots?
Yes. Regular boots can look steampunk with removable cuffs, straps, buckles, and aged metal accents, especially if the base boots are dark, structured, and comfortable.
Can you make steampunk boot cuffs without sewing?
Yes. Use non-fraying faux leather or vinyl with rivets, Chicago screws, snaps, or strong adhesive; just test the hold on scraps before relying on it for walking.
What material is easiest for beginners?
Medium-weight faux leather is usually easiest because it looks the part and holds shape without needing advanced leatherworking tools. Avoid very thin fabric unless you add backing or interfacing.